I came across some of these masterpieces while sorting through old files. I tried to sort them by awesomeness but they all tied.
Categories
 Tanner's Website
Experimental code: https://github.com/twstokes/arduino-gyrocube
Varying the speed on an RC car motor with the Arduino using PWM.
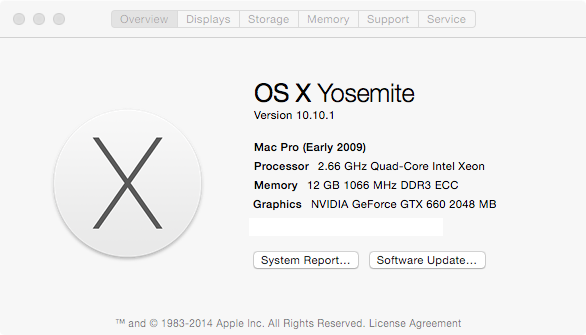
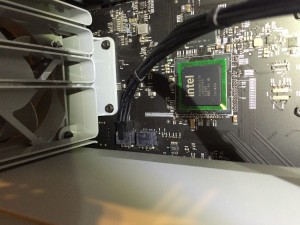
After upgrading to Yosemite, I noticed that graphics performance was starting to lag a bit on my 2009 Mac Pro while driving two monitors at fairly low resolutions. At one point I had two GT 120s running separate monitors, but after one replacement and two failures, I was back down to one.

I decided to look into upgrade options and was happy to see that OS X now supports non-EFI video cards. The only catch: You won’t see anything displayed until OS X loads your drivers. Who cares?
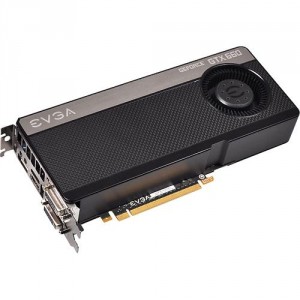
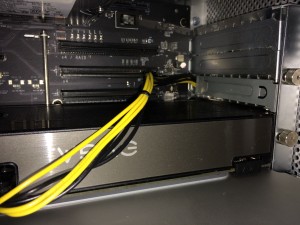
I settled on an EVGA GeForce GTX 660 2GB, which Best Buy happened to sell. I can feel the judgement from the hardcore nerds for buying something at Best Buy. Nevertheless, this was much cheaper than trying to buy another GT 120 to replace my second one and offers WAY more power. I don’t game on my Mac – I just want the OS to feel snappy and fluid.
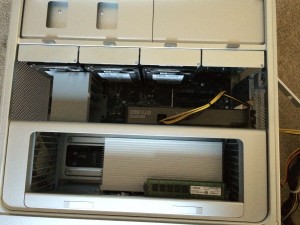
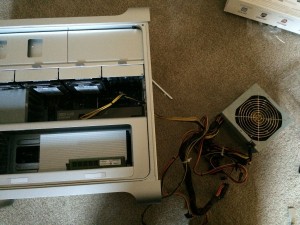
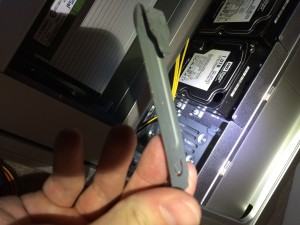
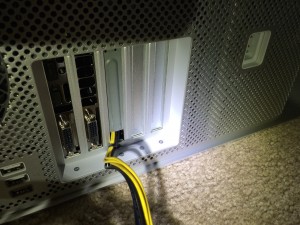
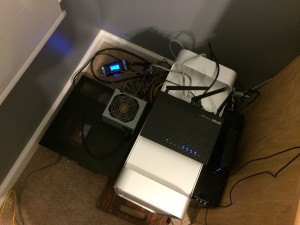
Like many powerful cards, the GTX 660 requires the PCIe 6 pin power connector from the power supply or motherboard. I’ve ordered this, but until it gets here, I’ve rigged up an external power source.
Steps to install:
Thoughts after installation:
Mode: 1680×1050 fullscreen on one monitor
Before:
After:


Herp Derp is back for Chrome! Check it out!

My Dad and I built the alarm system for their house in late 2009. He handled hardware, I did software. From time to time I export the data it collects just for the heck of it, since it’s been running non-stop for years.
The back door at their house has been opened 41,267 since the end of November 2009. That’s kind of surprising to me.
It’s interesting to see some patterns in the graph – it’s how many times the door has been opened per month. You can definitely tell what year I bought my house. 🙂

Say you have a disk image created using ‘dd’. You want to mount a partition contained on it but you realize it’s not as simple as just mounting the image and exploring the path.
The kpartx utility can help with that:
sudo kpartx -av disk.img
This should have created some partition mappings to /dev/mapper. Now, just mount the correct mapping the same way you would mount anything else. For instance:
sudo mount -t ntfs -o ro,noexec /dev/mapper/loop0p1 mountedThis is something I created over a year ago and I’ve decided to share the code in case someone finds it useful.

It’s nothing more than an example of using JavaScript to dynamically add connectable SVG objects.
Usage:
After learning about Smith numbers today I cooked up this script fairly quickly. There are many places where it could be optimized and cleaned up but that wasn’t really the point – I just needed something that was accurate, and I’m pretty sure this is.
It also helped me to learn about the ulimit command after running it with a HUGE number that had taken up about 7GB of swap before I had to kill the process remotely via SSH…
#!/usr/bin/python
# smith number detector - TWS 1-12-13

def detectSmith(num):
  if(sumFactors(num) == sumDigits(num)):
    return True
  else:
    return False

# calculate the sum of the factors
def sumFactors(num):
  factorList = factors(num)
  sum = 0

  for factor in factorList:
    if factor > 9:
      # if a number (base ten) has multiple digits it has to be broken down
      sum = sum + sumDigits(factor)
    else:
      sum = sum + factor

  return sum

# sum the digits in a number with two or more
def sumDigits(num):
  sum = 0

  if num > 9:
    while num > 9:
      sum = sum + num % 10
      num = num / 10
    sum = sum + num
    return sum
  else:
    # should never reach this
    return num

def factors(num):
  primeFactorList = []

  factor = lowestPrimeFactor(num)
  currentNum = num

  while factor != -1:
    primeFactorList.append(factor)
    currentNum = currentNum / factor
    factor = lowestPrimeFactor(currentNum)

  if(currentNum != num):
    # preventing returning the number passed in
    primeFactorList.append(currentNum)

  return primeFactorList

def lowestPrimeFactor(num):
  for x in range(2, (num / 2) + 1):
    if(num % x == 0):
      return x
  return -1

for number in range(1, 1000):
  if(detectSmith(number)):
    print "The number", number, "is a Smith number."
A super quick, super simple little example of how to get started with the AWS SDK2 for PHP. It connects to the S3 service with your credentials and checks to see if a file exists.
sudo apt-get install php-pear
pear channel-discover pear.amazonwebservices.com
pear -D auto_discover=1 install pear.amazonwebservices.com/sdk
 <?php

require 'aws.phar';

use Aws\Common\Aws;

$aws = Aws::factory(array(
   'key' => '[KEY HERE]',
   'secret' => '[SECRET HERE]'
));

$client = $aws->get('s3');

echo $client->doesObjectExist('[BUCKET NAME]', '[OBJECT KEY]');

?>
You’ll get back the boolean response of that call (assuming it makes it that far without error). Refer to the API documentation for the other methods and their responses.