I’ve had an Adafruit NeoTrellis M4 Express for a while and it’s a lot of fun to play with. It’s got NeoPixel illuminated buttons, audio capabilities, a powerful SAMD51 CPU, and a lot of potential.
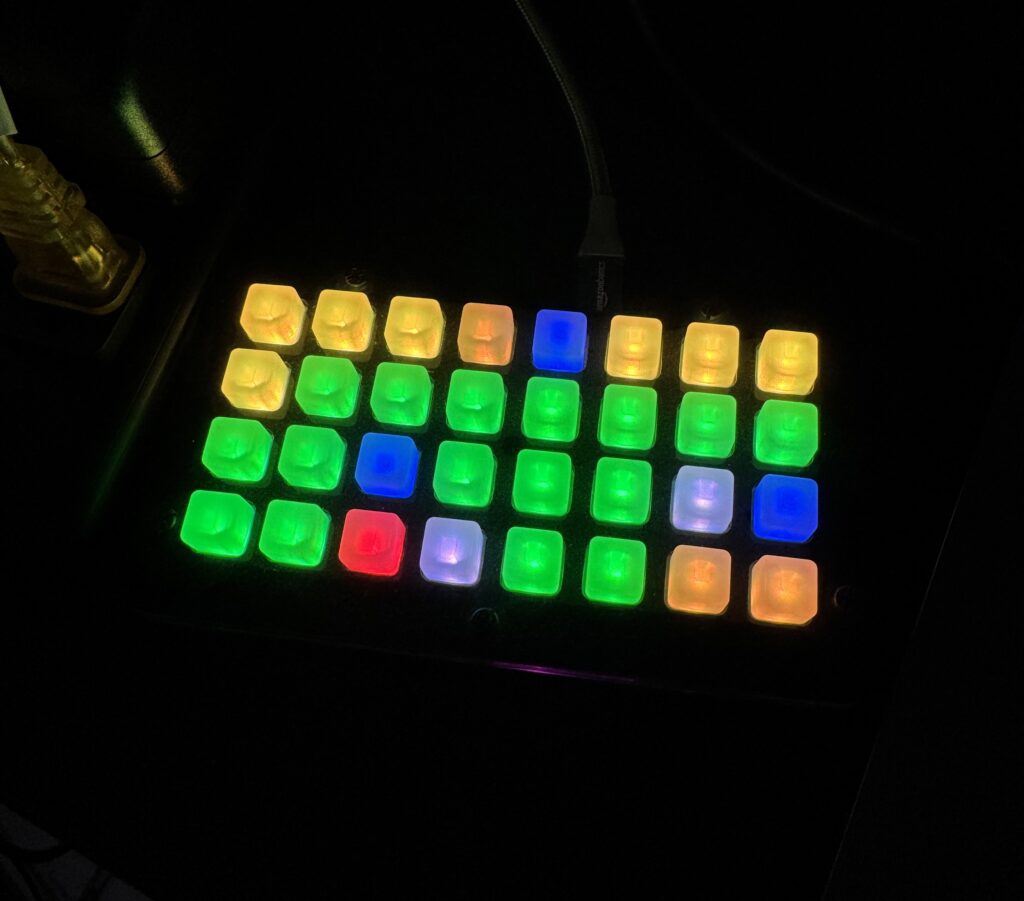
I’m on the Apps Infrastructure team at Automattic, so I thought it would be cool if I could make it represent the states of our Buildkite builds on the board. Green would mean the build passed, red would mean failed, pulsating yellow if running, etc. Pressing the button would open the build directly in my browser.
So that’s exactly what was built! Thanks to AI tooling I was also able to add some goodies like simulators for the Trellis as well as incoming Buildkite data.
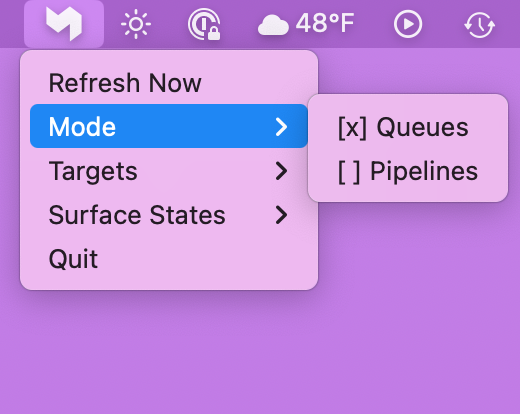
Builds can be filtered in a menu bar app by queue or pipeline, as well as states (e.g. just show me failing builds).
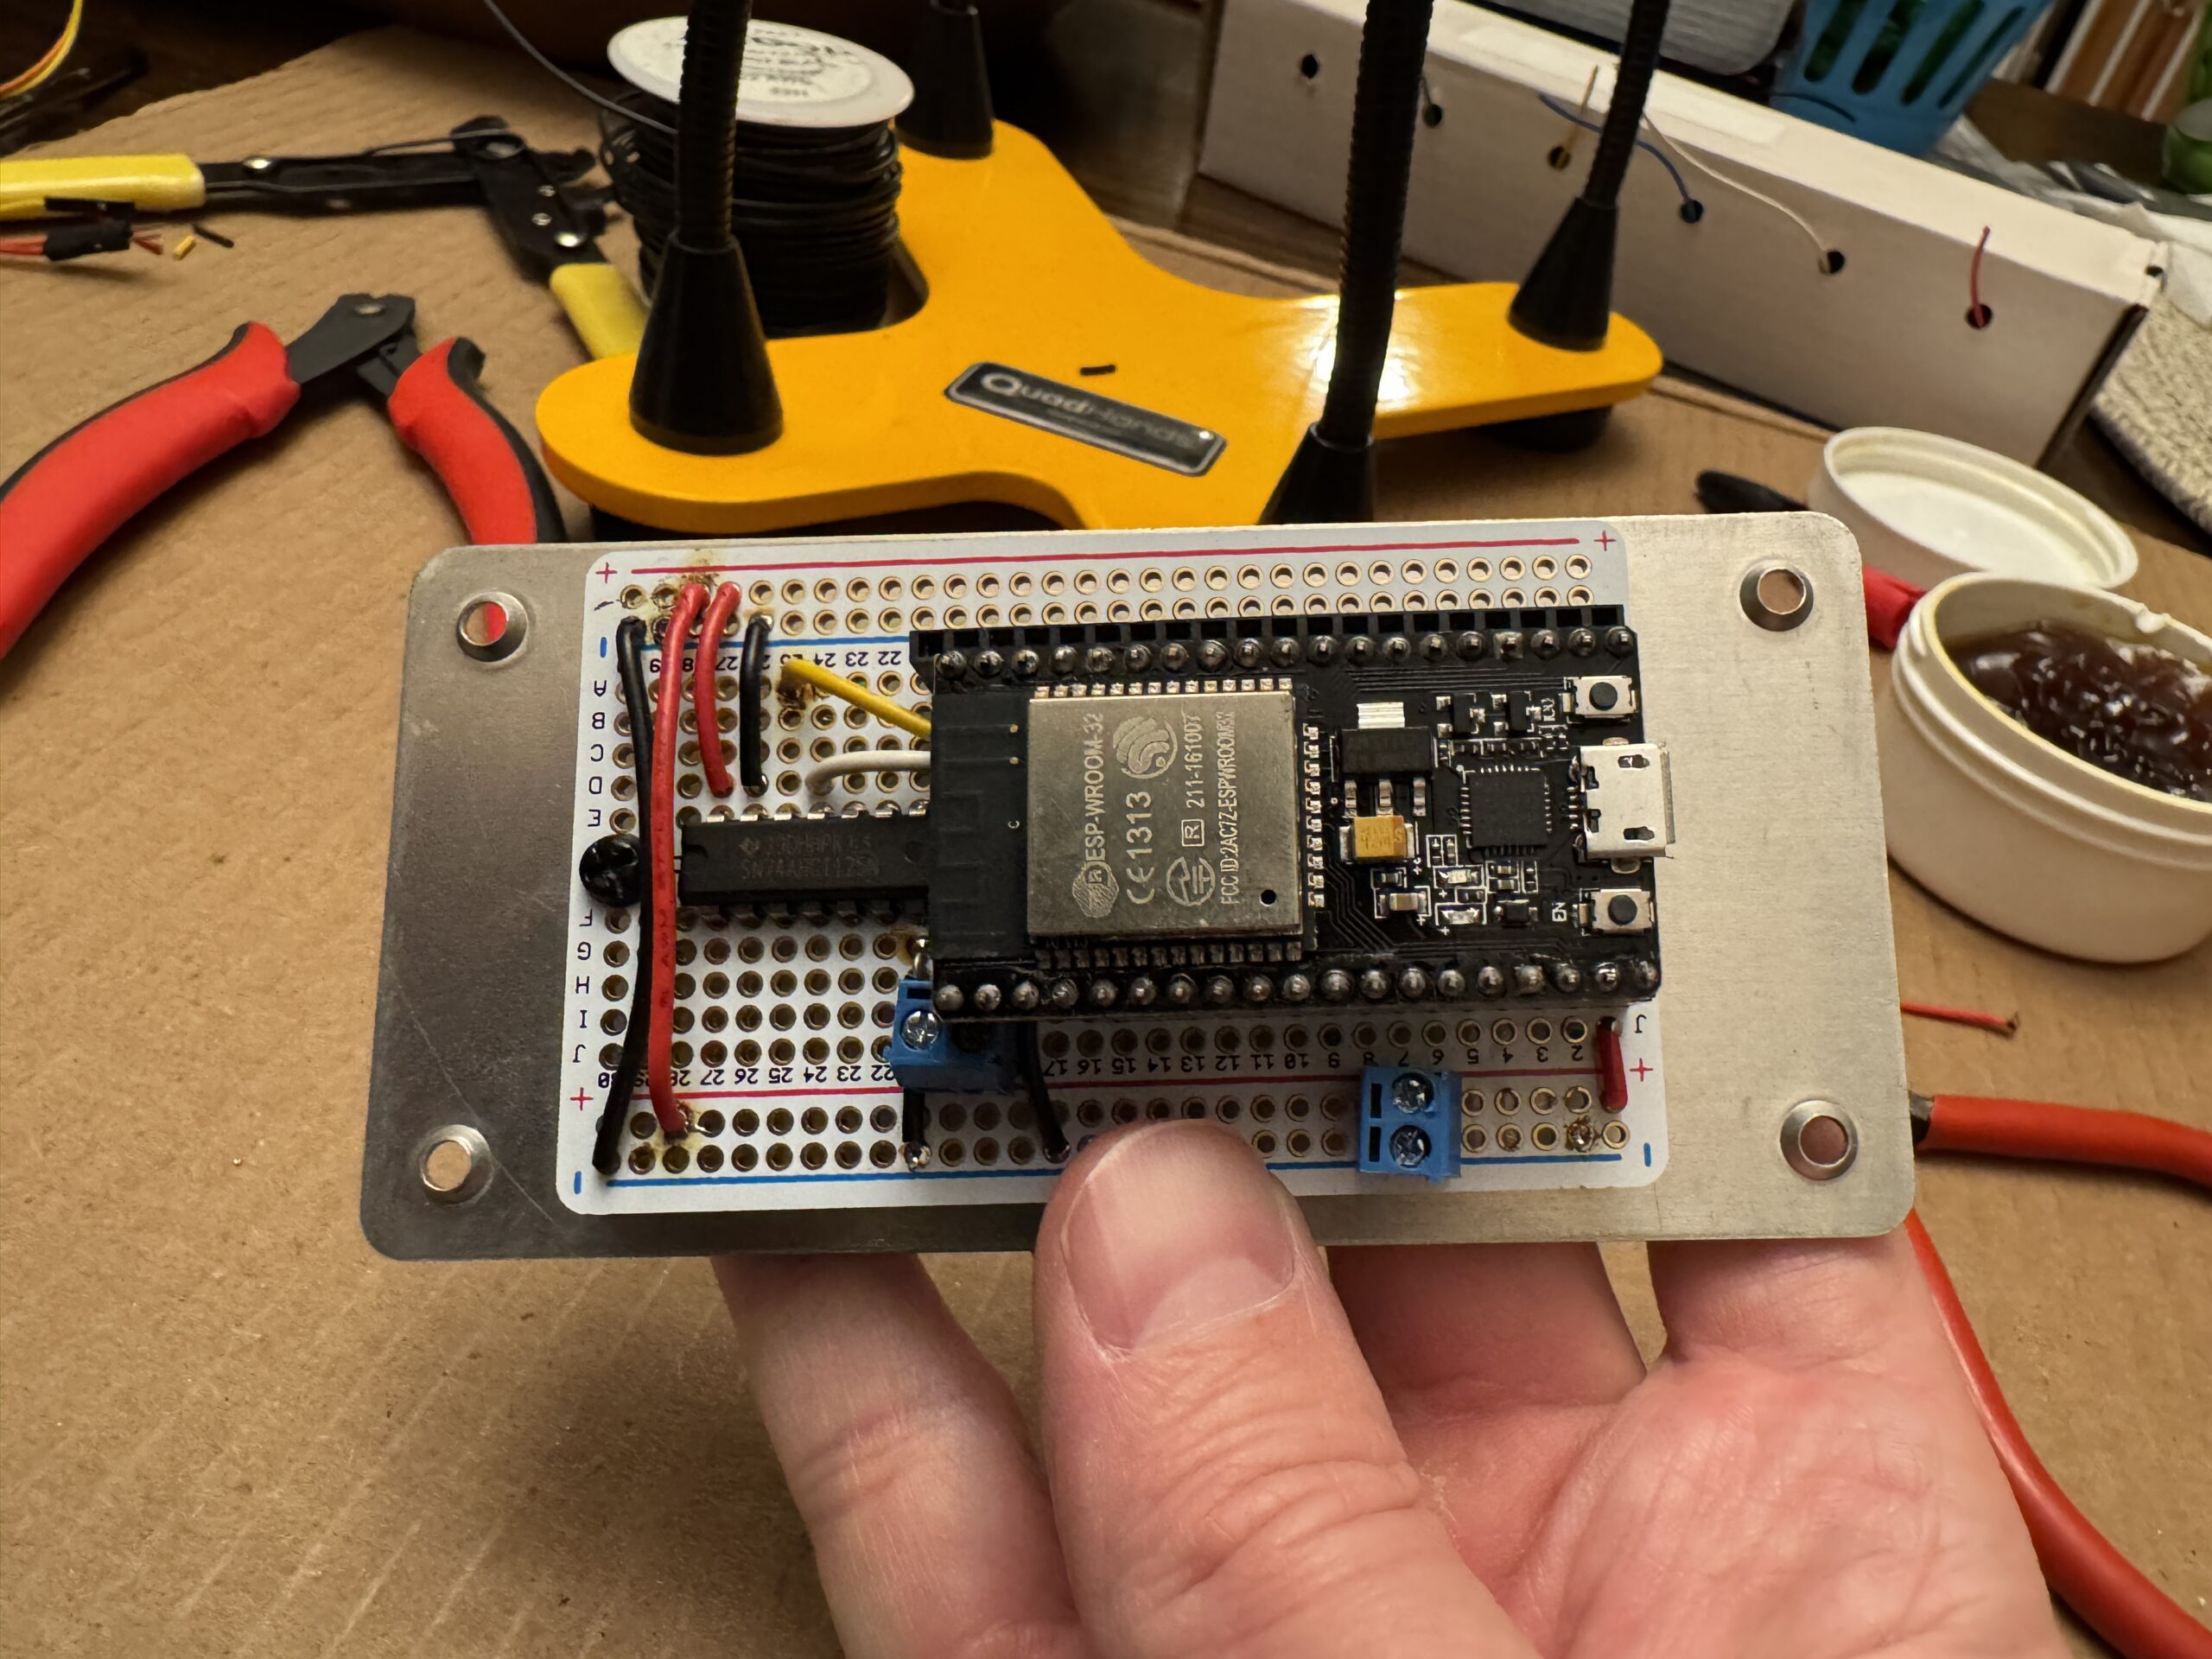
The ESP8266 was swapped for an ESP-WROOM-32 with dual cores
At the end of 2024 I experienced stability issues when updating many LEDs rapidly, e.g. a looping rainbow effect with a really low delay set. After some indeterminate amount of time the tree would crash and restart itself. I initially assumed it was bad C code on my part, but failed to spot anything and eventually put the tree away sometime in January of 2025 because it just got awkward. Now that we’re back to a socially acceptable time to have a Christmas tree out I’ve had a chance to do some deeper digging.
I added a new command to have the ESP return the reason it reset which was really helpful in confirming my suspicion that the ESP8266 just didn’t have enough oomph to drive pixels and run WiFi concurrently:
Long-ish story short I upgraded to an ESP32 with two cores (note: number of cores is model-dependent) and this provides the necessary headroom to bit bang LEDs and run WiFi stably. It required some re-soldering of the Perma-Proto board (since the pin layouts are different) as well as some code changes, but overall it was a relatively quick and straightforward upgrade. The tree hasn’t crashed since!
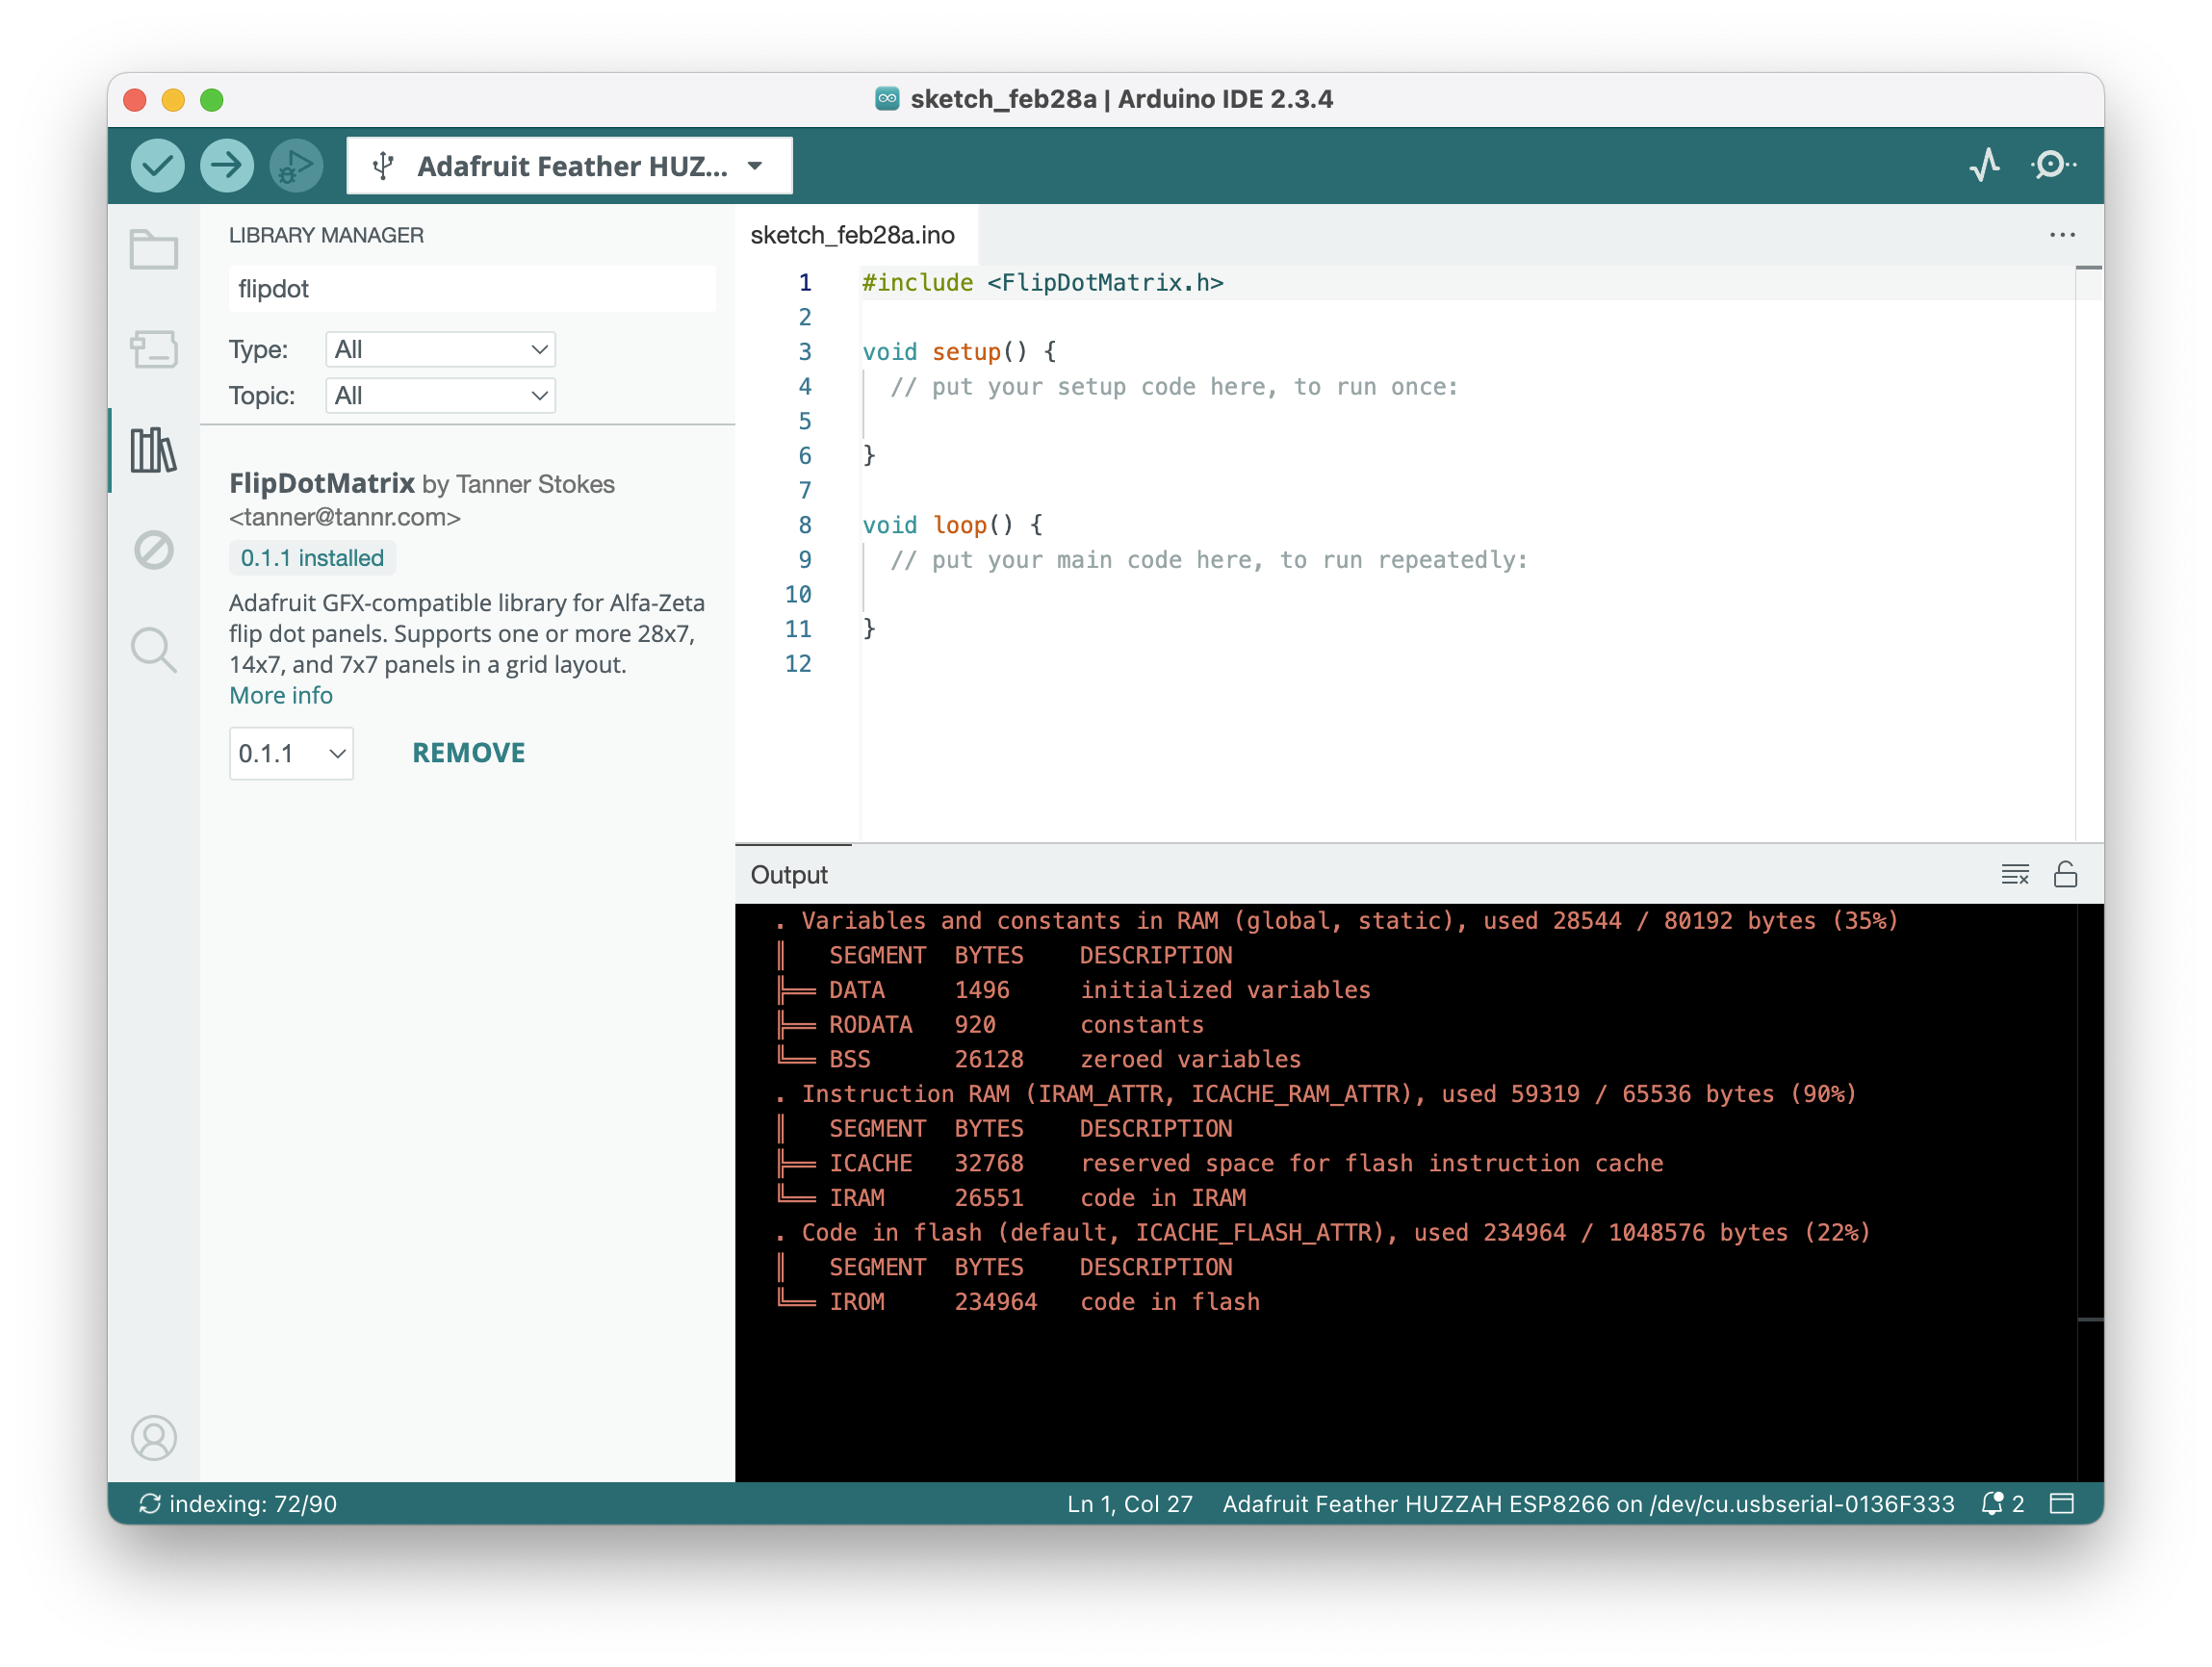
In the past I’ve blogged about my Alfa-Zeta flip dots (one, two) and how I got them working with the Arduino platform. I’ve taken some time to turn the work into a consumable library that should make it much easier for others who want a turn-key way to drive the display.
The library is available in the Arduino IDE as well as the PlatformIO registry and comes with examples to get started. When added to a project it’ll grab all its dependencies so you can get going as quickly as possible.
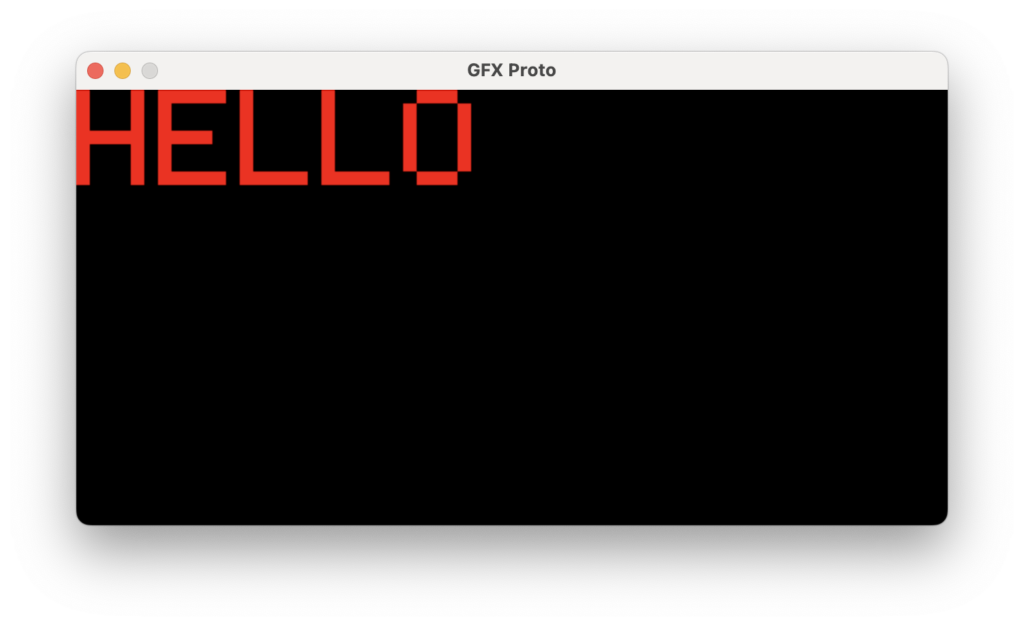
Most of the heavy lifting is done by the excellent Adafruit GFX Library and it’s been updated to support 7×7 and 14×7 panels in addition to 28×7. Flip on! 🔴
I’m starting to dust off some seasonal projects and realized I hadn’t made this simple tool public which others may find handy. With projects like the NeoPixel Tree it can be much quicker to code visual sequences locally instead of waiting for new firmware to upload to the MCU every time you want to tweak something.
I first want to acknowledge that I did the thing that I try to never do: I showed off a snazzy project, left some hints here and there of how it worked, said I would follow up with full details… and never did. That’s lame.
I’ve had multiple people reach out for more info and I’m glad they did, since that’s pushed me to finally get some repos public and this belated follow-up written. Apologies!
To jump straight to it, I’ve published these two repos:
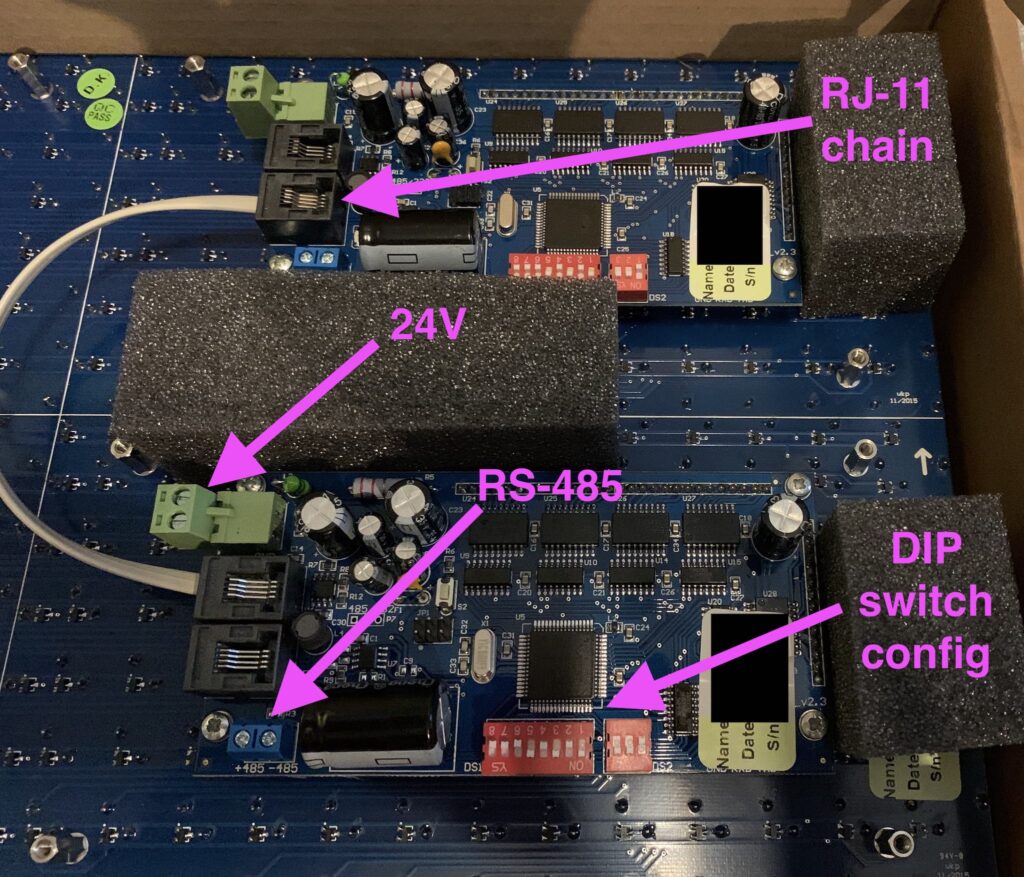
Let’s first go over the hardware involved. The most important piece, of course, is the Alfa-Zeta XY5.
In my case, the 14×28 board was made up of two 7×28 panels connected together via RJ-11.
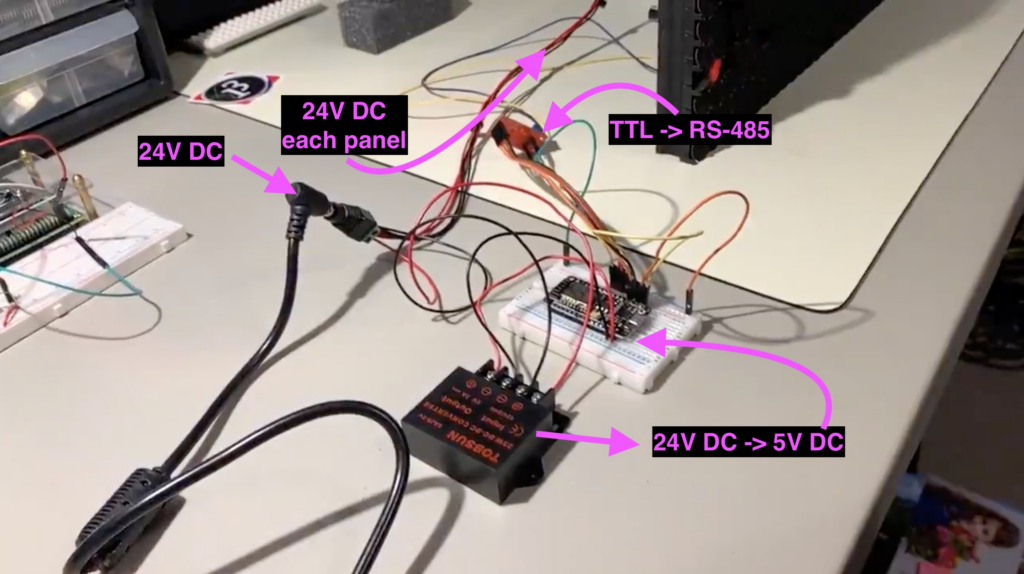
The panels are pricey, but they can be thought of as “hardware easy-mode”. Alfa-Zeta has done the hard job building the controller that drives the hardware and all we have to do is supply power and an RS-485 signal that abides by their protocol.
If you purchase a panel from them there are two important documents to request:
The main manual that describes the specs, features, and things like the DIP switch settings.
The protocol for sending commands to the controllers (which is really simple).
These can easily found by searching around, but if you own a panel the company should supply them. Most of the protocol can be deduced by looking at open source code.
At the moment there isn’t much to it – you can either compile the firmware to run in a mode that writes data from UDP packets to the board, or you can draw “locally” using Adafruit GFX methods.
See the README in the repo above for more details.
Semi-interestingly I utilized Adafruit GFXagain, this time via swift-gfx-wrapper to draw to the board over UDP. It’s hacky and experimental, but that’s part of the fun.
See the README in the repo above for more details.
Something I should’ve done long ago – enabling OTA (Over The Air) firmware updates so I don’t have to disassemble the project box and move the tree every time I want to change its code.
This weekend the NeoPixel tree got many much-needed updates!
Though I have more ideas to implement, the basics of what I wanted to do are complete, like sending commands remotely.
What we can currently do:
Set the brightness
Change the color
Turn the pixels off
Run some built-in sequences, like a nice rainbow
Set repeating color patterns
Set individual pixels
I also threw together a really quick iOS app to set the color with SwiftUI’s built-in ColorPicker view. Thanks to the Rover project (another one that’s been neglected), I had some UDP client code I could borrow to speed up development.
Changing the color of the tree with a SwiftUI ColorPicker view.
I realize this post may be useful to about three other people in the world, but sharing is caring.
What I wanted to do
On my Windows 11 machine I wanted to be able to write and upload firmware to an Arduino Pro Micro (Leonardo) using PlatformIO.
The standard way to accomplish this is to install PlatformIO in VSCode for Windows and you’re done. However, I’m a bit of long time *nix user and really like my PlatformIO + Git workflow in that environment.
WSL sounds like a great option for this case, but unfortunately from what I’ve read, serial communication doesn’t play too nicely without a bunch of hoops to jump through.
To keep things (somewhat) simple I installed a Linux VM through VirtualBox and added a USB Device Filter for the attached Arduino Leonardo so it would be forwarded and accessible by PlatformIO. Using VSCode as my editor would still be possible thanks to its awesome remote features.