The only ‘gotcha’ I came across was when sending audio to the Bluetooth speaker, the emulator I was using (snes9x, the default) got super choppy. This was resolved by adding pisnes as an emulator to EmulationStation and using it instead.
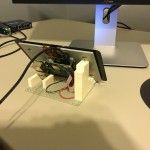
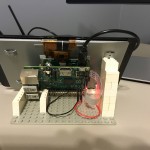
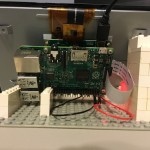
I recently acquired a couple of the awesome 7″ Raspberry Pi touch screens. They’re great except for one thing – how the heck do you hold it up out of the box?
Some third party manufacturers are selling stands, but can dirt-cheap LEGOs accomplish the same thing? Of course. I cooked this up in a few minutes. Three points support the screen perfectly, and a piece is added behind the USB ports to minimize sliding (though that hasn’t been an issue at all).
A downside to this design is that two USB ports are blocked on this model, but you may not need them at all as in my case.
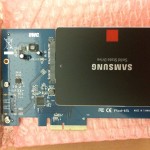
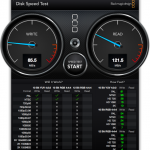
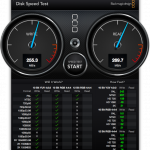
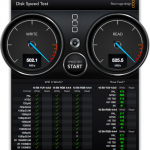
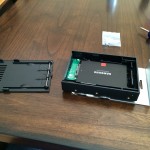
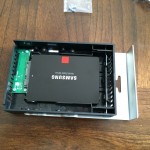
Welp, that didn’t take long. After installing my new SSD I quickly realized I could do better. Upgrading to SATA III from SATA II for less than $60 was a no-brainer.
Installation couldn’t be simpler either: All I had to do was attach the SSD onto the onboard slot and install the PCIe card. After powering on it booted right up, nothing else required.
In hindsight I probably should’ve looked into a PCIe SSD to get higher speeds since my 2009 Nehalem machine has only SATA 2.0. Regardless, I’m loving the boost.
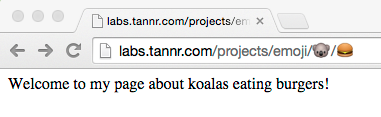
Today I got curious if I could solve the issue of high-res images being loaded on small screens with responsive design. Here’s my solution via jQuery plugin.
Basically, I’m detecting the max size of the image by looking at its parent container and comparing that with the grid breakpoints. In my example I used Bootstrap, but I don’t see why any other responsive framework wouldn’t work.
Did this quick graph recently with my Gmail data to see when I was most likely to send an email. Surprisingly my night-owlness isn’t as apparent as I thought it’d be.
If you’re waiting on an email from me, it’s most likely coming at 11am or 11pm.
This part expands on that and tackles the issue: ‘How do I know the state of my garage door if I’m not at home?’
Because the code operates no differently than someone pressing a single button on the remote control, you would normally have to look with your own eyes to see if you were closing, stopping, or opening the garage door. This can be an issue when your eyes are nowhere close to it.
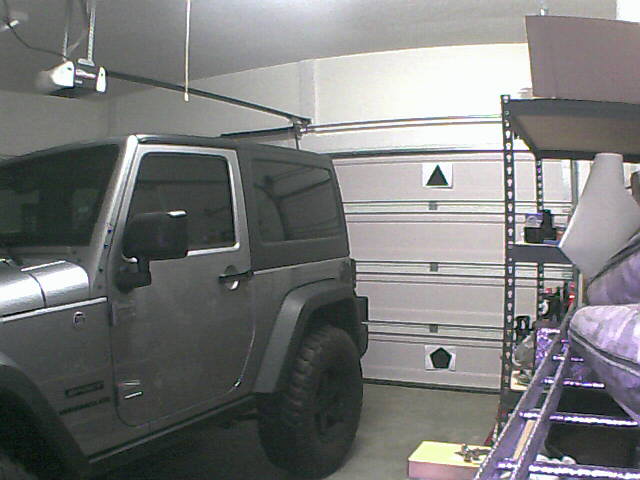
I wanted to come up with a solution that didn’t involve running new equipment such as a switch to detect the door’s orientation. I decided to utilize what I already had in the garage: A camera. Namely, this one: Foscam FI8910W
The idea is to use the camera to grab an image, pipe that image into OpenCV to detect known objects, and then declare the door open or closed based off of those results.
I whipped up a couple of shapes in Photoshop to stick on the inside of my door:
Shapes taped to the inside of the garage door
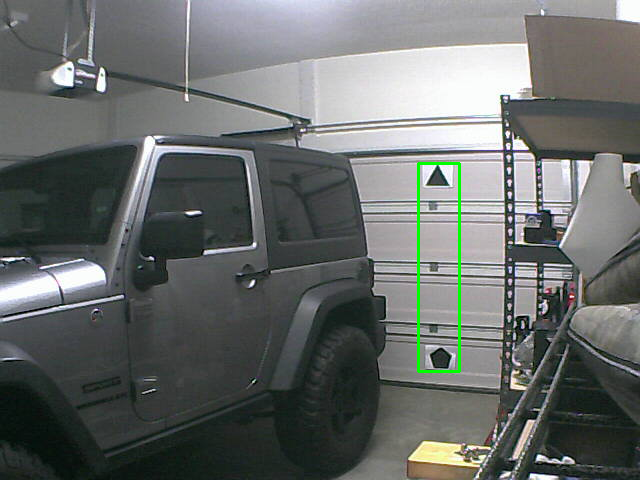
I then cropped out the shapes from the above picture to make templates for OpenCV to match.
The basic algorithm is this:
Get the latest image from the camera
Look for our templates with OpenCV
If all objects (templates) were detected, the door is closed – otherwise it’s open
Shapes successfully detected
To help make step 3 more accurate, I added a horizontal threshold value which is defined in the configuration file. Basically, we’re using this to make sure we didn’t get a false positive – if the objects we detect are horizontally aligned, we can be pretty certain we have the right ones.
I was happy to find that the shapes worked well in low-light conditions. This may be due to the fact that my garage isn’t very deep so the IR range is sufficient, as well as the high contrast of black shapes on white paper.
Currently I have some experimental code in the project for detecting state changes. This will not only provide more information (e.g. the door is opening because we detect the pentagon has gone up x pixels), but is good for events (e.g. when the alarm system is on, let me know if the door has any state change).
I’ve tested running this on the Raspberry Pi and it works fine, though it can be a good bit slower than a full-blown machine. I have a Raspberry Pi 2 on order and it’ll be interesting to see the difference. Since this code doesn’t need anything specific to the Raspberry Pi, someone may prefer to run it on a faster box to get more info in the short time span it takes for a door to open or close.
I’ve created a video to demo the script in action!
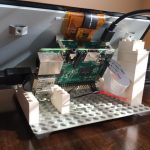
I want to be able to control my garage door from anywhere. Solution? Dedicated Raspberry Pi.
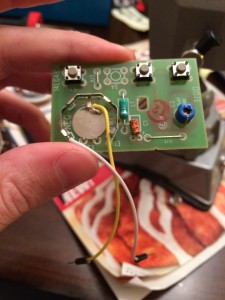
Pi with breakout board attached to garage remote
How it was made:
The garage door opener remote was removed from its casing and I located the button used to open the door. My particular model had three buttons.
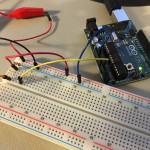
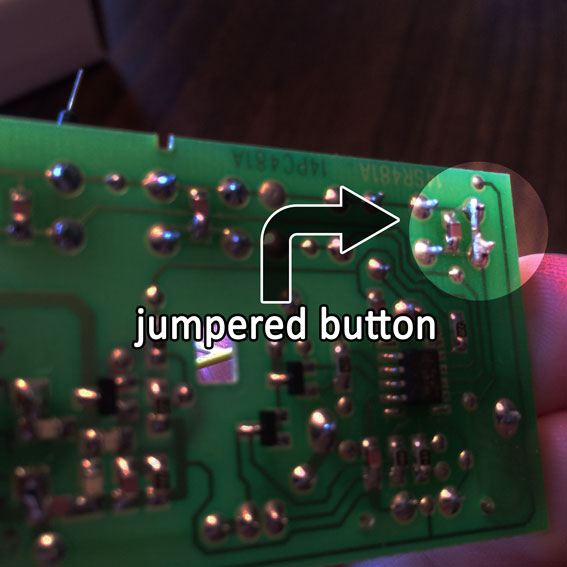
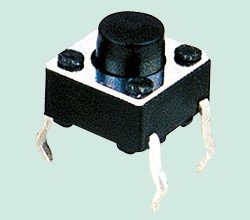
I soldered a jumper on the button leads to always create a circuit, removing the functionality of the button so it’s “always on” when power is applied. The button was this style – a standard electronics button.
I removed the coin battery and soldered on two leads that will be powered by the Raspberry Pi. When the Raspberry Pi sends power, this will be no different than someone normally pressing the remote button.
I wrote code to control the pin that outputs power.
Notes:
Garage door openers can vary, but I’m willing to bet a lot (if not most) use a CR2032 battery. The Pi puts out 3.3 volts, (.3 V higher), but I haven’t noticed any issues.
I’ve provided the simplest example here. The next step would be to have the code driven by a web interface that could be loaded on a phone or a web browser.
There will be an exciting part 2 to this article where I take this one step further!


