 Tanner's Website
I first want to acknowledge that I did the thing that I try to never do: I showed off a snazzy project, left some hints here and there of how it worked, said I would follow up with full details… and never did. That’s lame.
I’ve had multiple people reach out for more info and I’m glad they did, since that’s pushed me to finally get some repos public and this belated follow-up written. Apologies!
To jump straight to it, I’ve published these two repos:
Update March 2025: The main repo URL has been updated as this is now a library.
Let’s first go over the hardware involved. The most important piece, of course, is the Alfa-Zeta XY5.
In my case, the 14×28 board was made up of two 7×28 panels connected together via RJ-11.
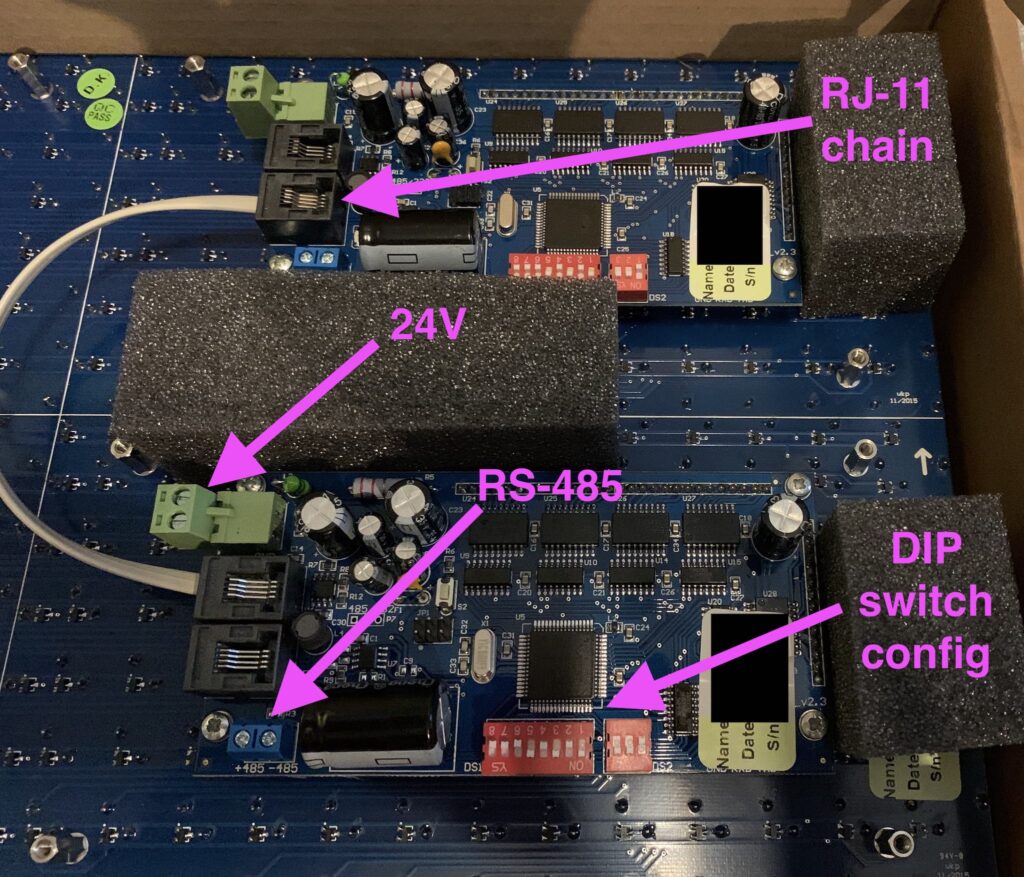
The panels are pricey, but they can be thought of as “hardware easy-mode”. Alfa-Zeta has done the hard job building the controller that drives the hardware and all we have to do is supply power and an RS-485 signal that abides by their protocol.
If you purchase a panel from them there are two important documents to request:
These can easily found by searching around, but if you own a panel the company should supply them. Most of the protocol can be deduced by looking at open source code.
The 24V -> 5V converter isn’t necessary if you supply power to the MCU independently, say through a USB power adapter.
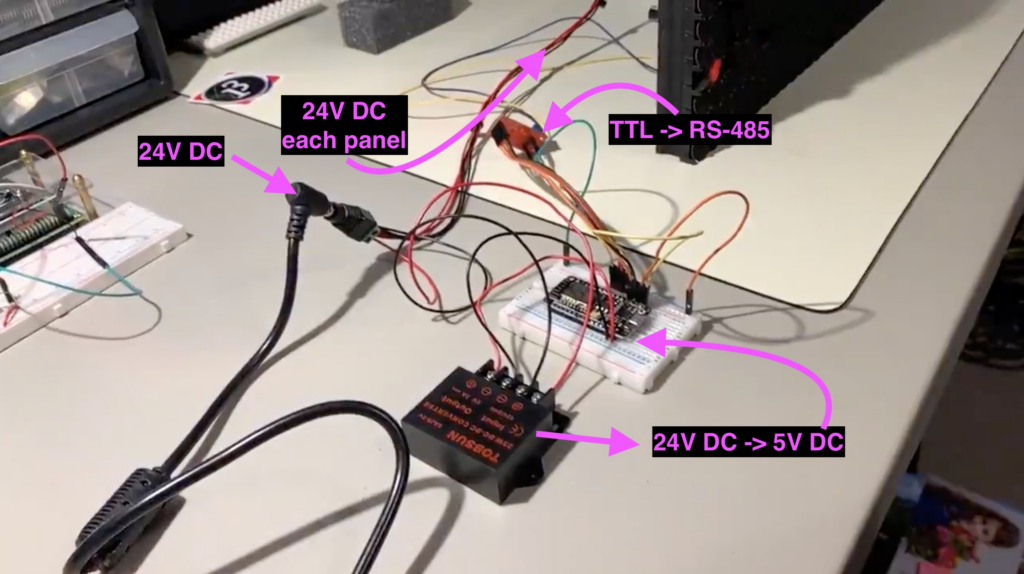
VCC -> 3.3vGnd -> GndDE -> 3.3v pulled high because we're always transmittingRE -> 3.3v pulled high because we're always transmittingDI -> TX[x] x being 0 or higher depending on boardRO -> RX[x] most boards only have the main serial IO, but boards like the Mega have multiple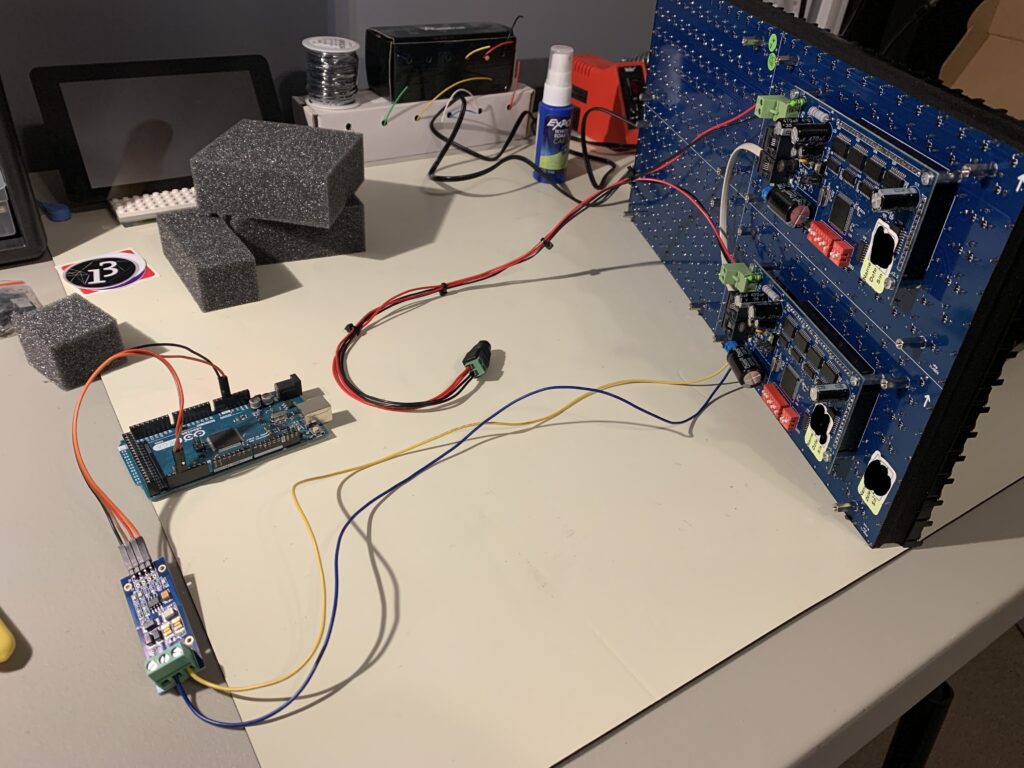
An Arduino Mega is driving the board in this photo.
See https://github.com/twstokes/flipdots for the code that runs on the MCU.
At the moment there isn’t much to it – you can either compile the firmware to run in a mode that writes data from UDP packets to the board, or you can draw “locally” using Adafruit GFX methods.
See the README in the repo above for more details.
See https://github.com/twstokes/flipdots-ios for the code that runs on these devices.
Semi-interestingly I utilized Adafruit GFX again, this time via swift-gfx-wrapper to draw to the board over UDP. It’s hacky and experimental, but that’s part of the fun.
See the README in the repo above for more details.
I’m really happy that most modern monitors support DDC so that we can programmatically change settings rather than go through clunky OSDs.
At my desk I have my Mac Studio and my latest gaming PC and they both share a triple monitor setup. When I want to switch the monitors between the two, I either need to:
Auto-switching kinda worked, but has quirks I can’t live with. One is when I’m playing a game on the PC and the Mac wakes up for whatever reason, the PC receives a signal that hardware has been connected or disconnected and the screen freezes. It seems like a firmware bug to me – if an input is being actively used the others should be ignored.
The manual route is pretty bad as well. The M32U‘s input switchers are on the back of the monitor, which is pretty much the worst spot possible. Only the far right monitor is slightly more convenient to access.
By using m1ddc on the Mac we can easily script a way to switch between the two machines. 🎉 This means I can create a keyboard shortcut to toggle the inputs, a physical button, or even run it from an external computer. Hooray!
I threw together a quick Flask app that can be accessed from any device on my network to switch inputs. Neato!
Note: Once I connect the left monitor the same way I connect the other two, the transition should be more in sync. Currently it’s a little slower due to the HDMI connection.
For those who use desktop speakers there’s a similar dilemma for audio: sharing one output for multiple inputs. The M32U (like many monitors) has a mini-jack that outputs audio from the currently selected video input. You then can plug your desktop speakers into that jack and you’re good to go – switching to another video source also means switching to its audio.
If that’s your only option there’s no problem, but do know that audio quality may be subpar as the DAC chip inside the monitor most likely isn’t great. I also found that I had no volume control in macOS for this setup, but was able to work around it using MonitorControl which – you guessed it – uses DDC.
Another option would be a powered stereo mixer like the Rolls MX51S that would let each system handle its own analog output. That should give you better quality, but introduces complexity via a new box to power and extra cables. You also may have to fight noise and hums. One upside to this setup would be that you could play audio from multiple machines at the same time – maybe the Mac plays music while the PC plays a game.
The solution I landed on is my favorite: A speaker system with USB input. The same way I share my keyboard input (via the monitor’s USB hub) I share the audio output. There’s no interference or noise, and quality is superb because the speakers are made for digital input.
I recently set up a ZFS mirror on my home server and found myself needing a way to be alerted if something went wrong. That same server runs Grafana and InfluxDB, and collects various metrics from my other machines (and itself) via Telegraf. Since I already have email alerts set up with that stack, it felt simplest to use it for this solution.
#!/bin/sh

# Compares the expected zpool status output with the actual status.
# Copy to a global location such as /usr/local/bin so it's accessible to Telegraf.
# Note: This can provide a false-postive if the output of the command changes, which is not guaranteed to be stable.

# Returns 0 for "false" (not healthy), returns 1 for "true" (healthy)
# Chose using integers over booleans due to how Grafana handles alerts.

OUTPUT="zfs_status,host=[HOSTNAME HERE] healthy="

if [ "$(zpool status -x)" != "all pools are healthy" ]; then
	OUTPUT=${OUTPUT}"0i"
else
	OUTPUT=${OUTPUT}"1i"
fi

echo $OUTPUT
There are similar scripts floating around on the Internet so I used those for inspiration. The only difference with mine is that it outputs the InfluxDB Line Protocol.
host= is just a convenient tag where you could put your box’s hostname (or call the hostname command and interpolate it).
Everything else should be explained by the script, including the possibility of false positives. Feel free to rename the zfs_status field to anything you wish. In my instance I use tws_zfs_status to differentiate custom fields I’ve created and possibly prevent namespace conflicts.
Telegraf has a super handy exec input where you can run arbitrary commands, so that’s what we use:
[[inputs.exec]]
  commands = ["sh /usr/local/bin/zfs_check.sh"]
  timeout = "5s"
  data_format = "influx"
When Telegraf collects data from its inputs it will write a one or a zero for its zfs_status field.
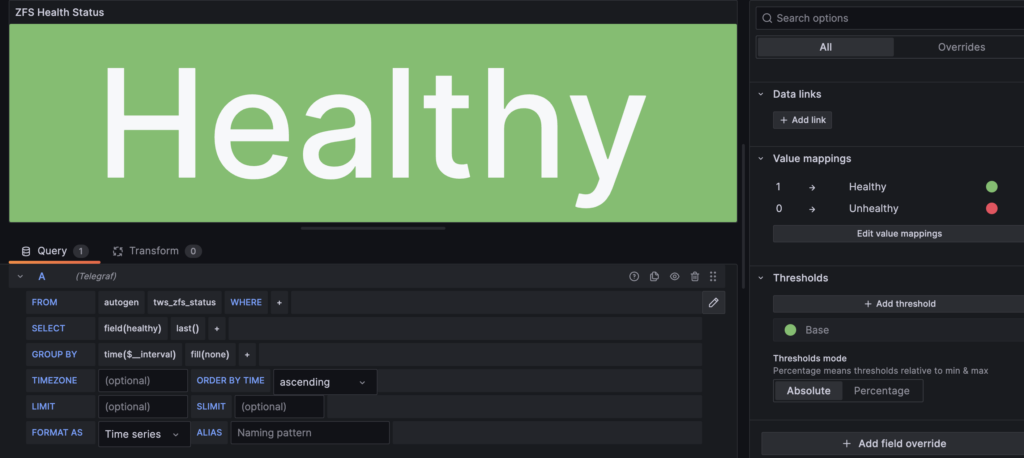
The basic setup in Grafana is:
That’s basically it! It’s a really good idea to test it by temporarily tweaking the script to output a 0 and waiting for an email to arrive. 🙂
I know this has been done, but I hadn’t done it, so it was my weekend nerd snipe. (no game audio)
Edit September 2025: Audio was implemented!
This was a lot easier thanks to doomgeneric!
Since doomgeneric exposes the framebuffer, I throw that into an SKTexture and that gets added to a node in the SpriteKit scene, which is subclassed to override the update method to call doomgeneric_Tick(). Objective-C is used for interop between C and Swift, and fulfills most of the functions listed here. SwiftUI ultimately outputs the scene.
Very few tweaks needed to be made in doomgeneric itself.
They were basically:
GitHub repo: https://github.com/twstokes/AppleGenericDoom
Since restoring a couple Mac OS 9 machines and playing with them, I’ve noticed some nice touches in various places.
One is that when you have the Platinum Sounds enabled and drag a window, the sound effect will pan in stereo with the window’s horizontal location.
I probably didn’t pick it up very well by recording with my iPhone, but just imagine it gets louder on the speaker the window is closest to. Pretty cool!
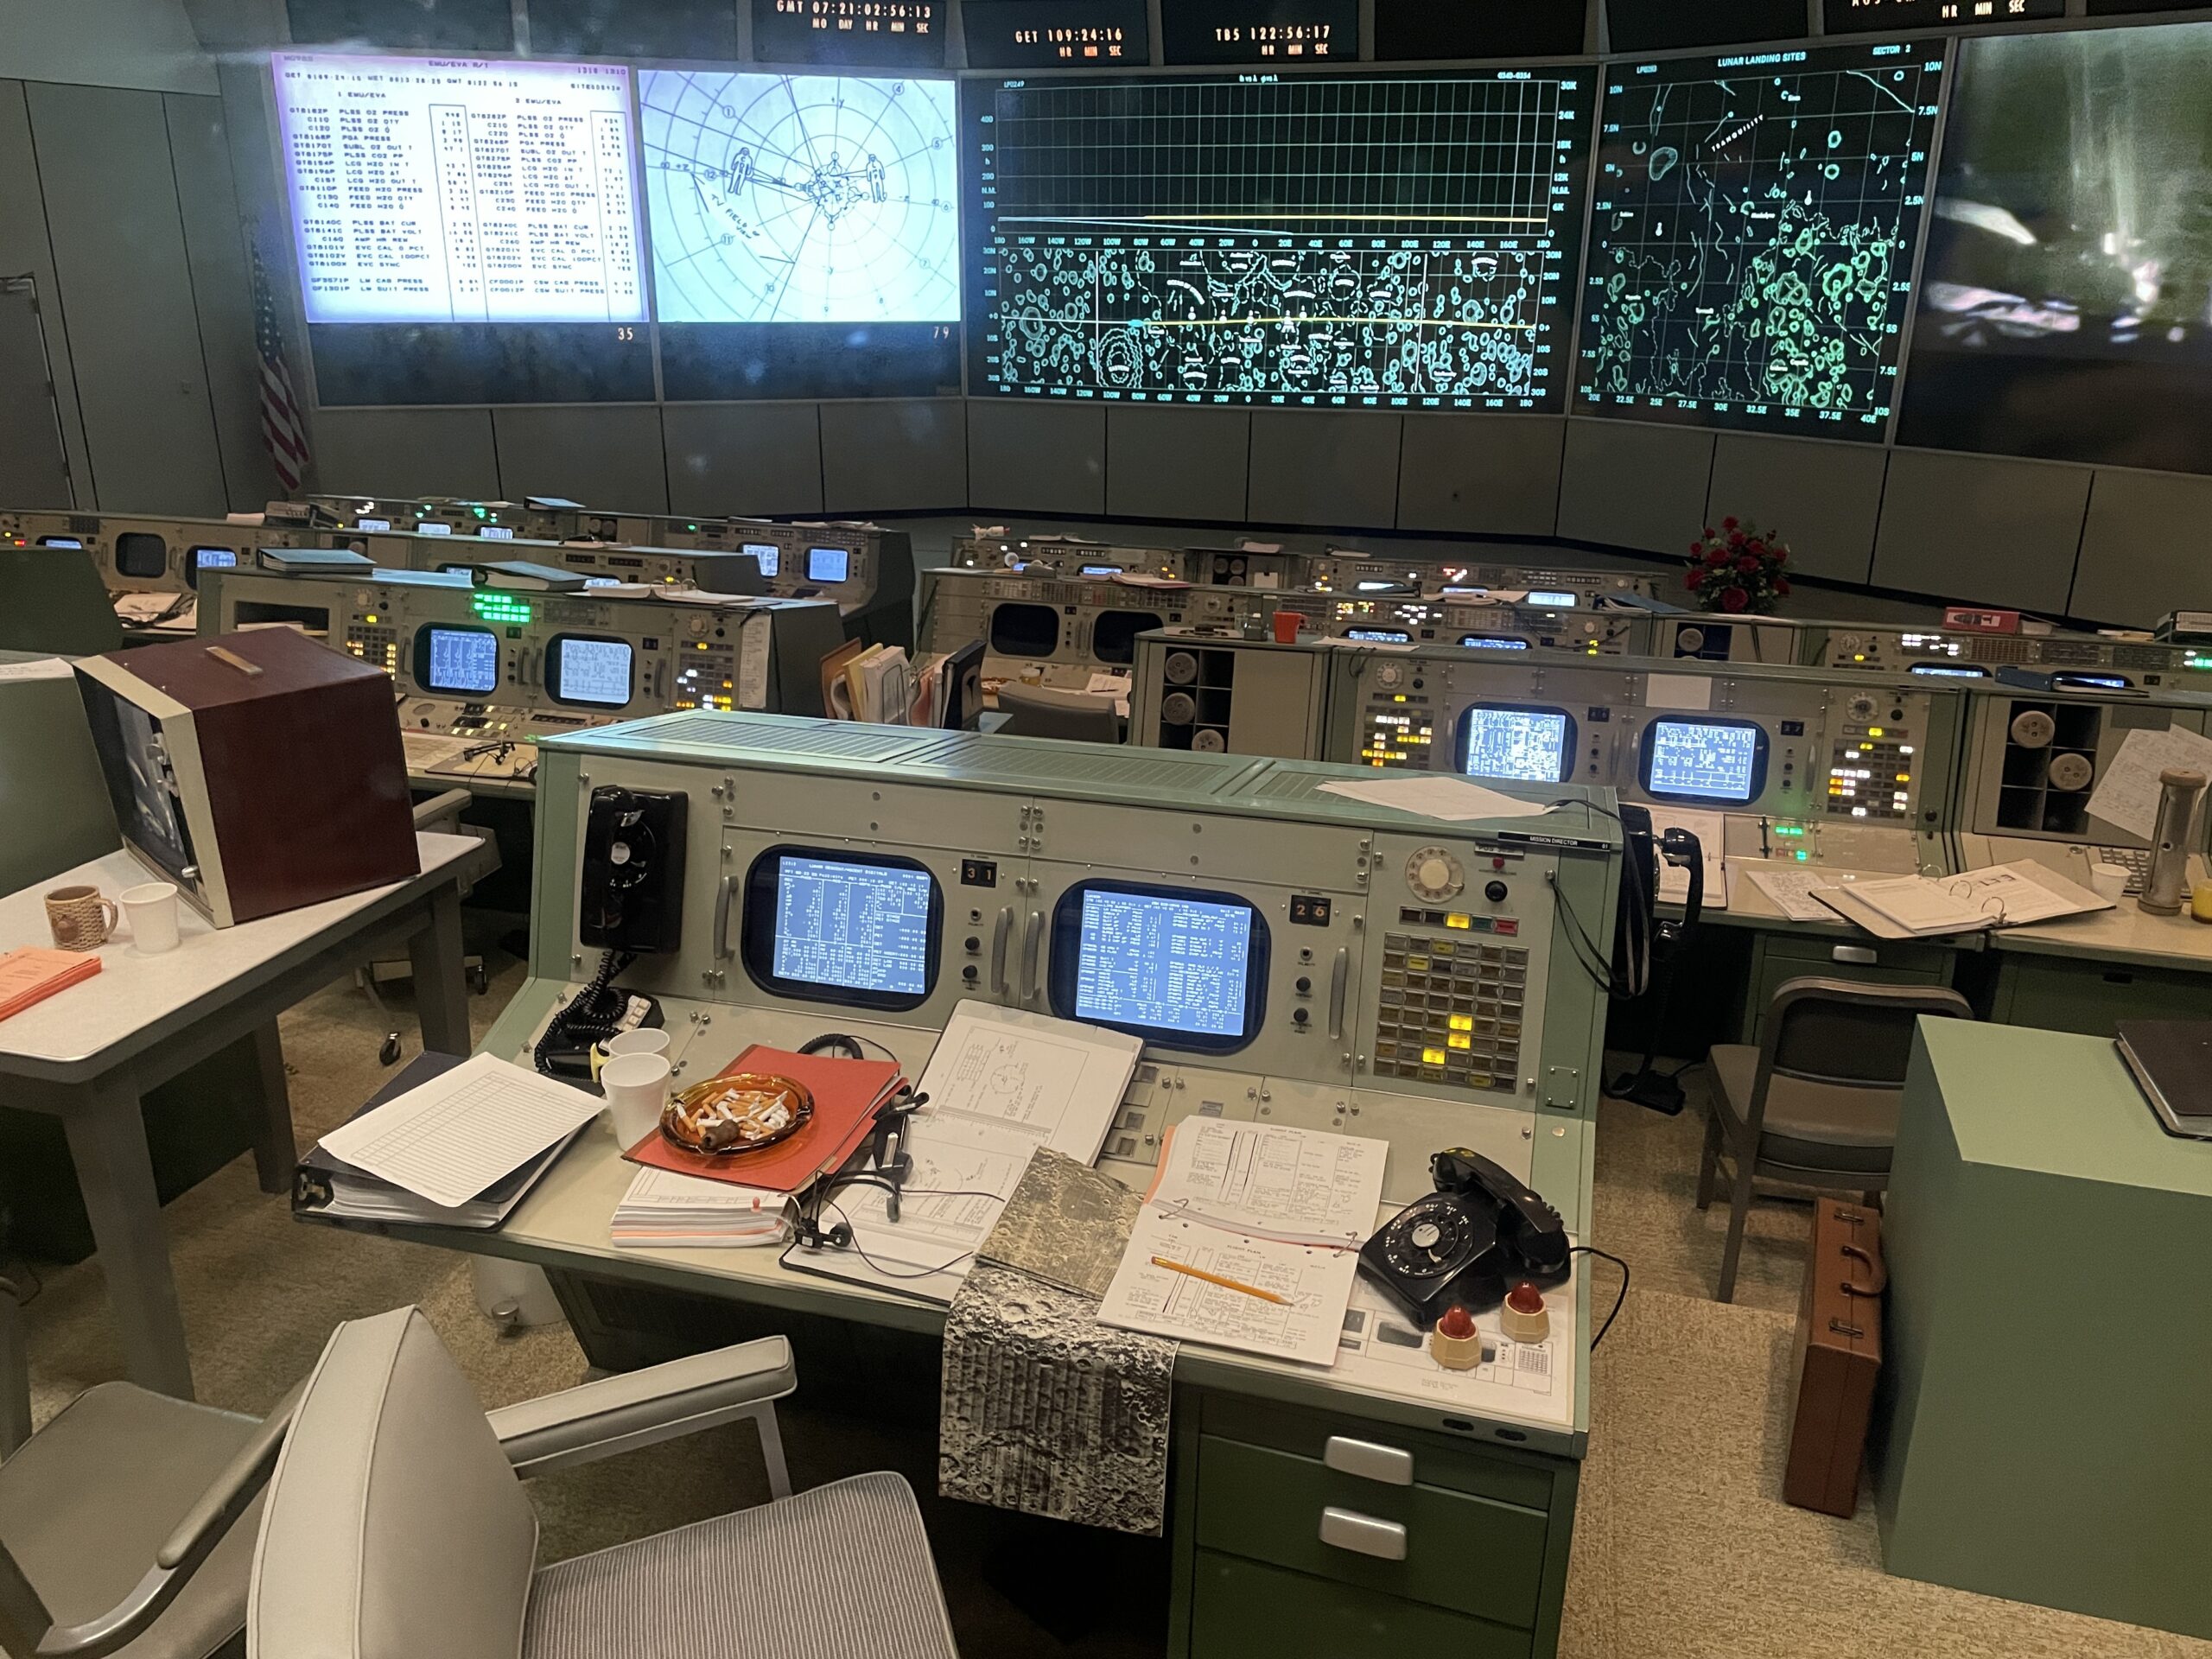
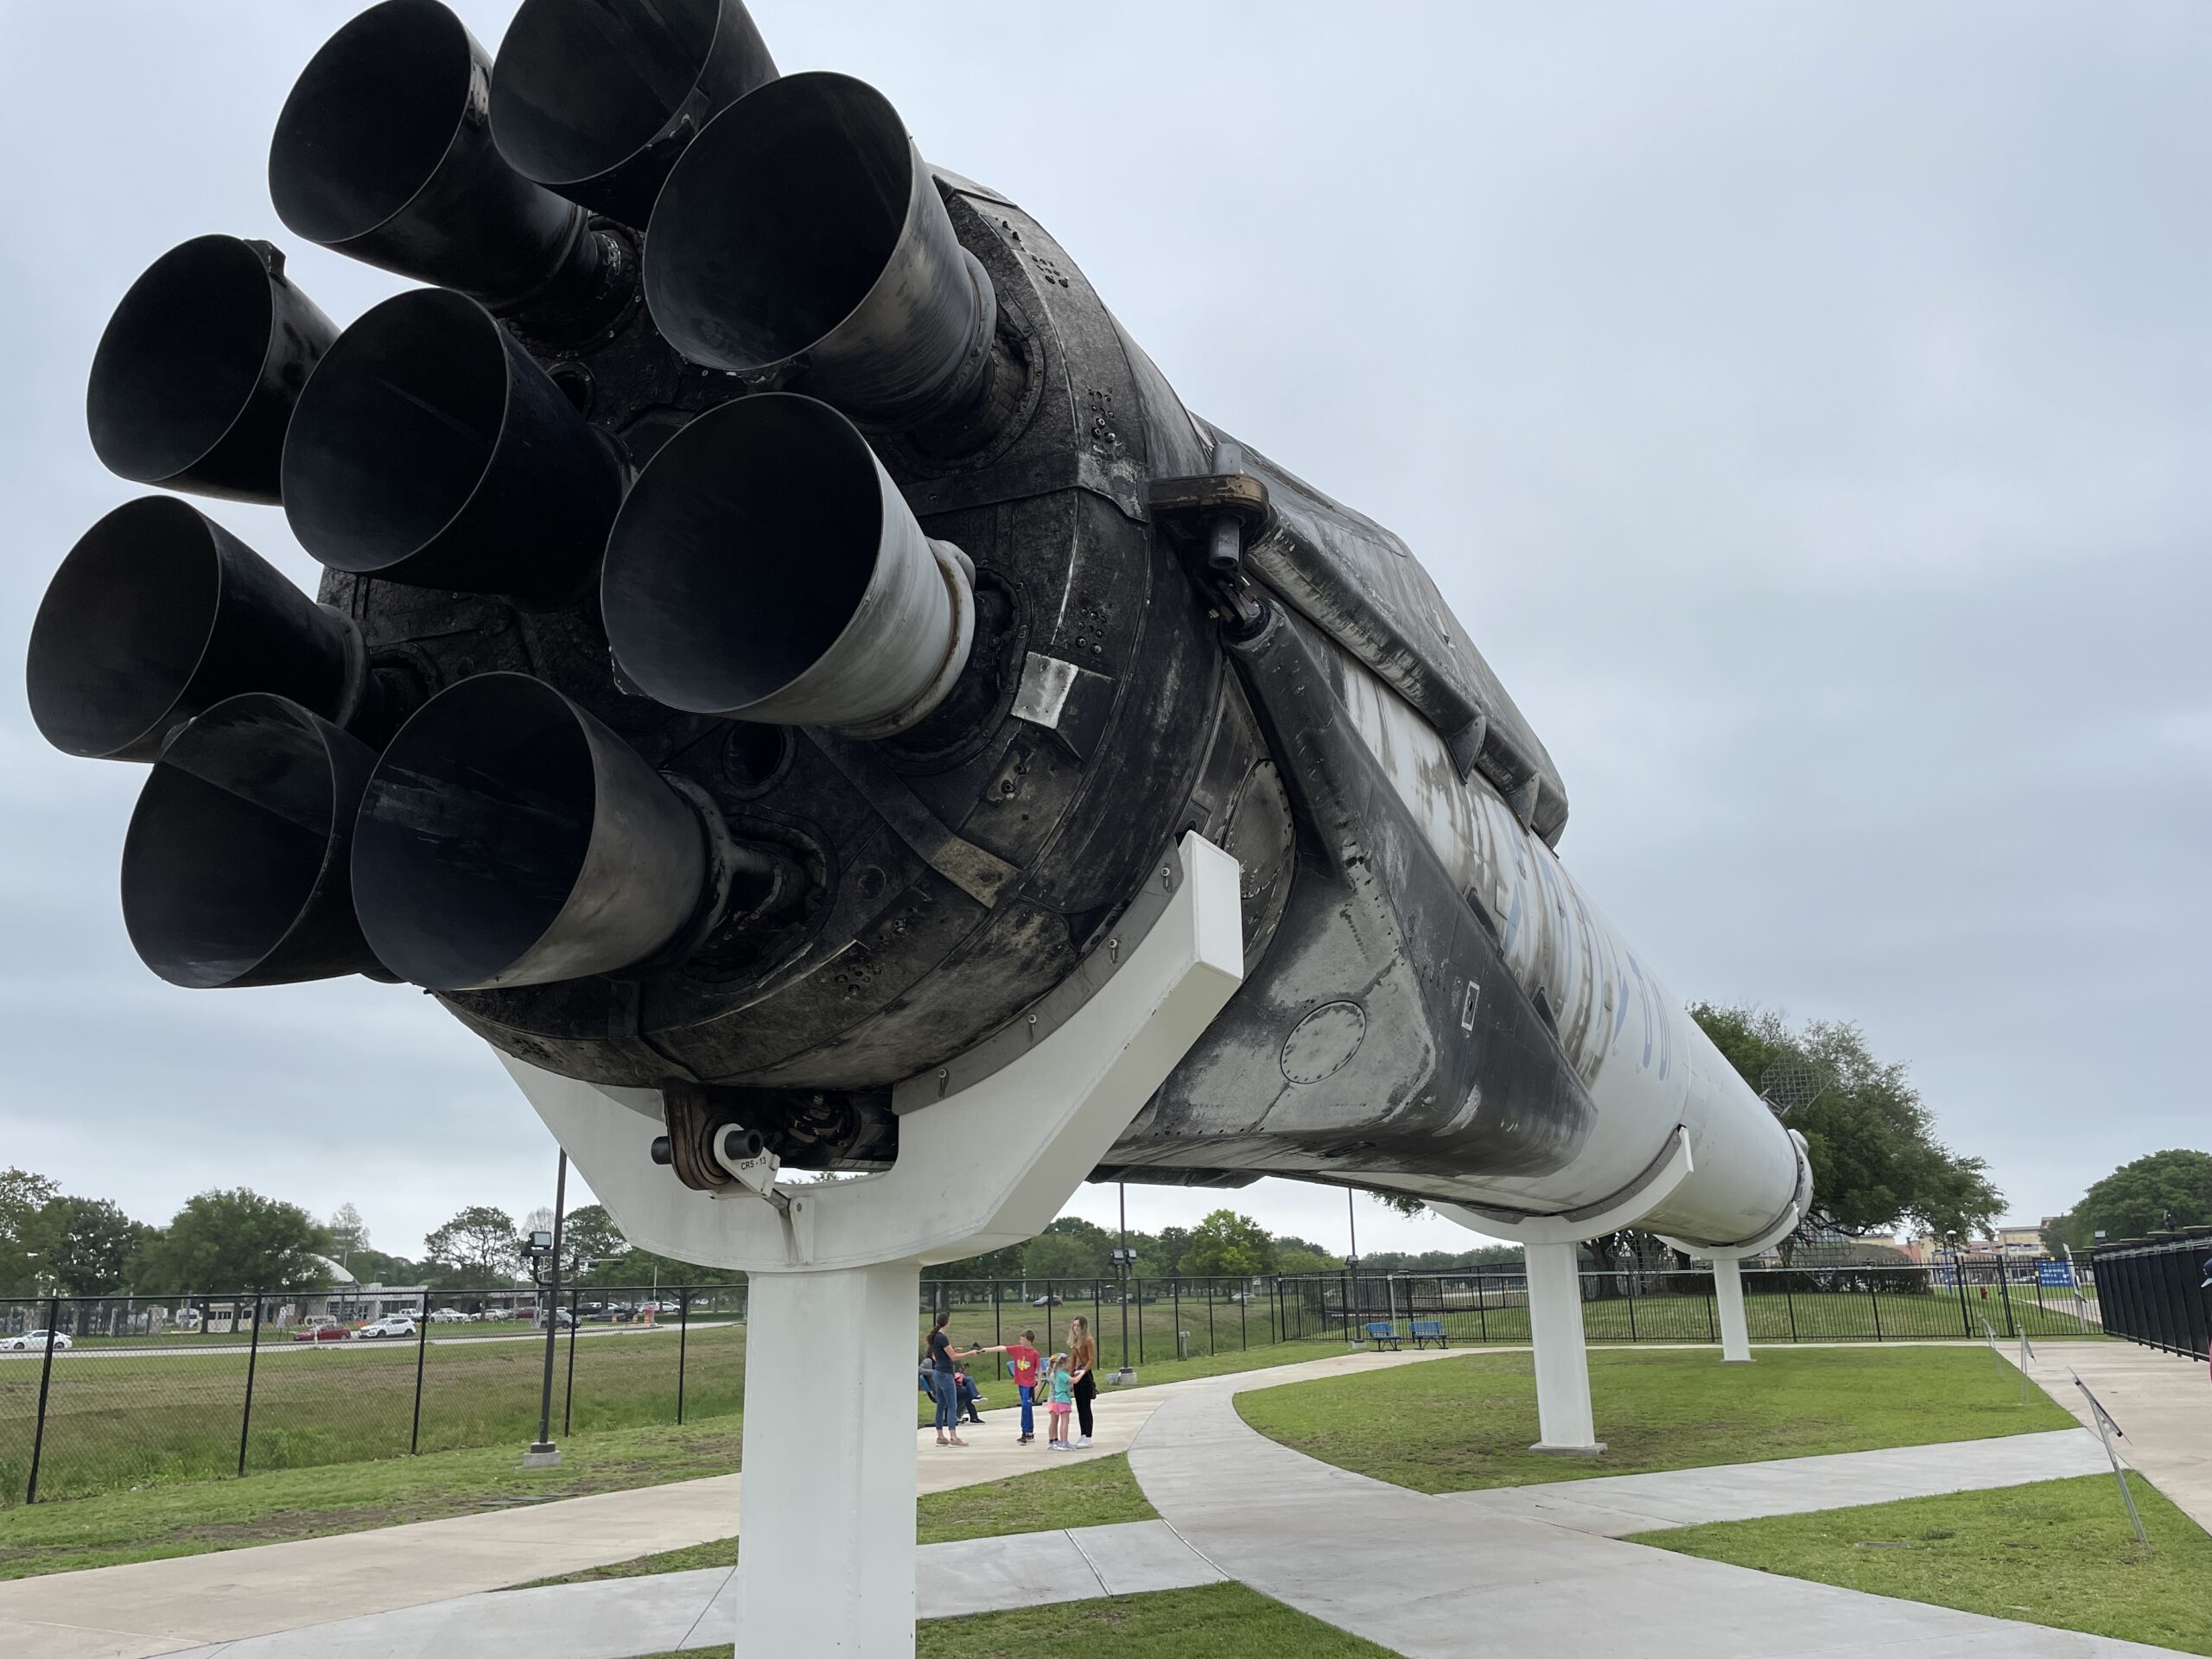
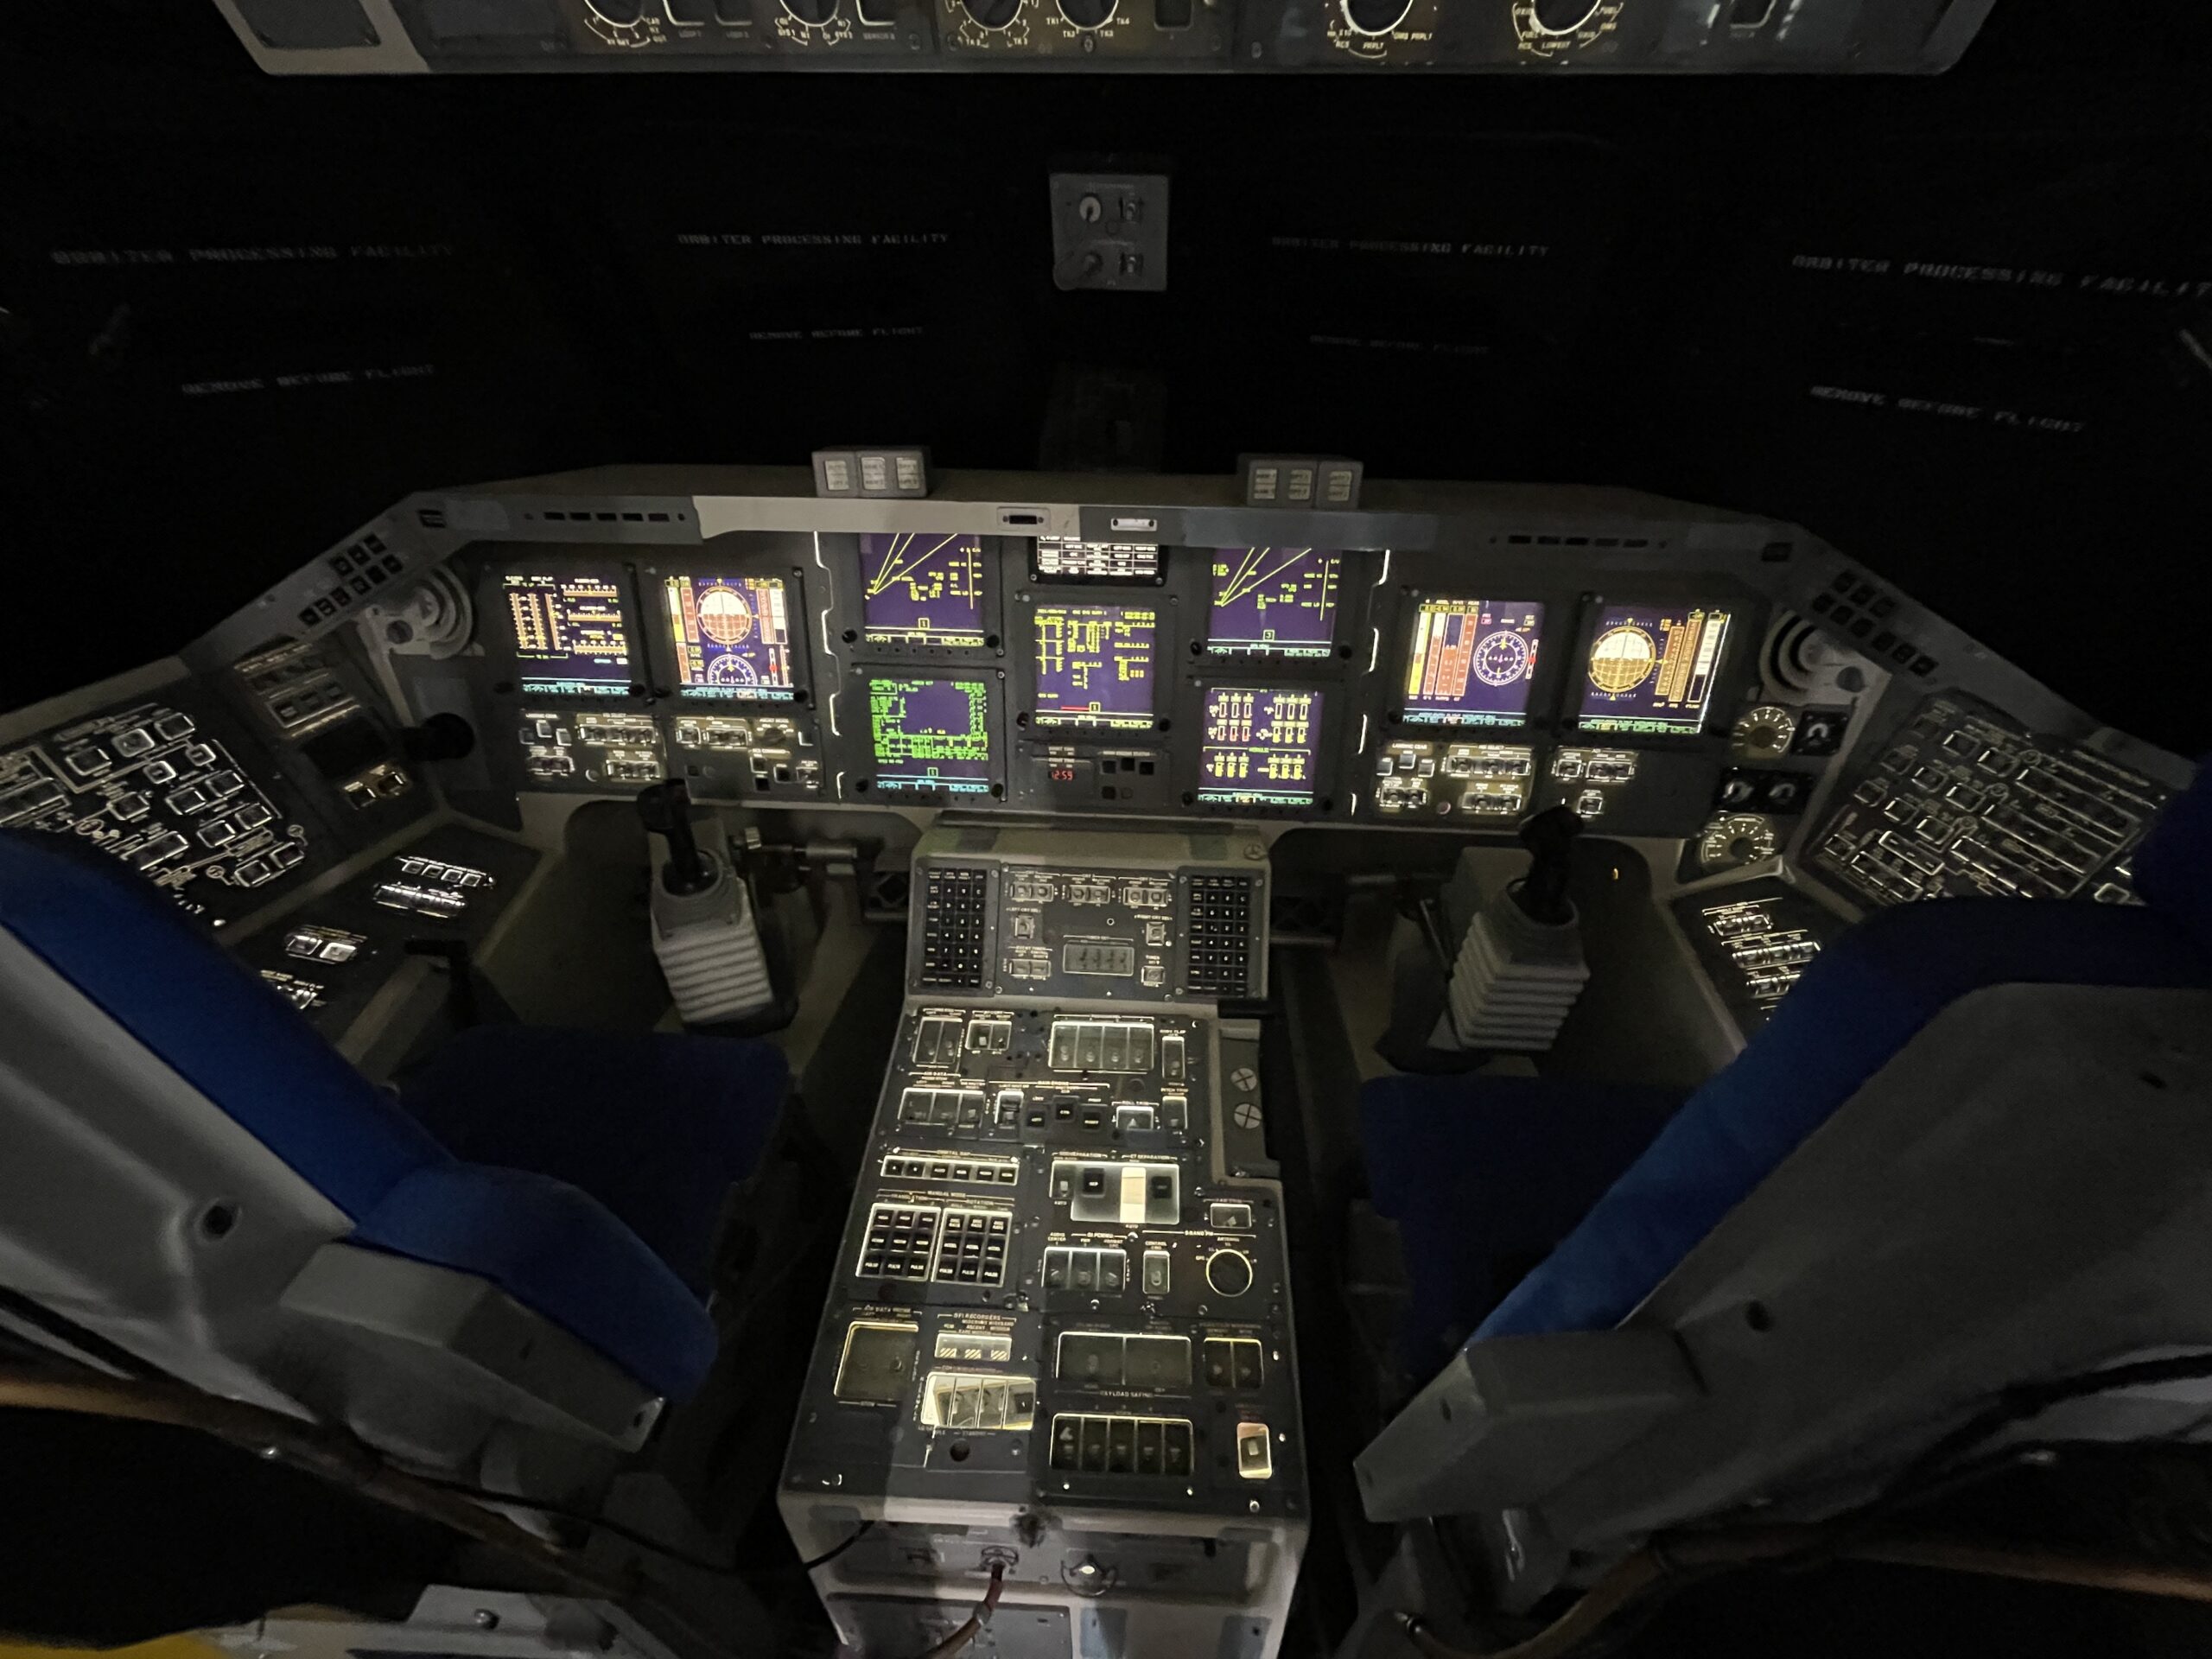
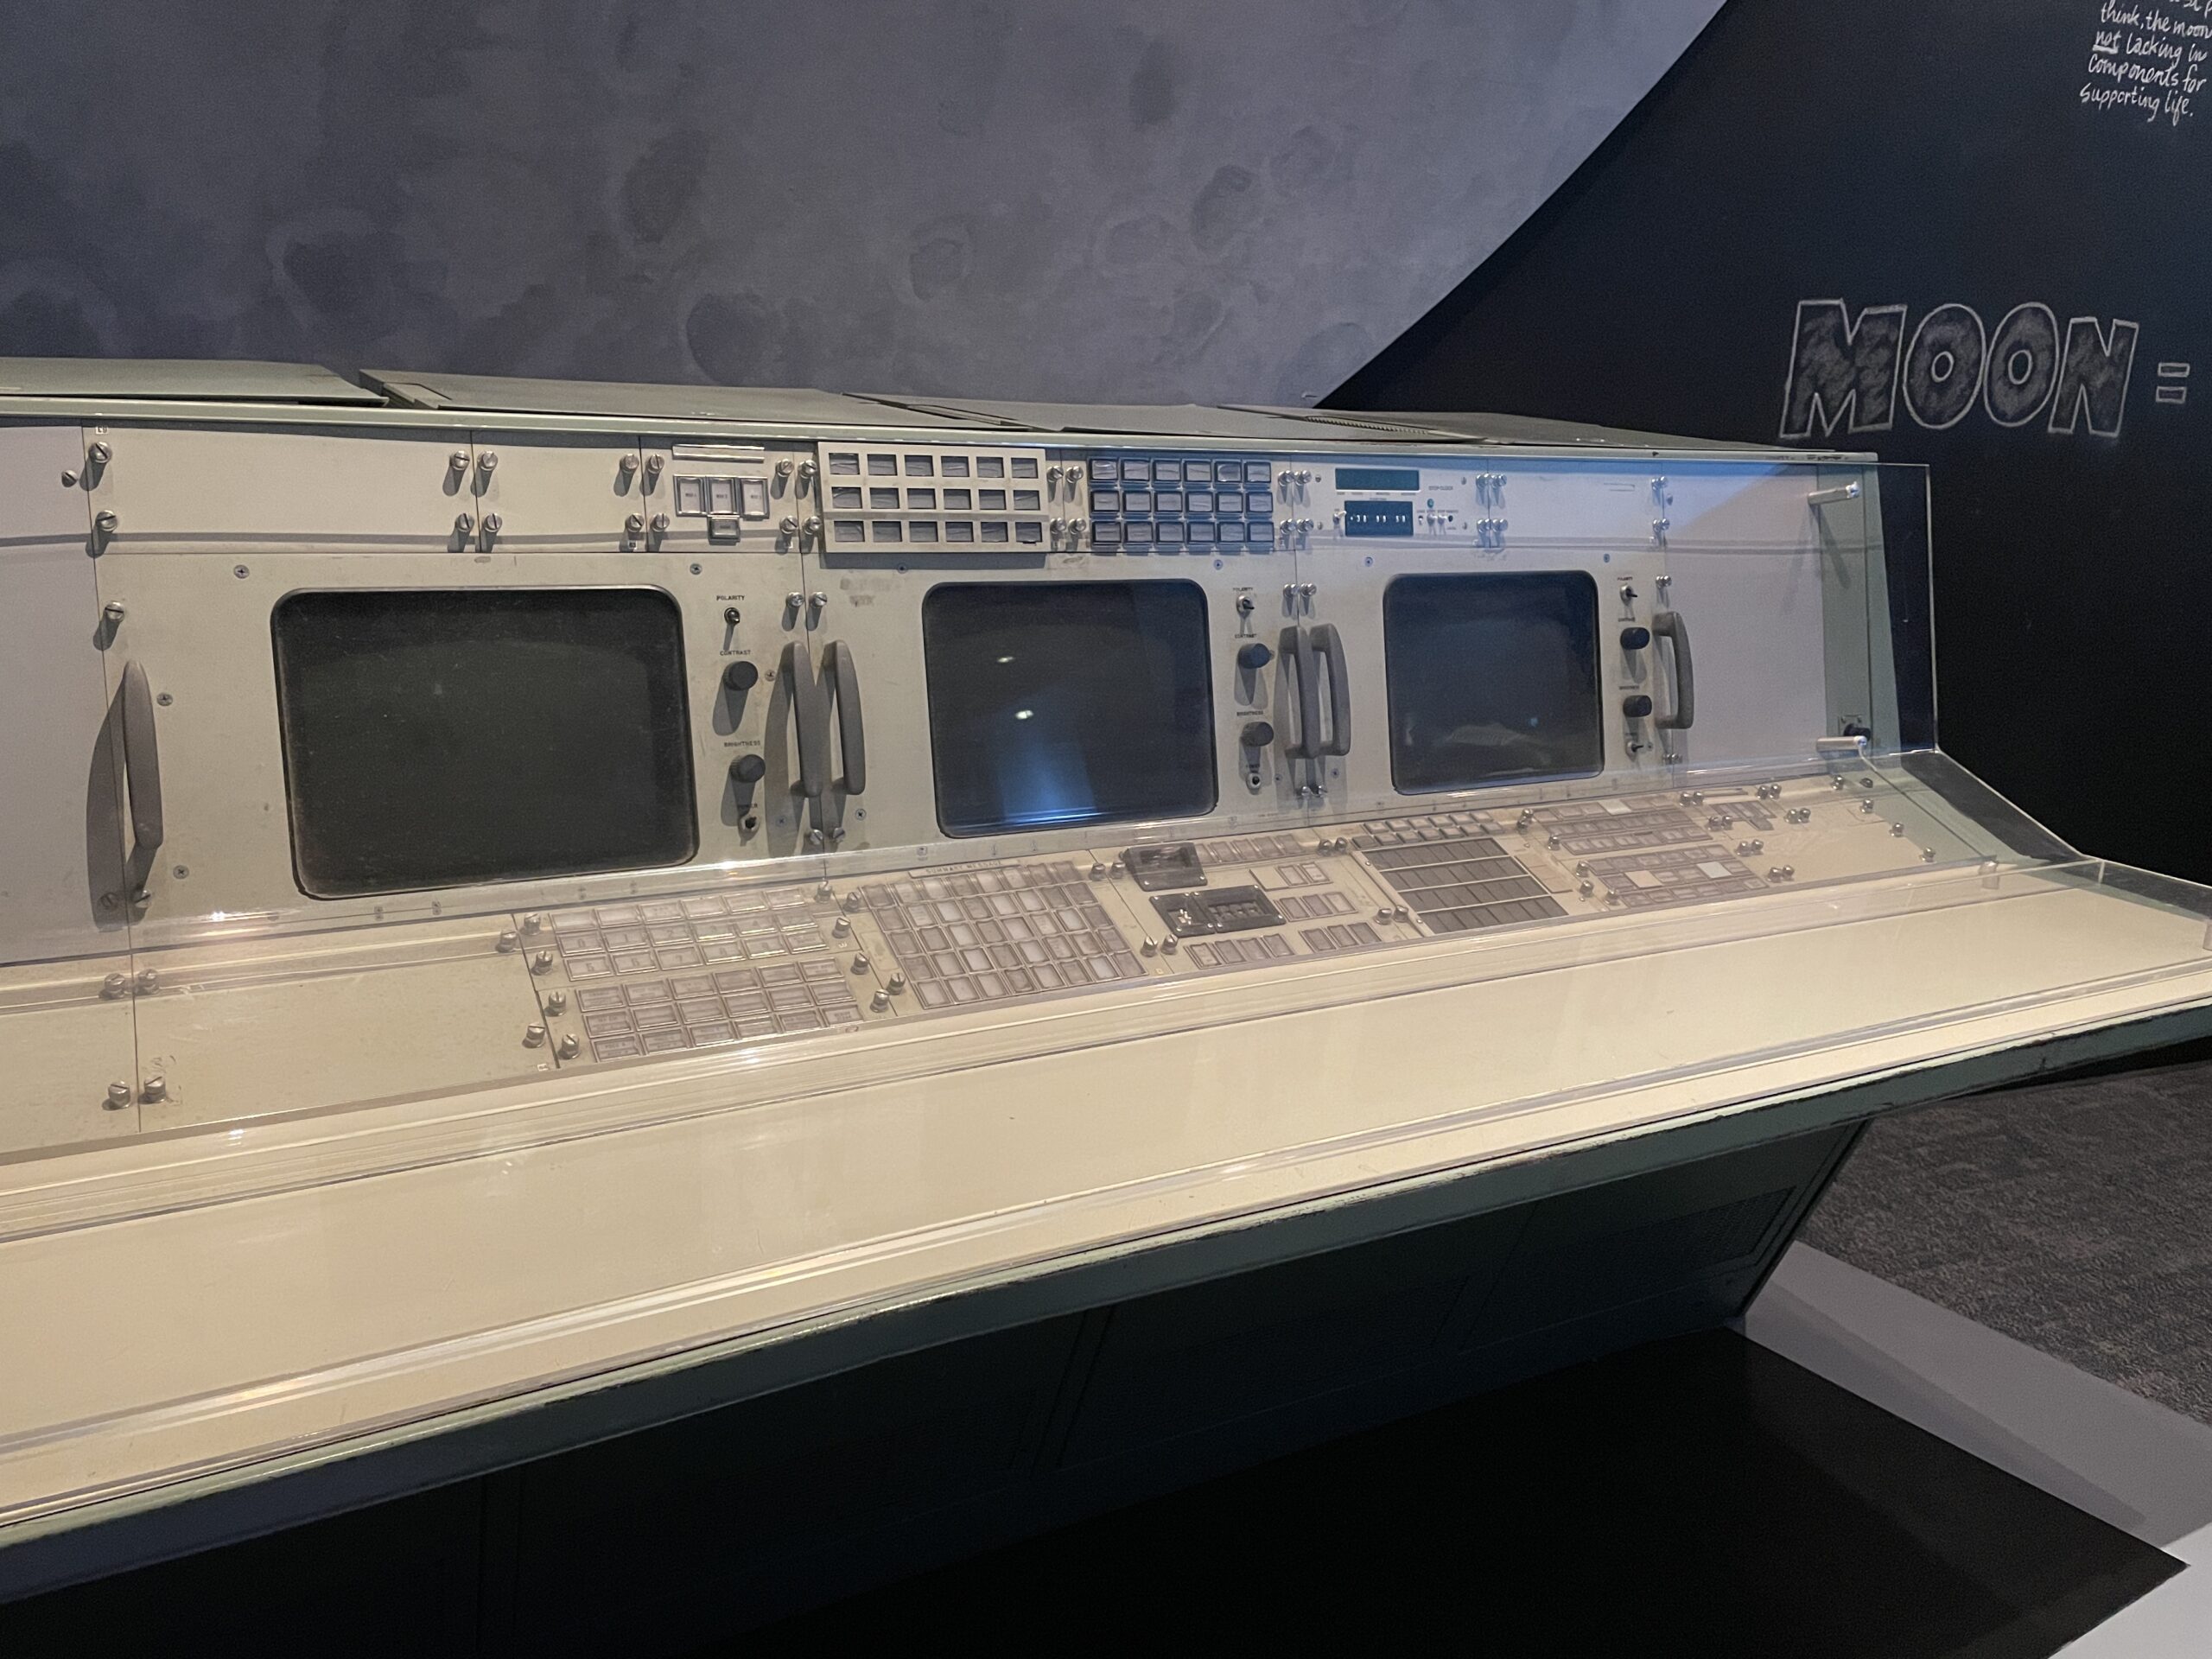
We visited the Space Center and had some great BBQ, Tex-Mex, and Vietnamese food. 😋


I haven’t spent as much time on my Commodore 64 as my other retrocomputers (which can seem modern in comparison), but my explorations over time are trending towards older hardware. I can only assume that my final stop will be an abacus.
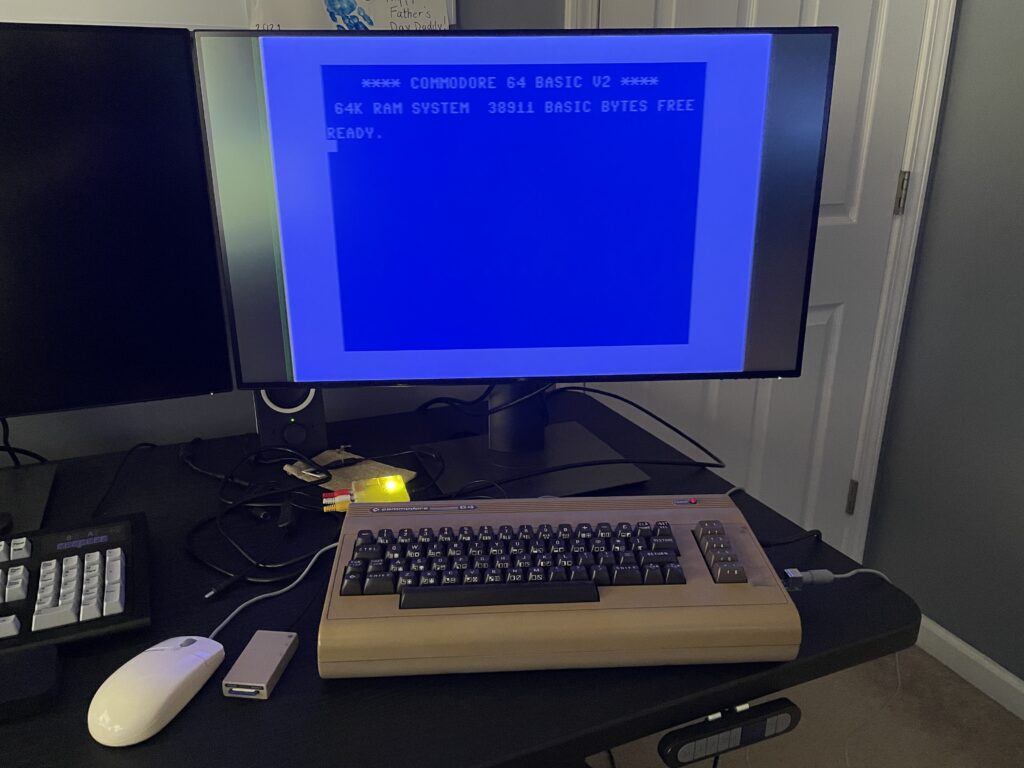
I have three C64s all passed down from my dad. One had been devoted to a home alarm system (of course we still have the schematics), but by the time I came around it was only used for playing half-working totally not bootlegged games.
A sampling of some favorite software from my childhood:
I hope to be able to fully restore at least one of these machines this year. The one pictured above powers on and is fully functional, but some flakiness at startup tells me that it’s overdue for a recap.
One not-so-smart thing I did when I unpacked all of this equipment was powering it up with the original C64 power supply. That’s a risky move and likely to damage the C64 with bad power, so I’ve since replaced it with a new modern one (see the parts list).
I’m not interested (nor do I have the space) to use these machines in the “pure way” with a CRT and 1541 drives, although I have both. Maybe down the road that would be fun, but for now I’m utilizing modern gadgets from the wonderful C64 aftermarket community.
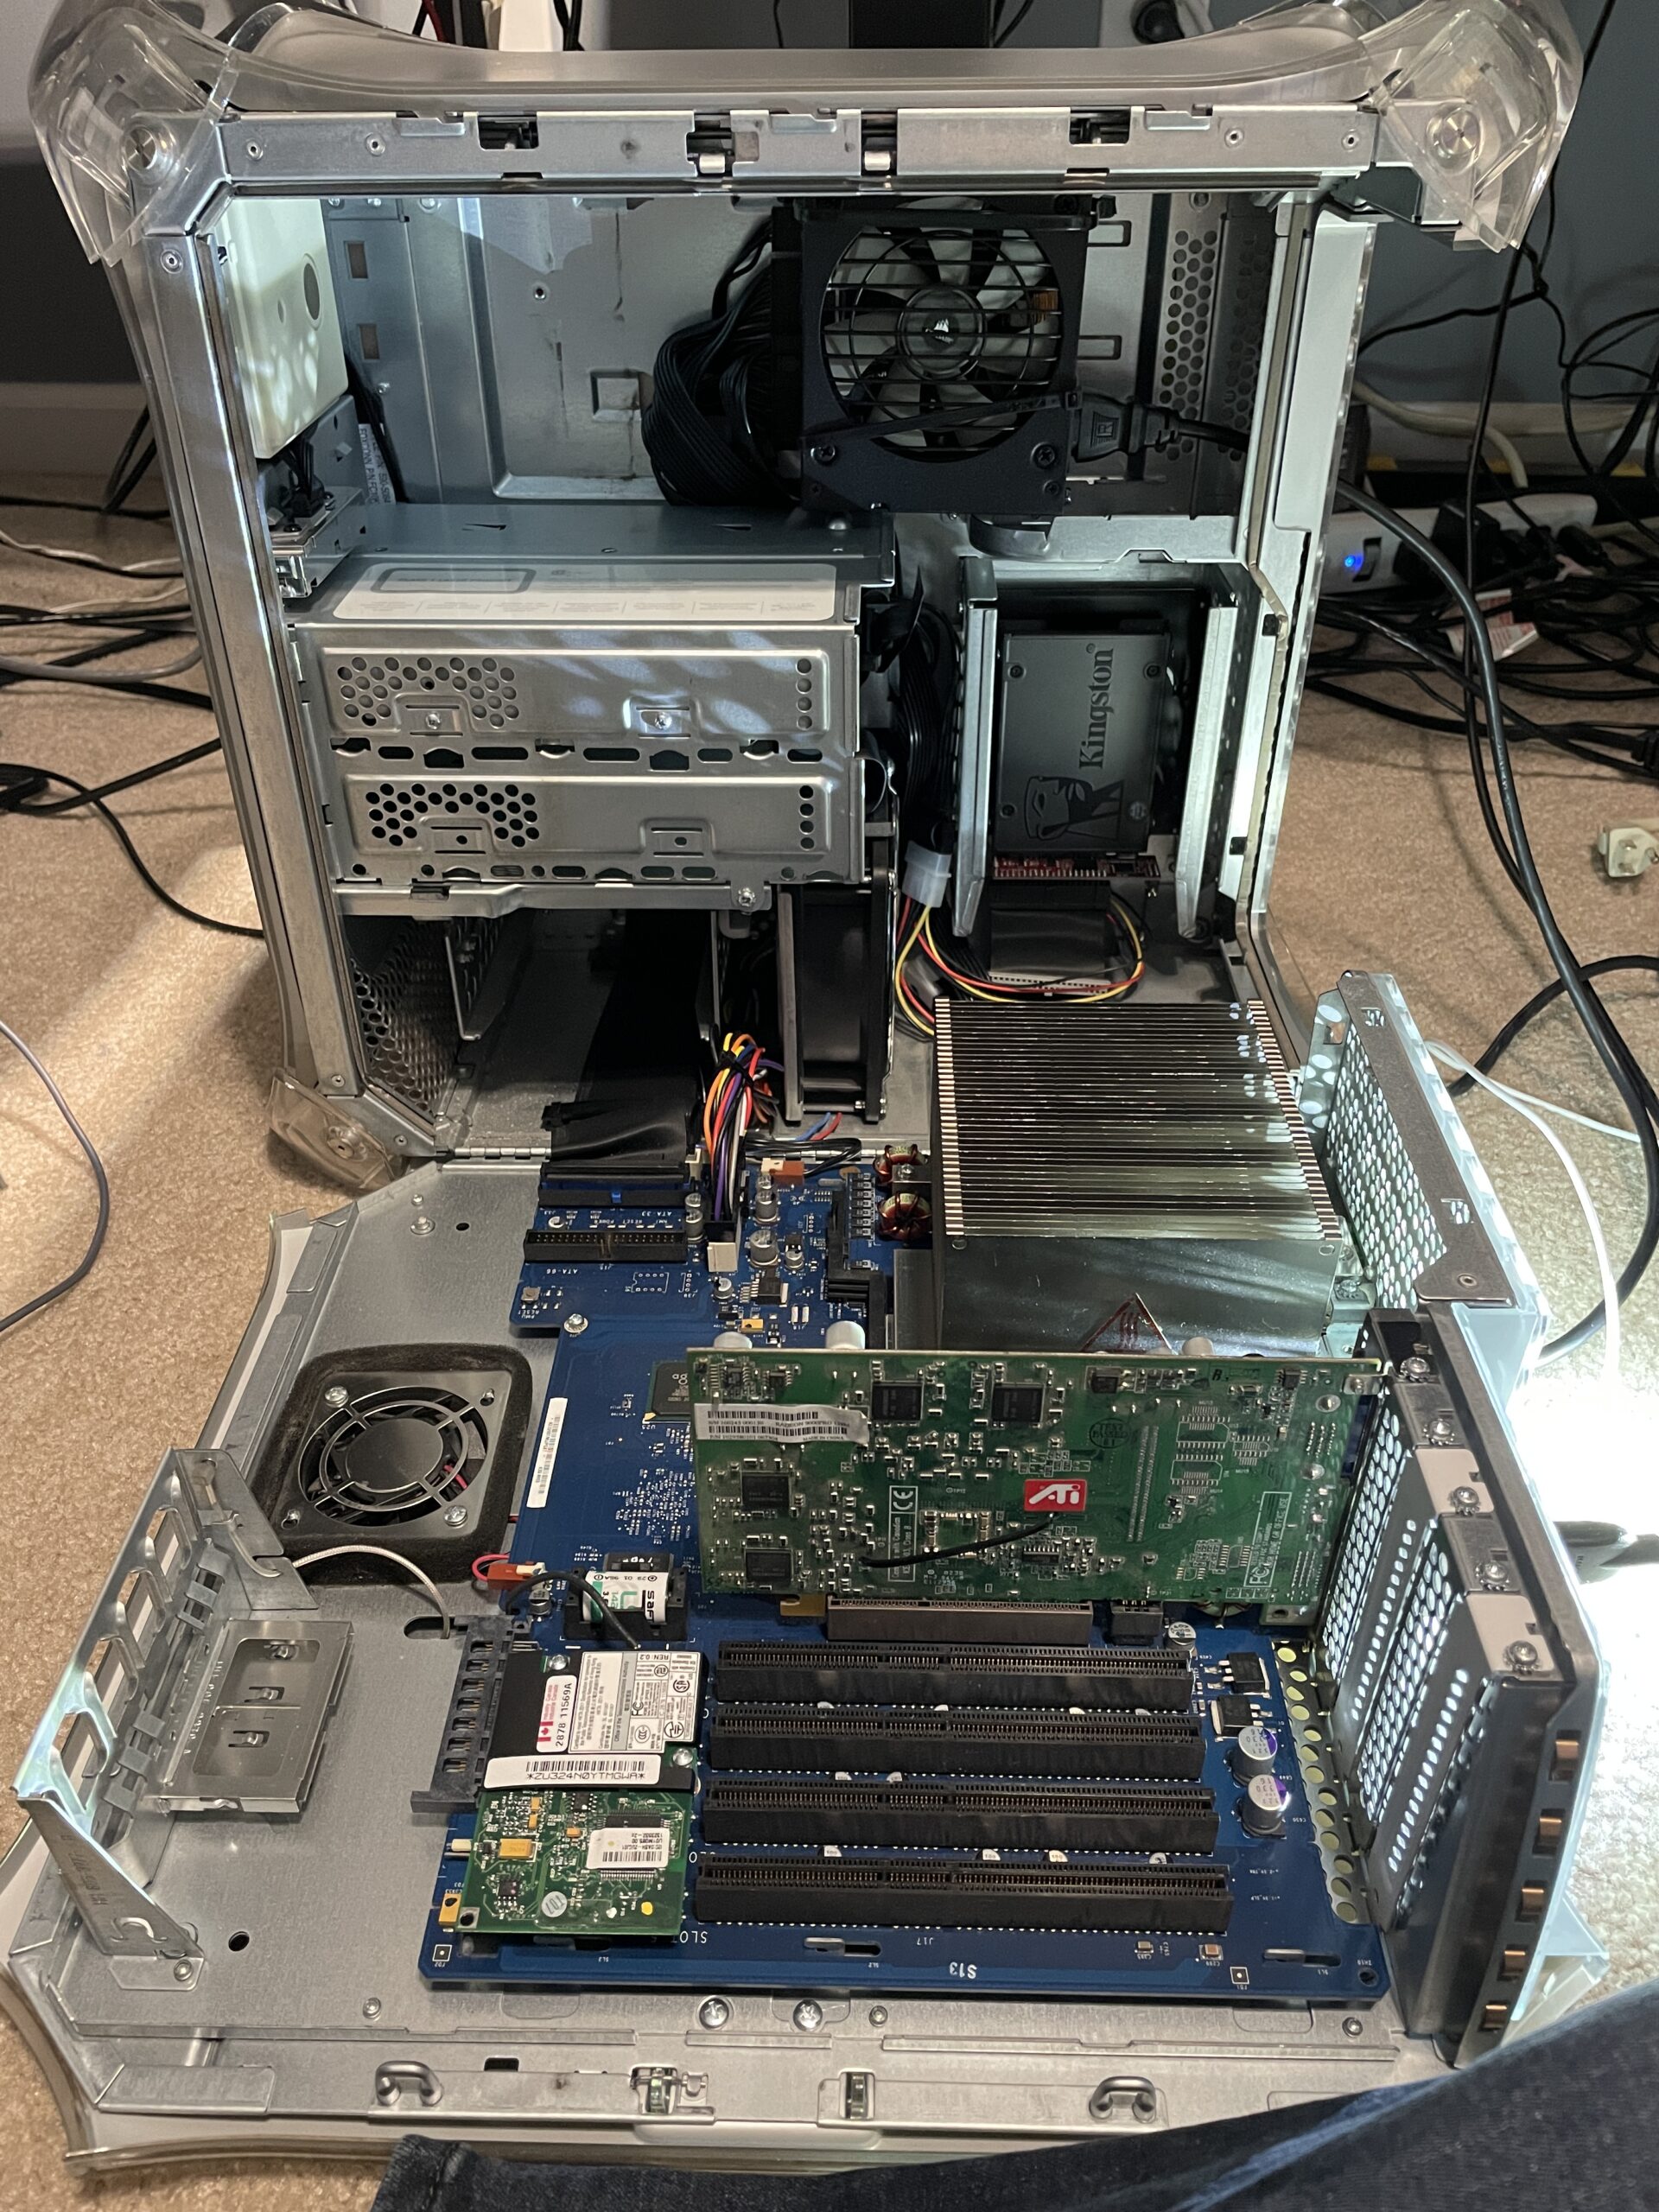
The Power Mac G4 didn’t get the “windtunnel” nickname for nothing – its power supply is quite loud. Thankfully with the help of an adapter, a standard ATX (or SFX) power supply can replace it. I love putting “modern” power supplies into my retro machines to get less noise and clean power.
I went with a Corsair SF600 from my previously built Mini-ITX machine and it’s worked really well due to its small form factor. Although it’s rigged in place with two wire ties it’s not going anywhere. 😀
Resources:
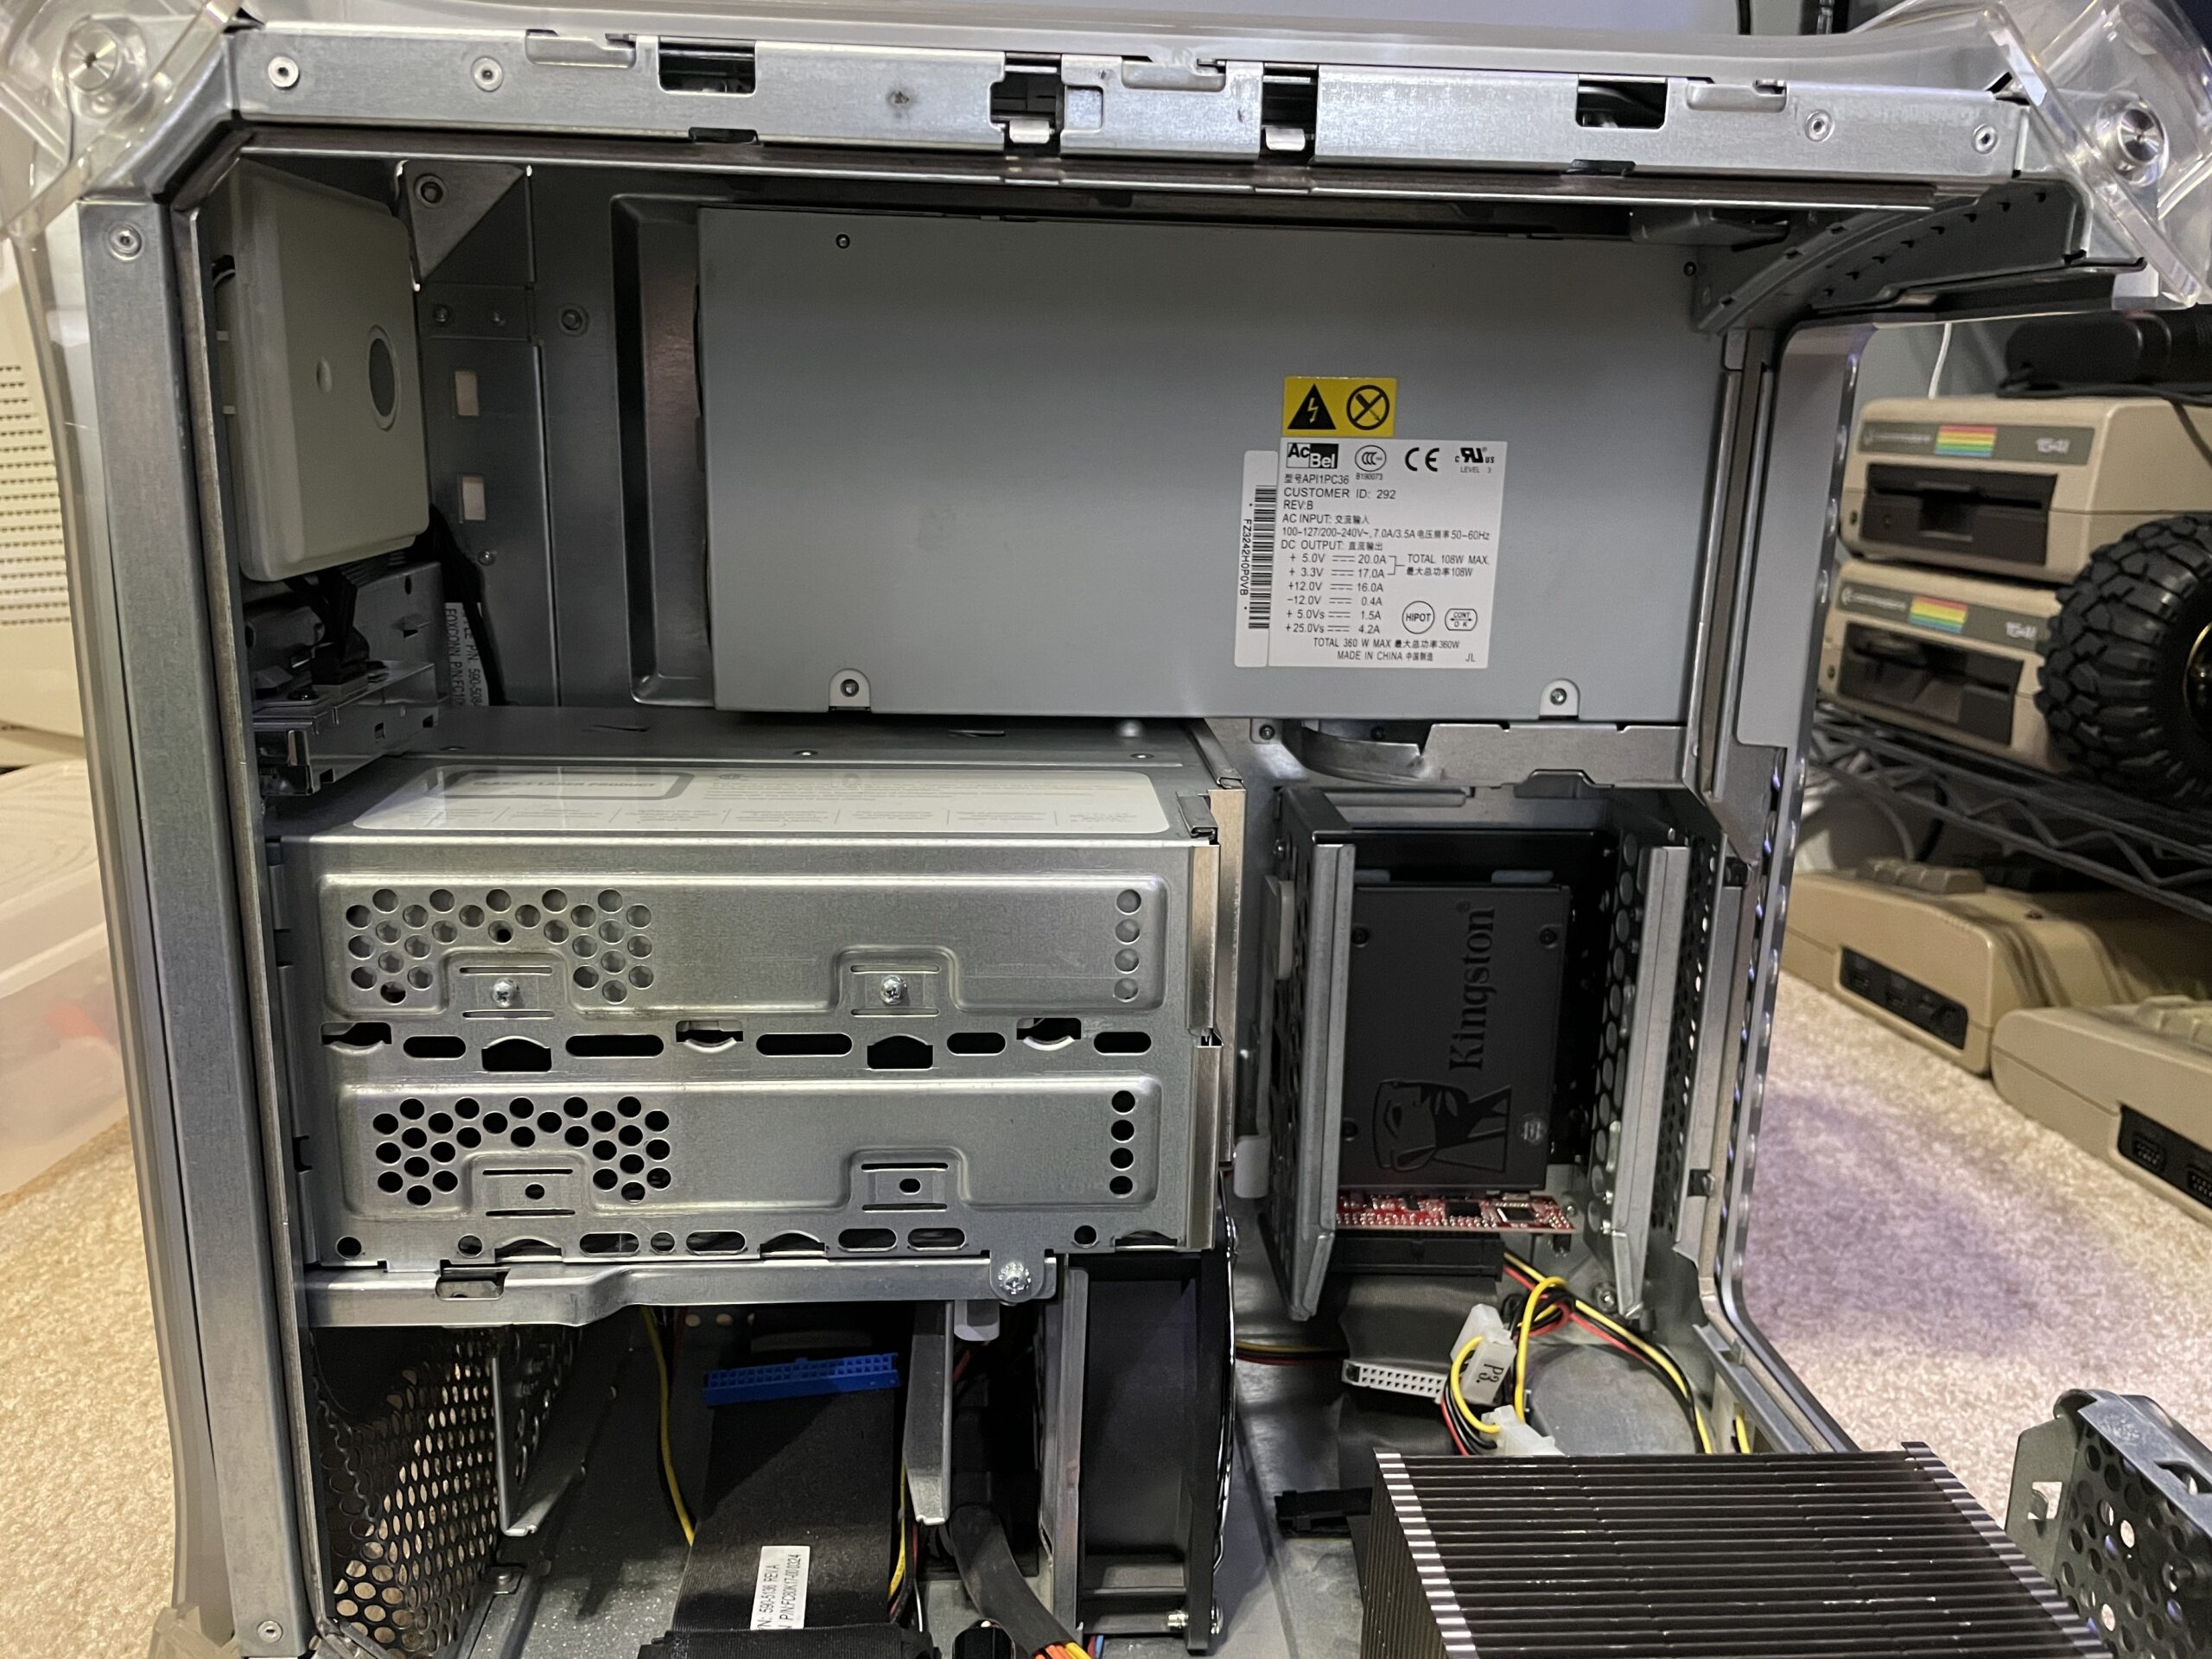
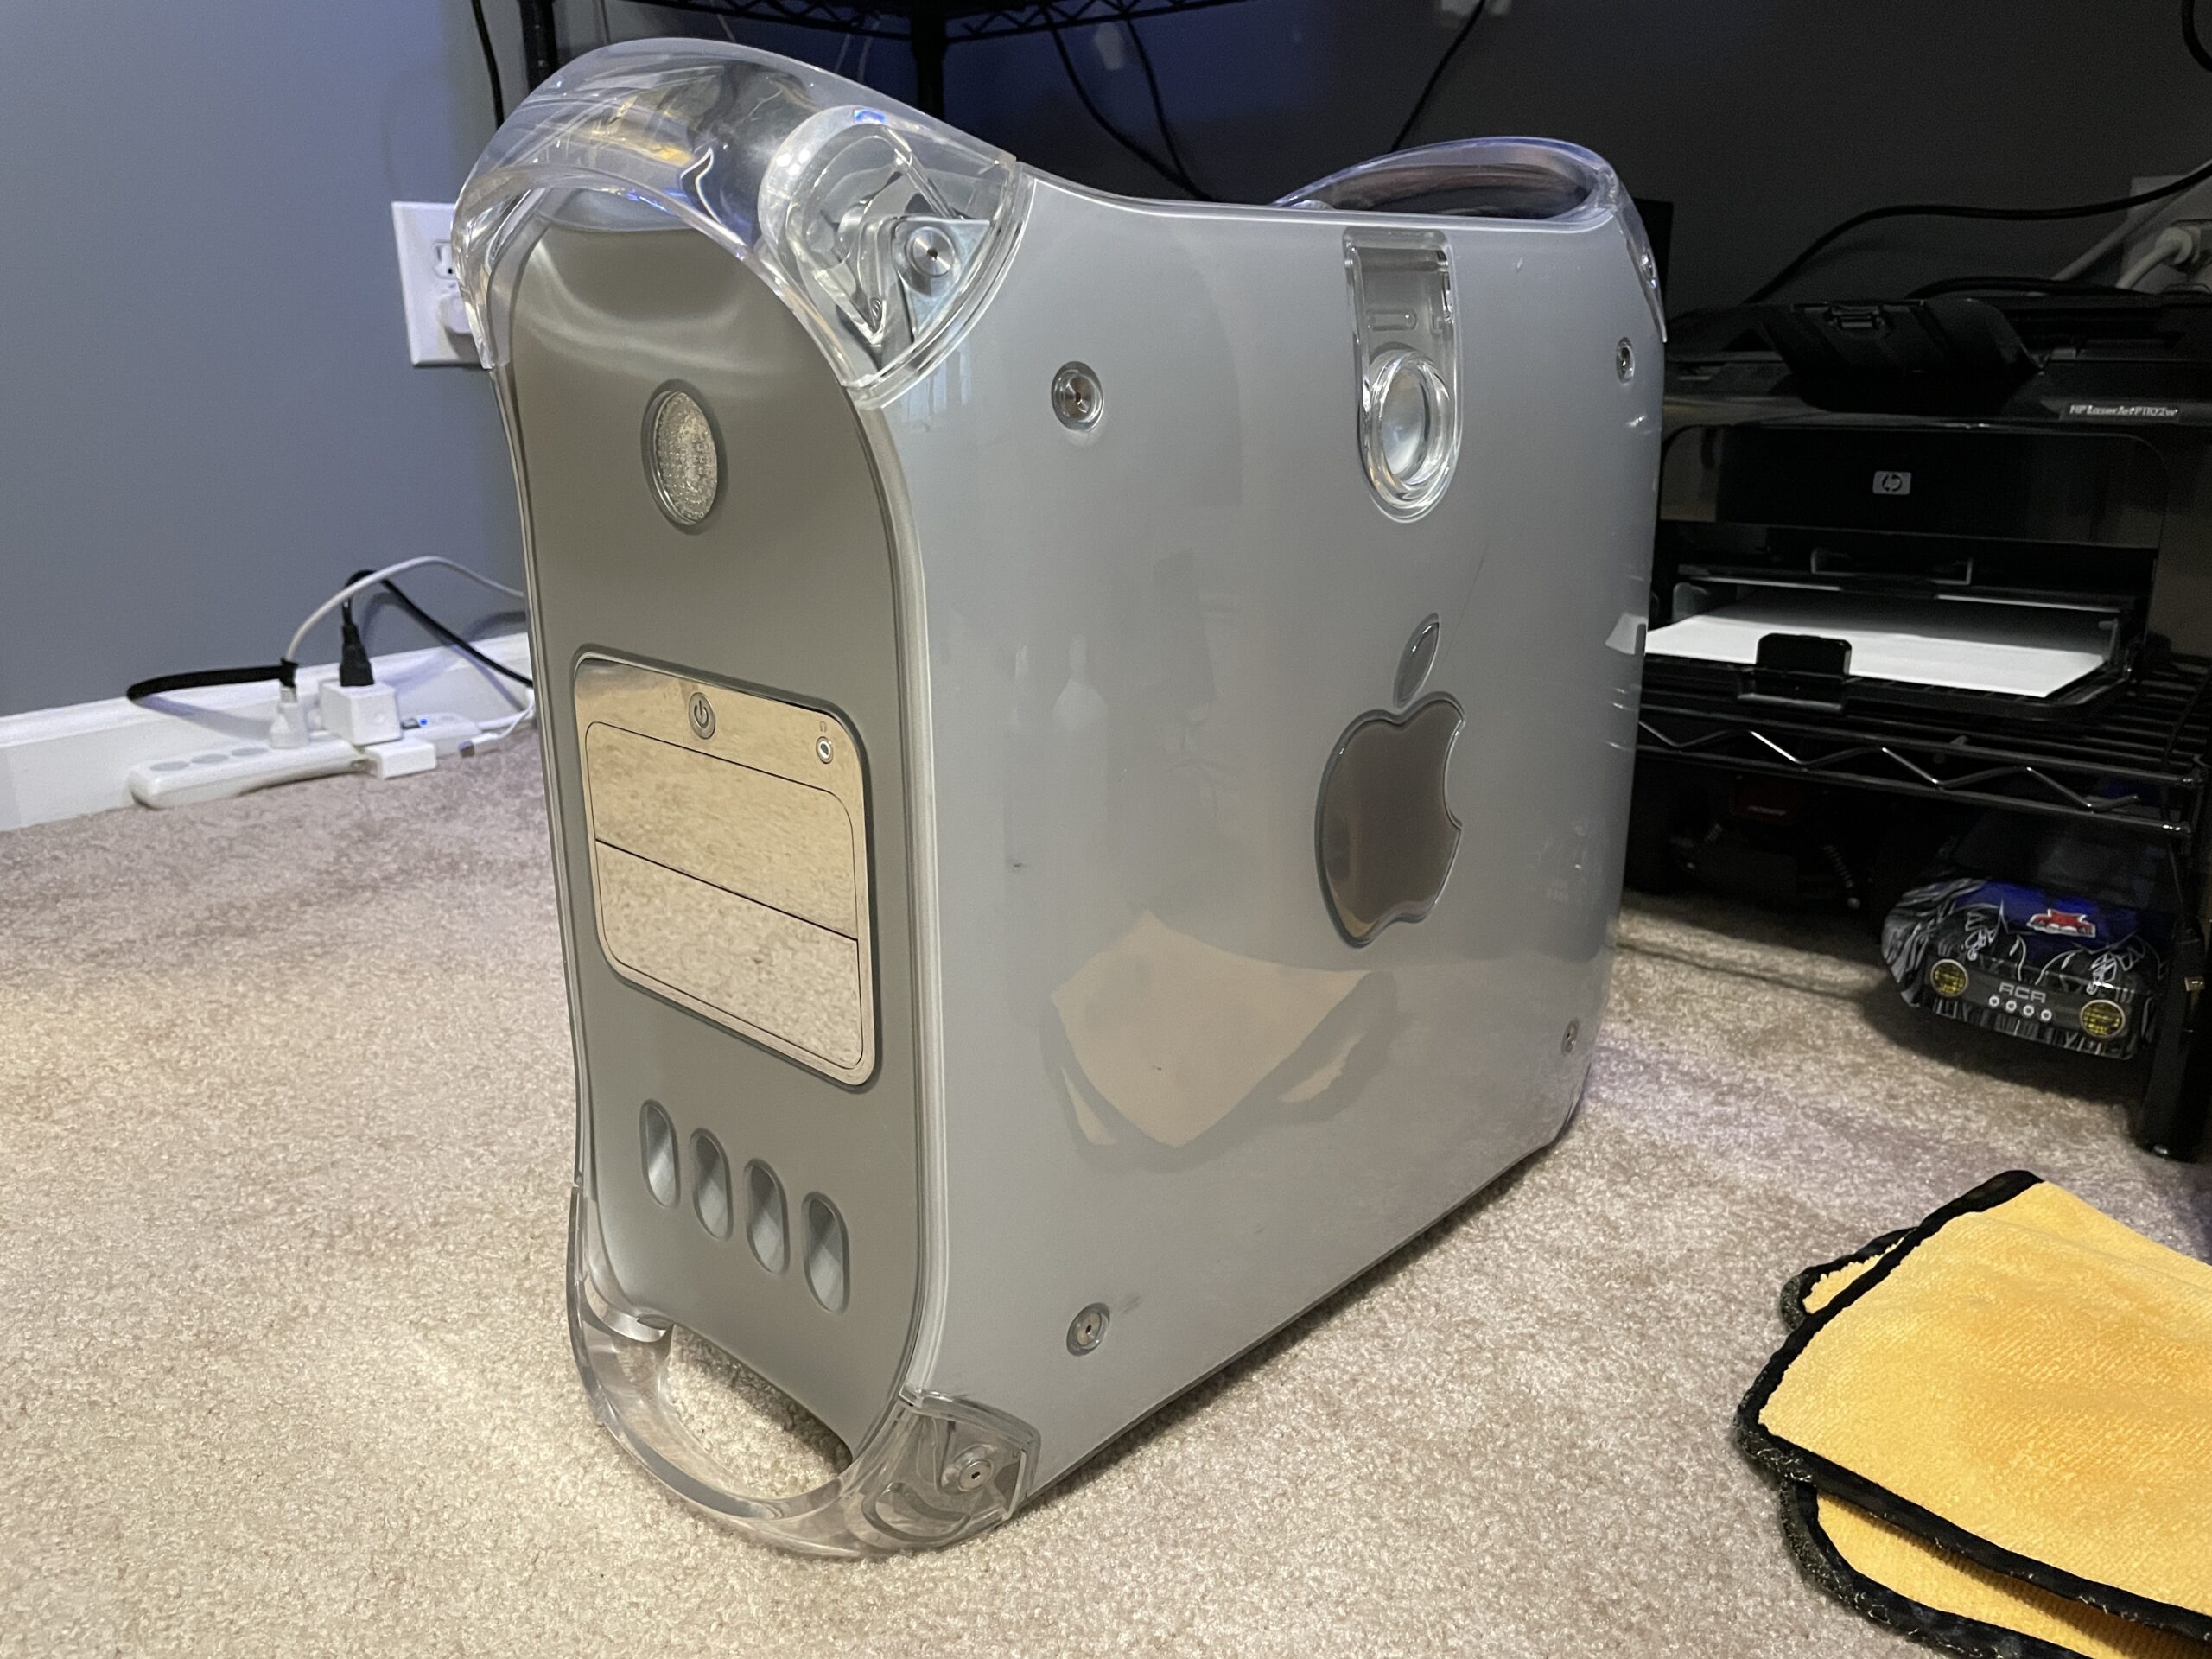
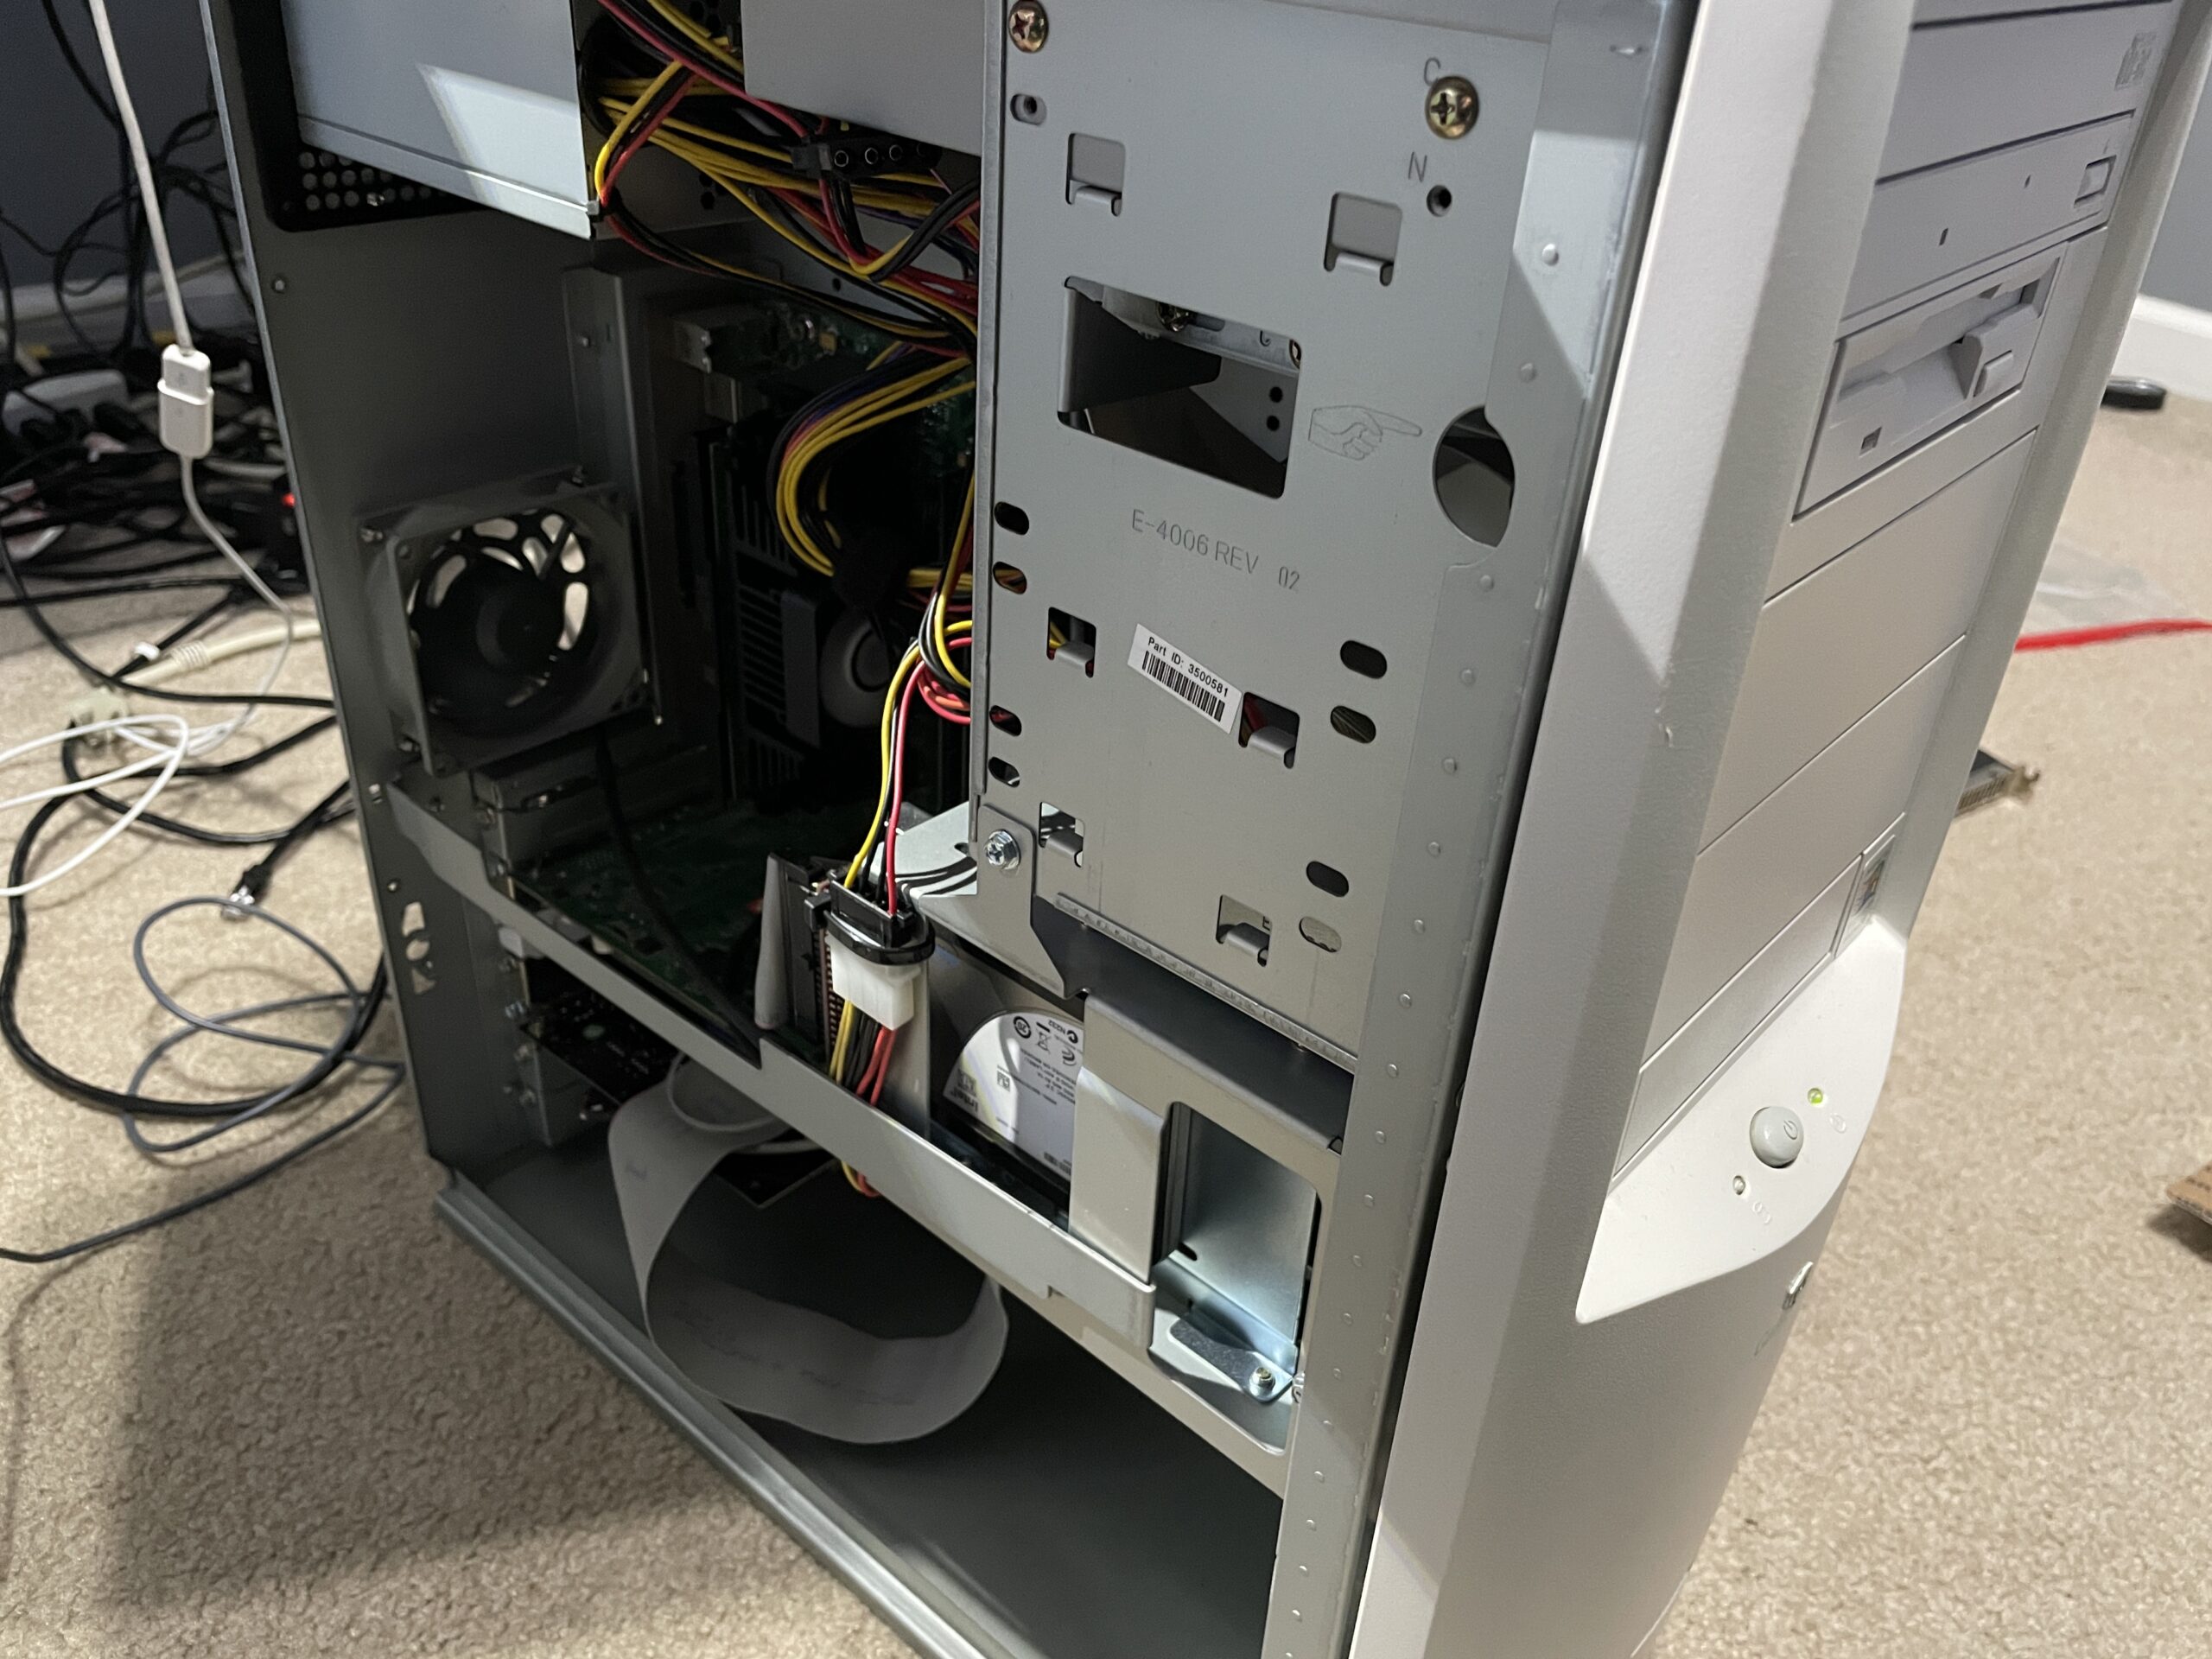
I’ve acquired yet another retro machine – this one a Power Mac G4 MDD. There are a few reasons I find it appealing:
Surprisingly it started on the first boot attempt! The PRAM battery was dead, which was expected, but other than that it seemed perfect… for a while. The next day when I tried to boot it I saw only a black screen, so the troubleshooting started.
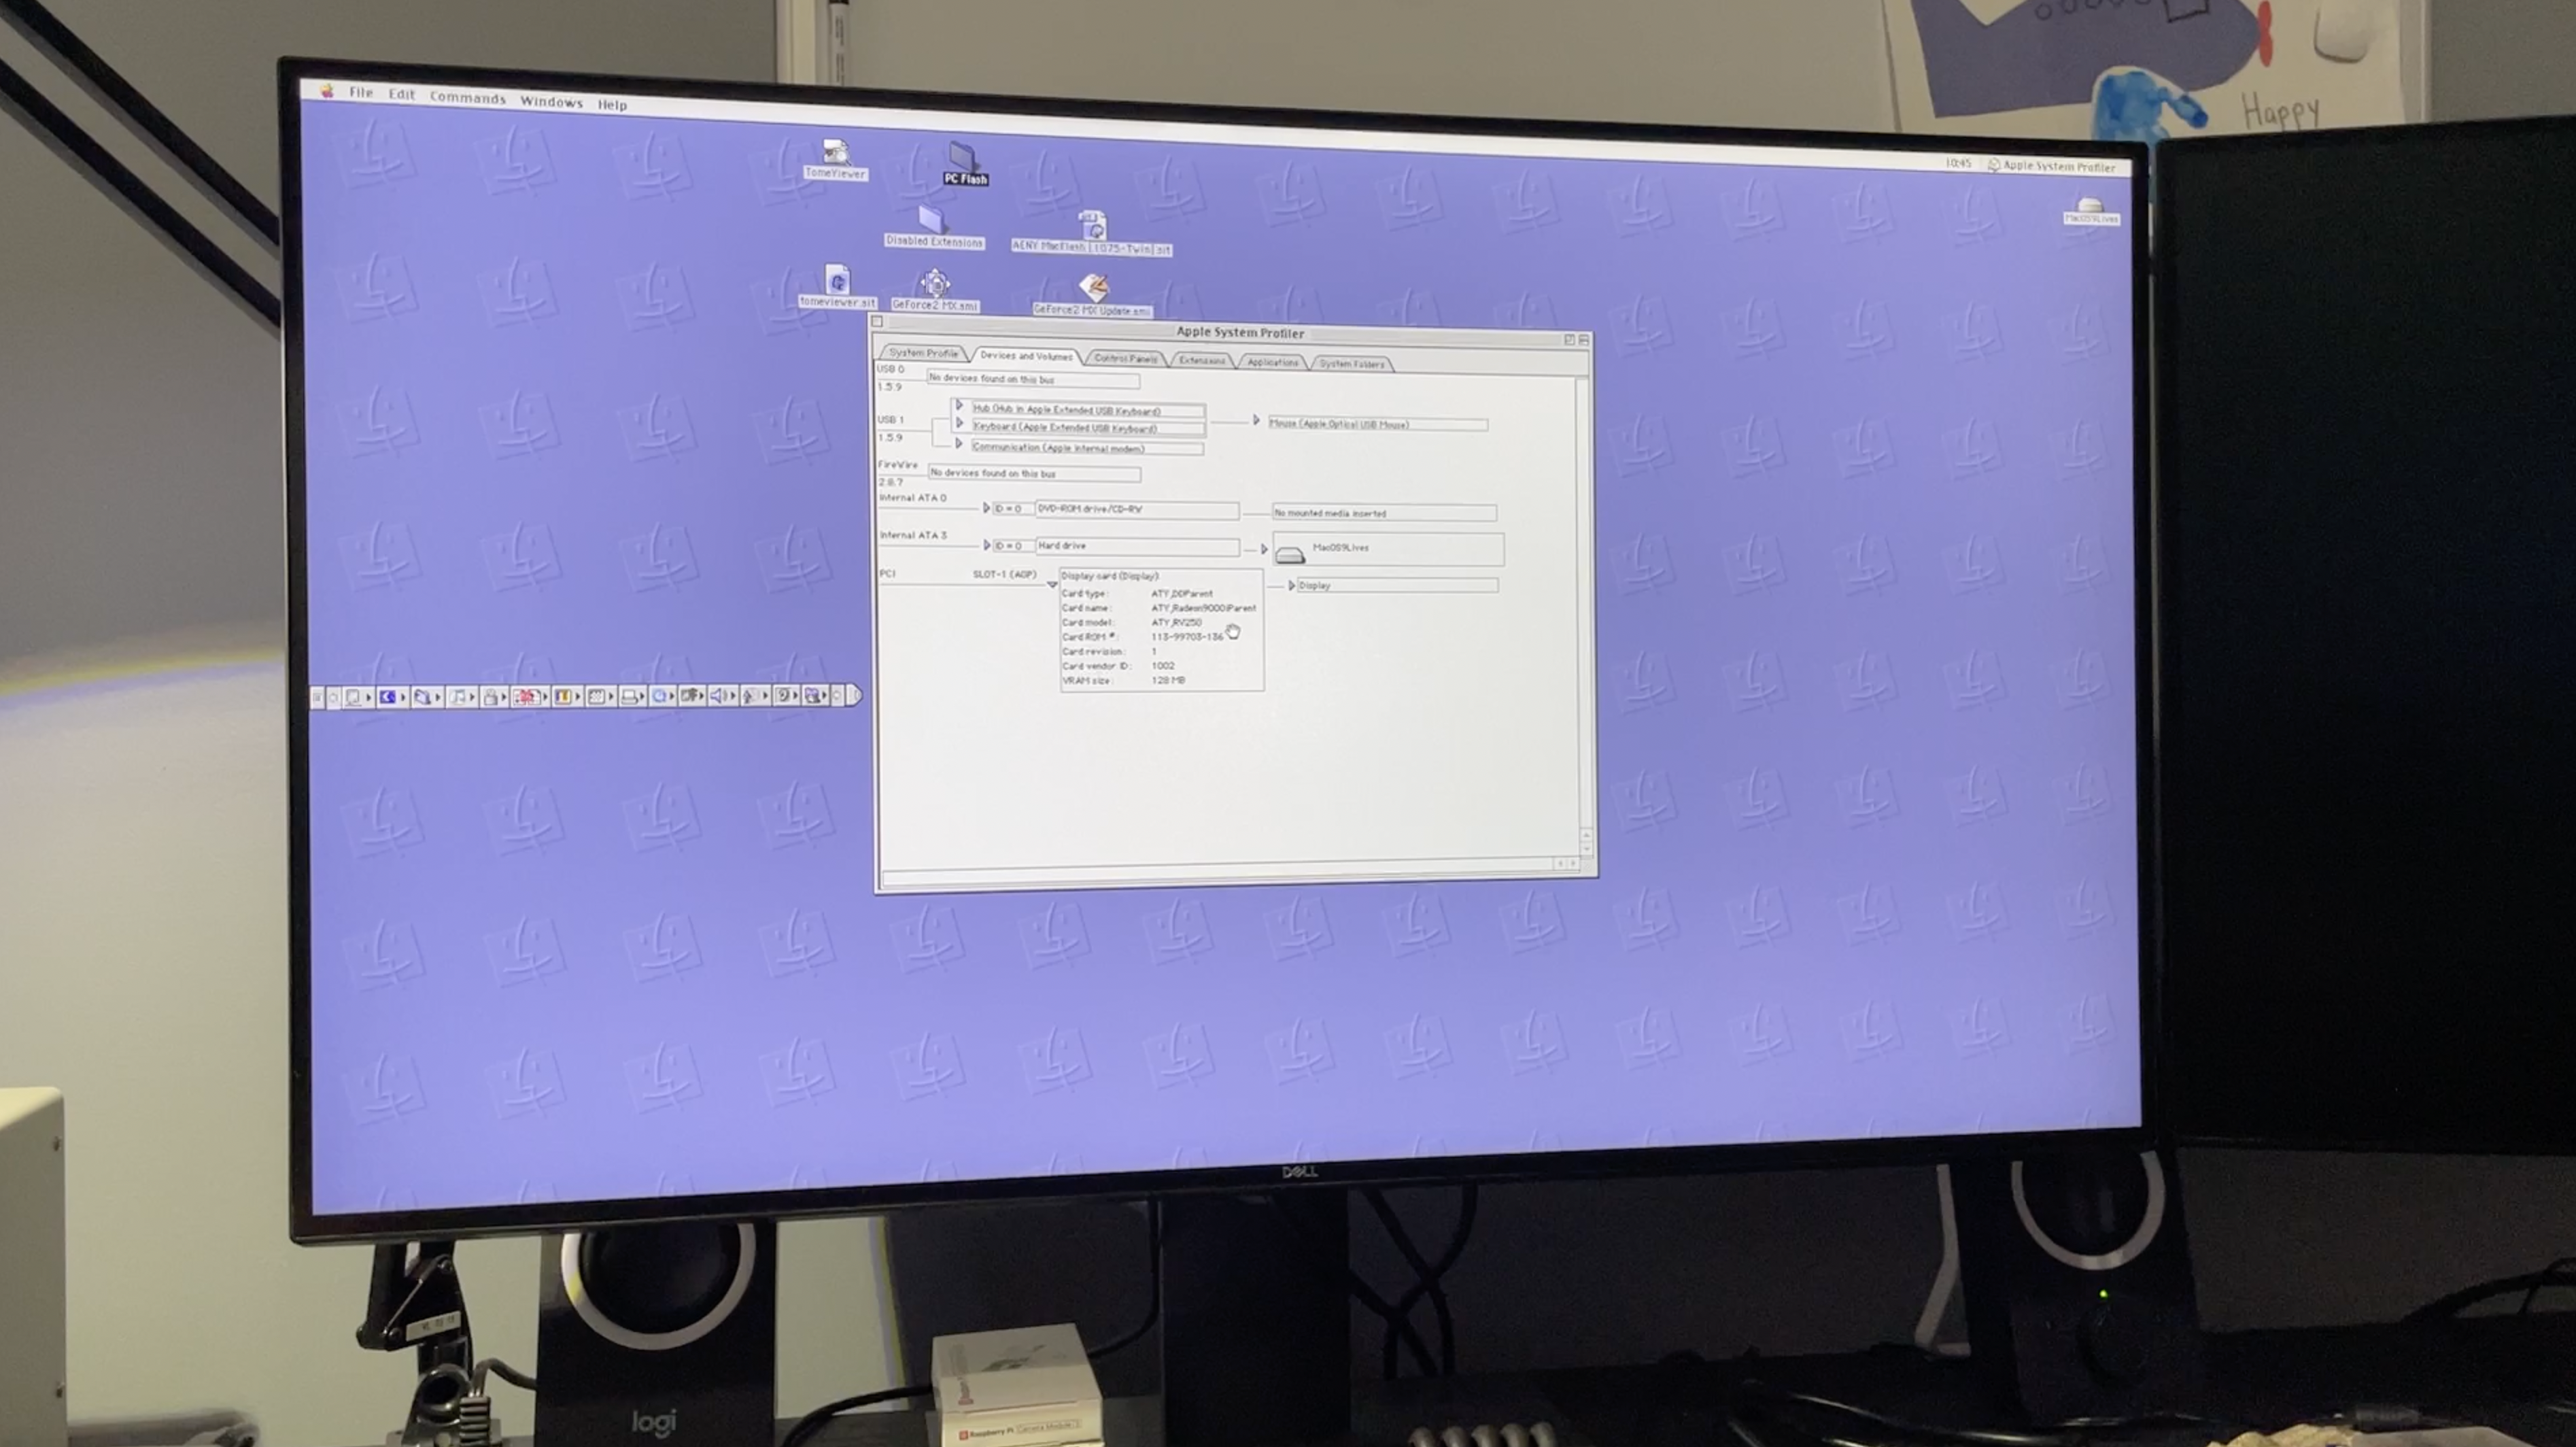
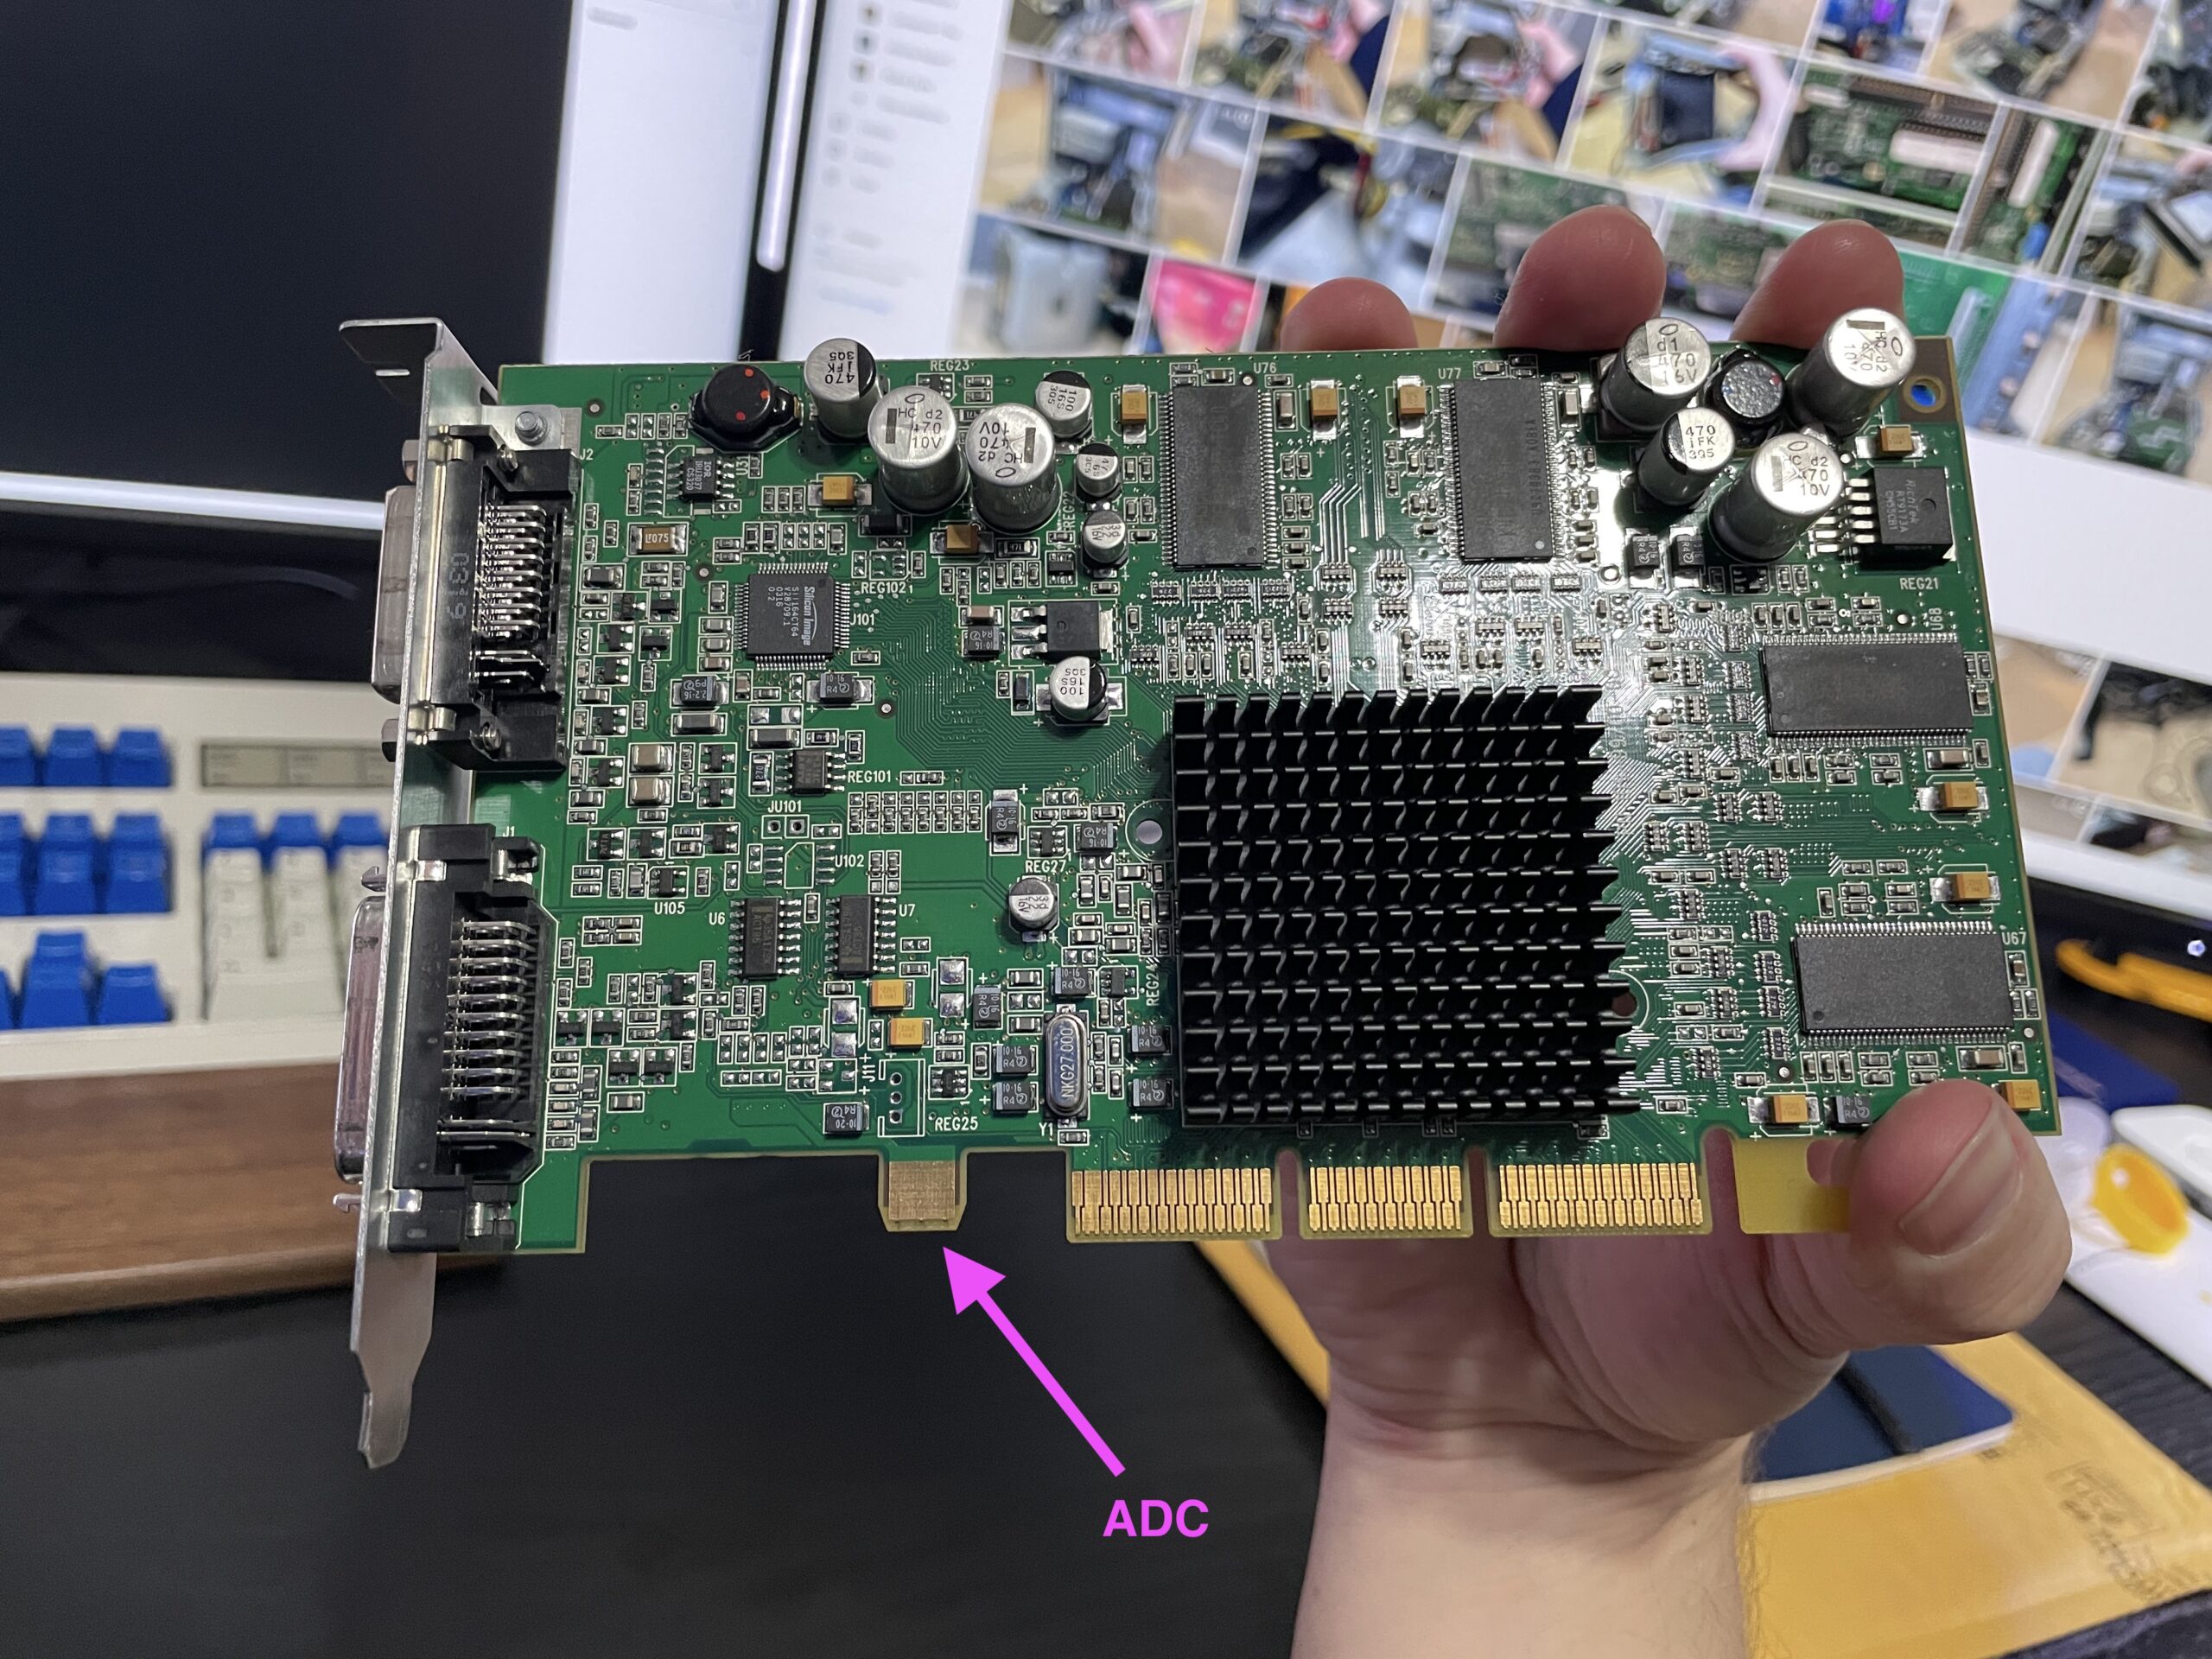
To keep things brief it all came down to two components in my case (literally) – either the power supply or the video card, which is an ATI Radeon 9000 Pro Mac Edition 64MB.
After trying some spare PC AGP cards I was able to boot consistently with a PNY GeForce 2, telling me the power supply is probably OK. I could’ve stopped here but the graphics performance was terrible with the GeForce 2 and I never got hardware acceleration to work.
I attempted to flash a new ROM to the card but kept getting rejected, so I decided to go in another direction.
There are a few sites that were extremely helpful in this quest to determine what cards could be used in the Power Mac:
If going with a PC version of a video card some will need to be re-flashed with Mac firmware and some also need pins disabled.
I decided to go with another Radeon 9000 but not a Mac Edition – one for PCs only. This would mean higher availability in the used hardware market, a lower cost, and no work to disable pins. It also meant double the VRAM – 128 MB instead of 64.
I wouldn’t be utilizing the extra ADC power port in the AGP slot nor would the card supply an ADC connector, but for me that’s OK.
When I ordered the card from eBay the description mentioned a failed fan so I needed to address that first.
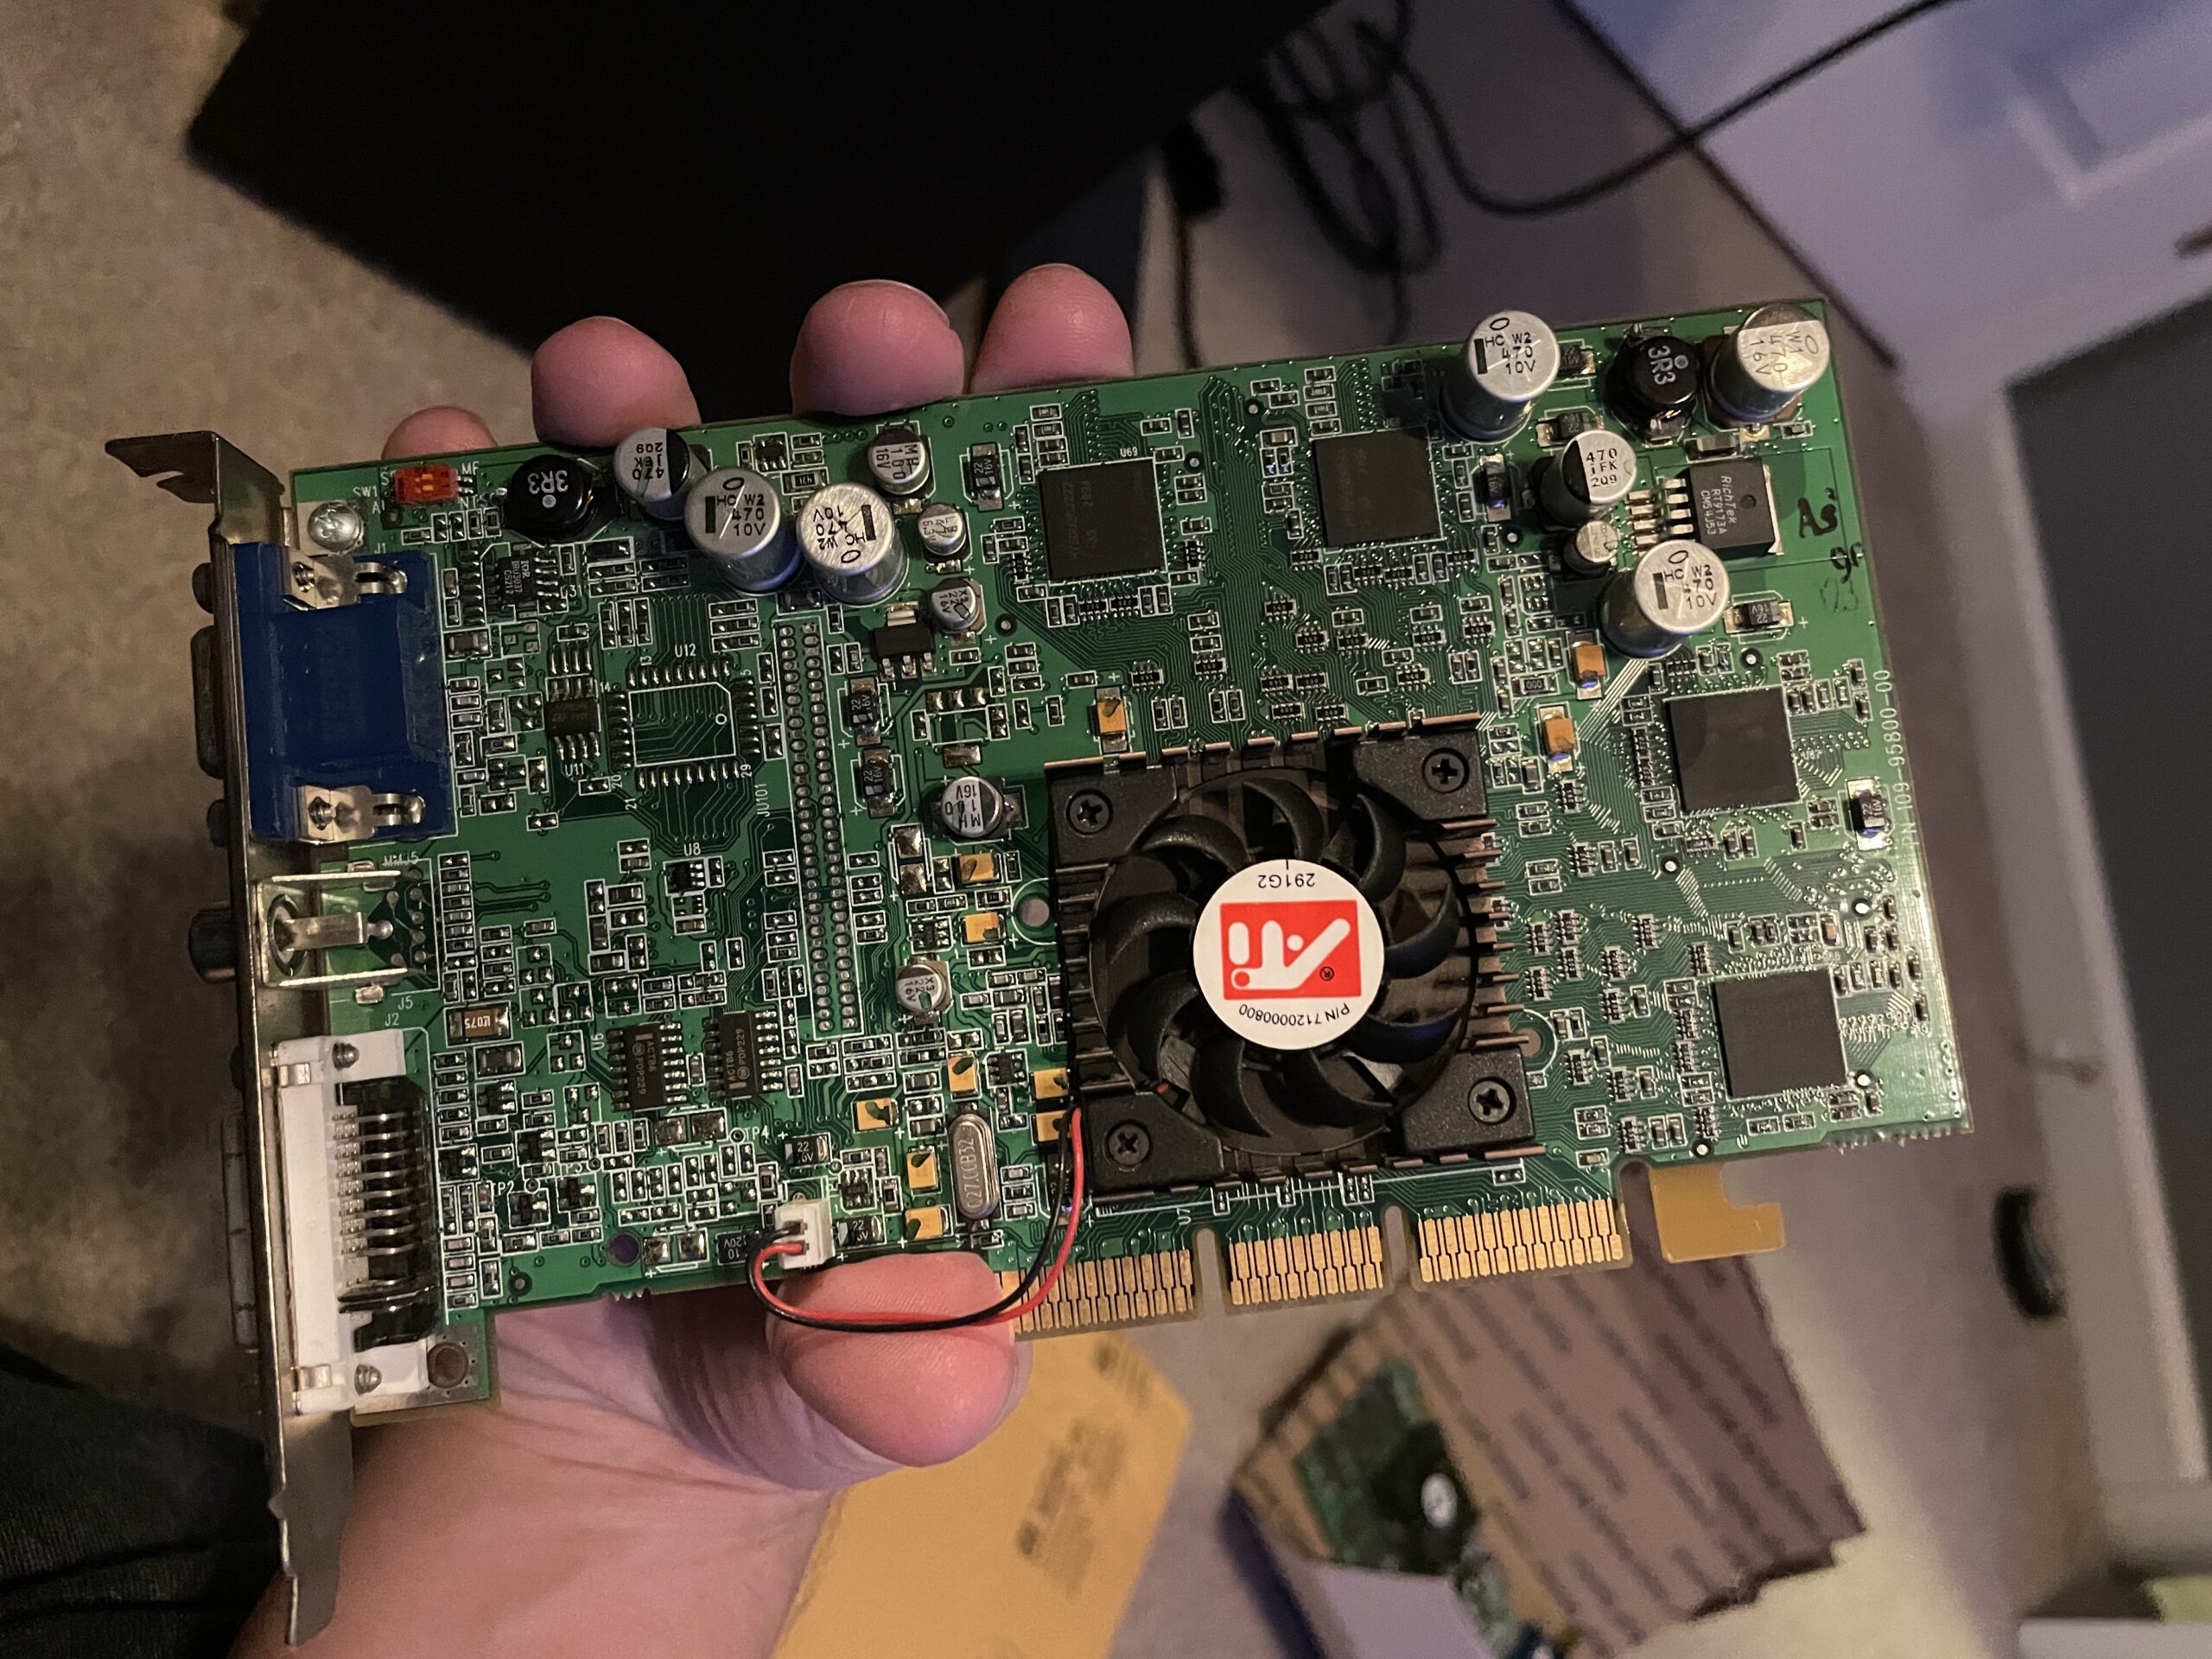
The board’s connector outputs 5V DC and most of my other cards do 12V, but I found a spare fan I’d used for a Raspberry Pi that would work. It’s a bit of a rig at the moment, but a wire tie holds the fan tightly to the original heat sink.
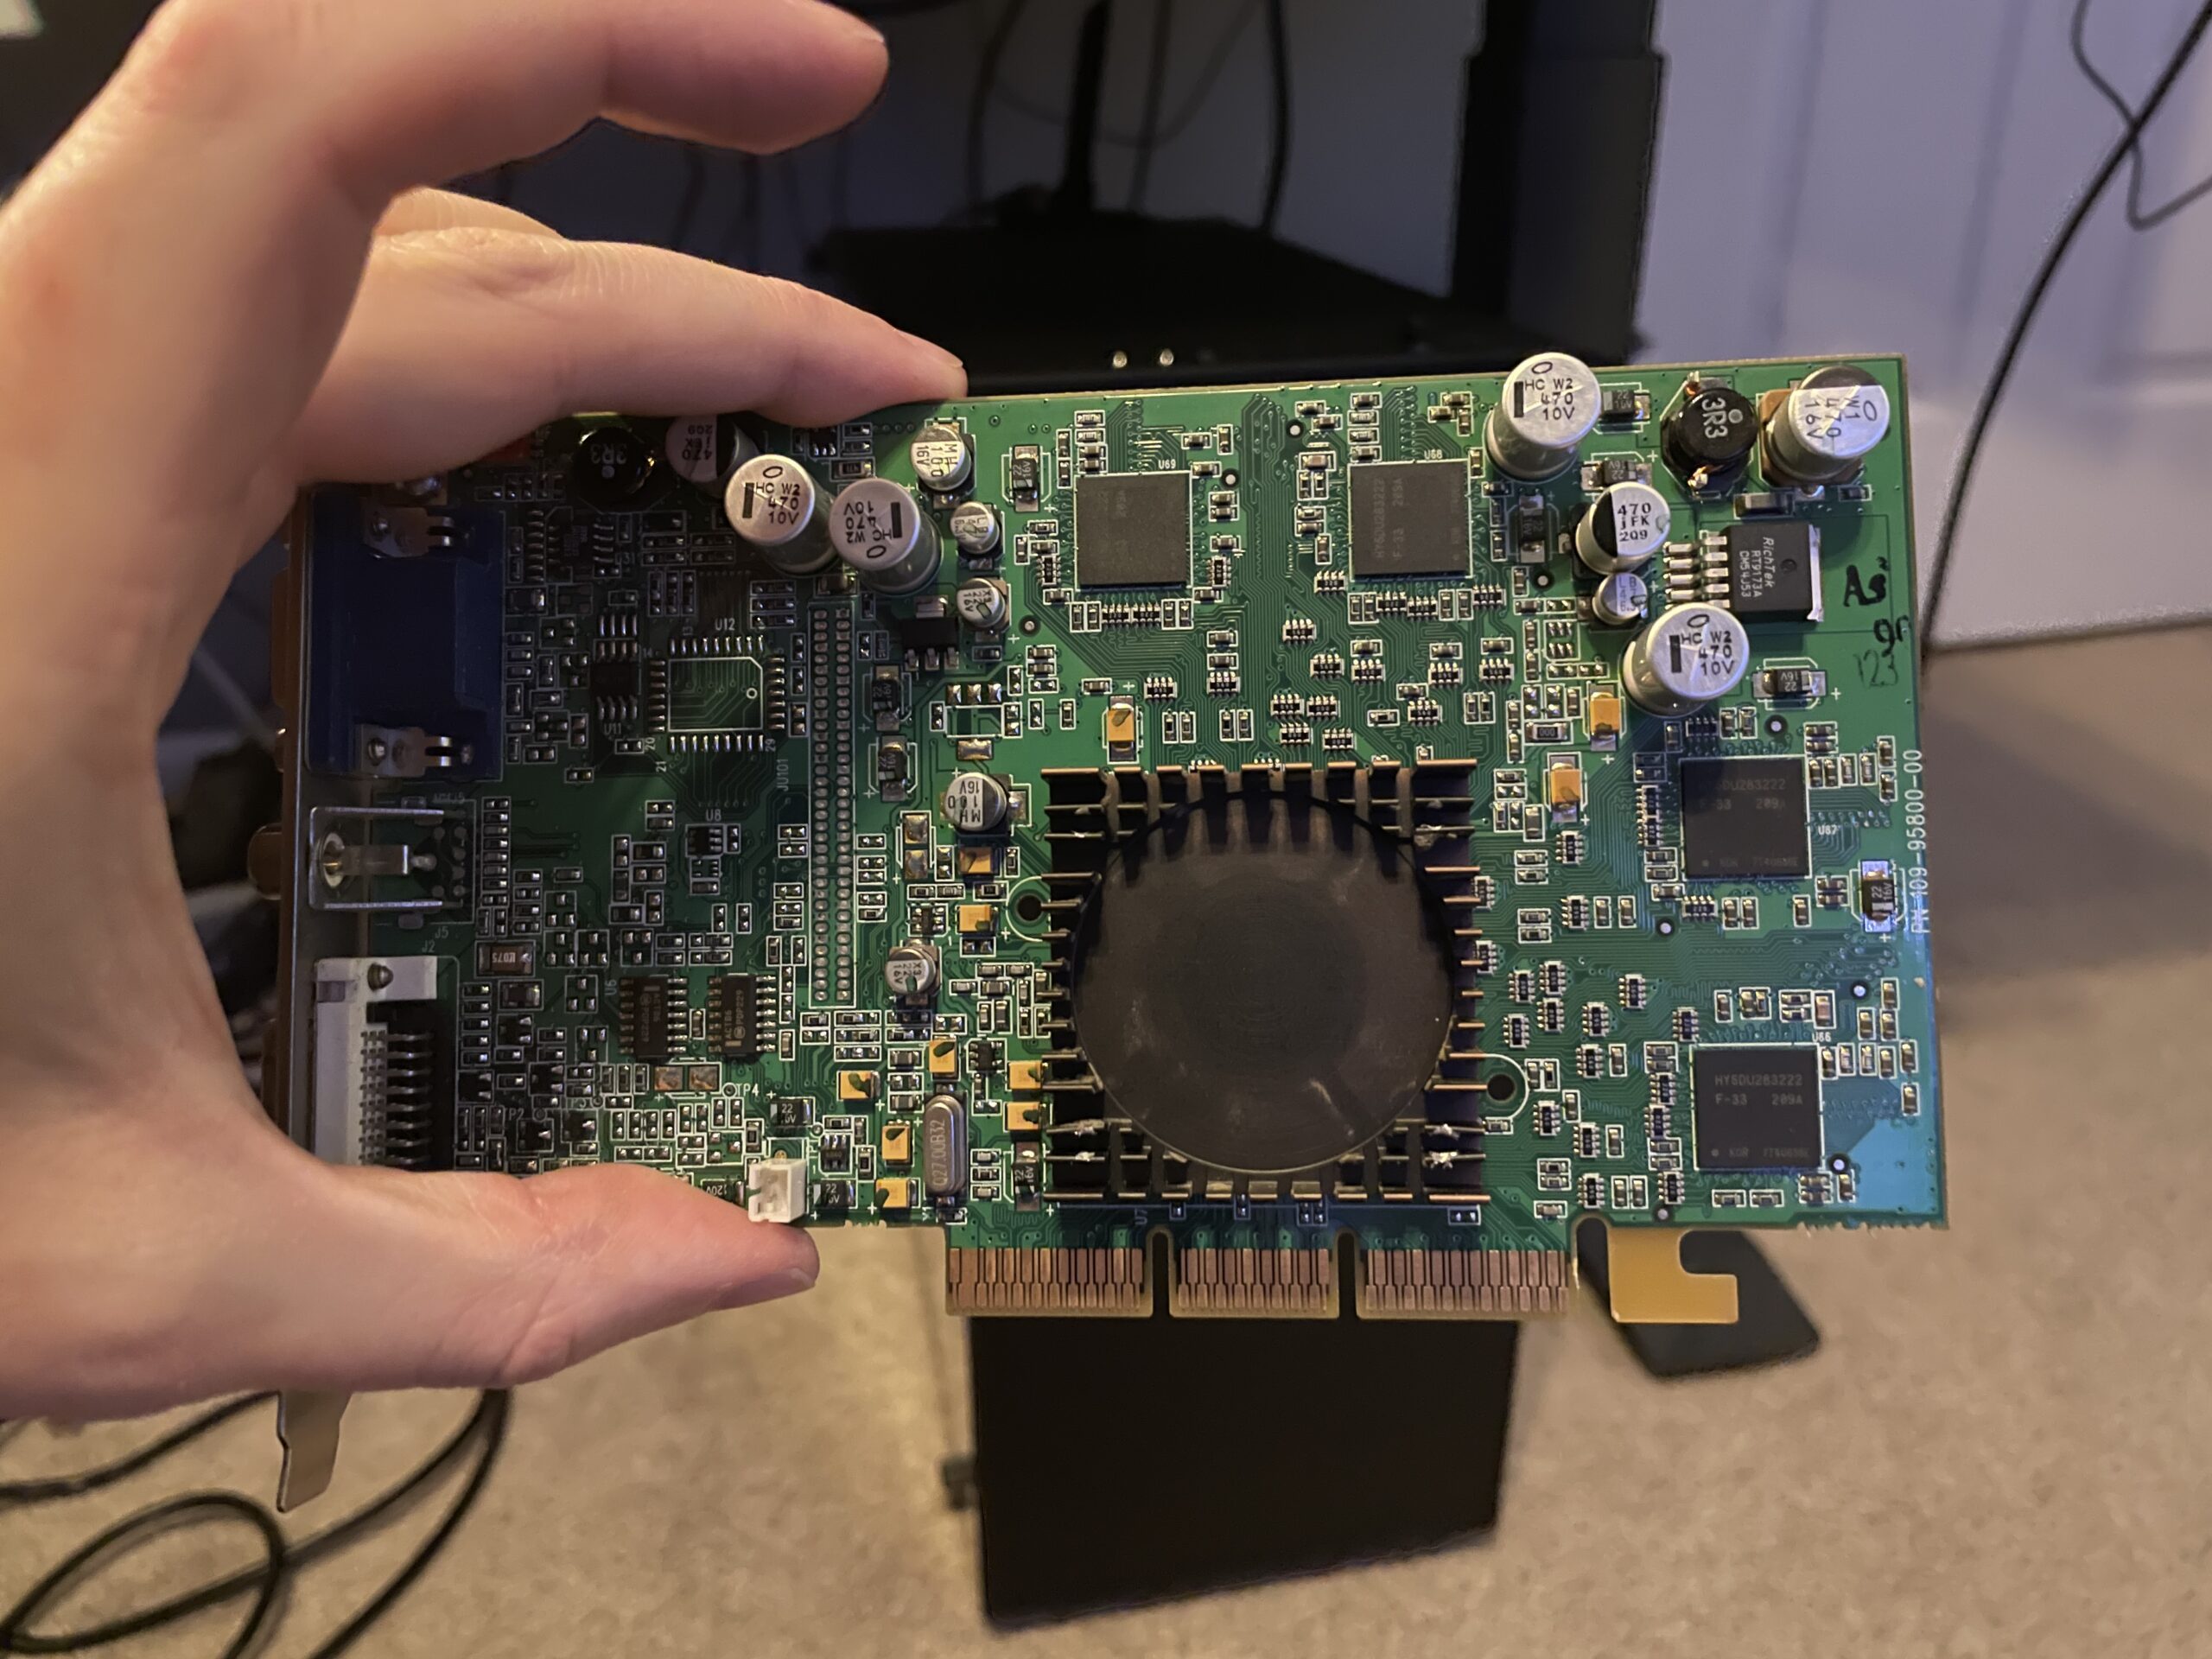
Once I was sure the new fan setup was working I popped the card into the Mac just to see what would happen. Turns out, nothing. Just a black screen. I don’t think Mac OS 9 even booted.
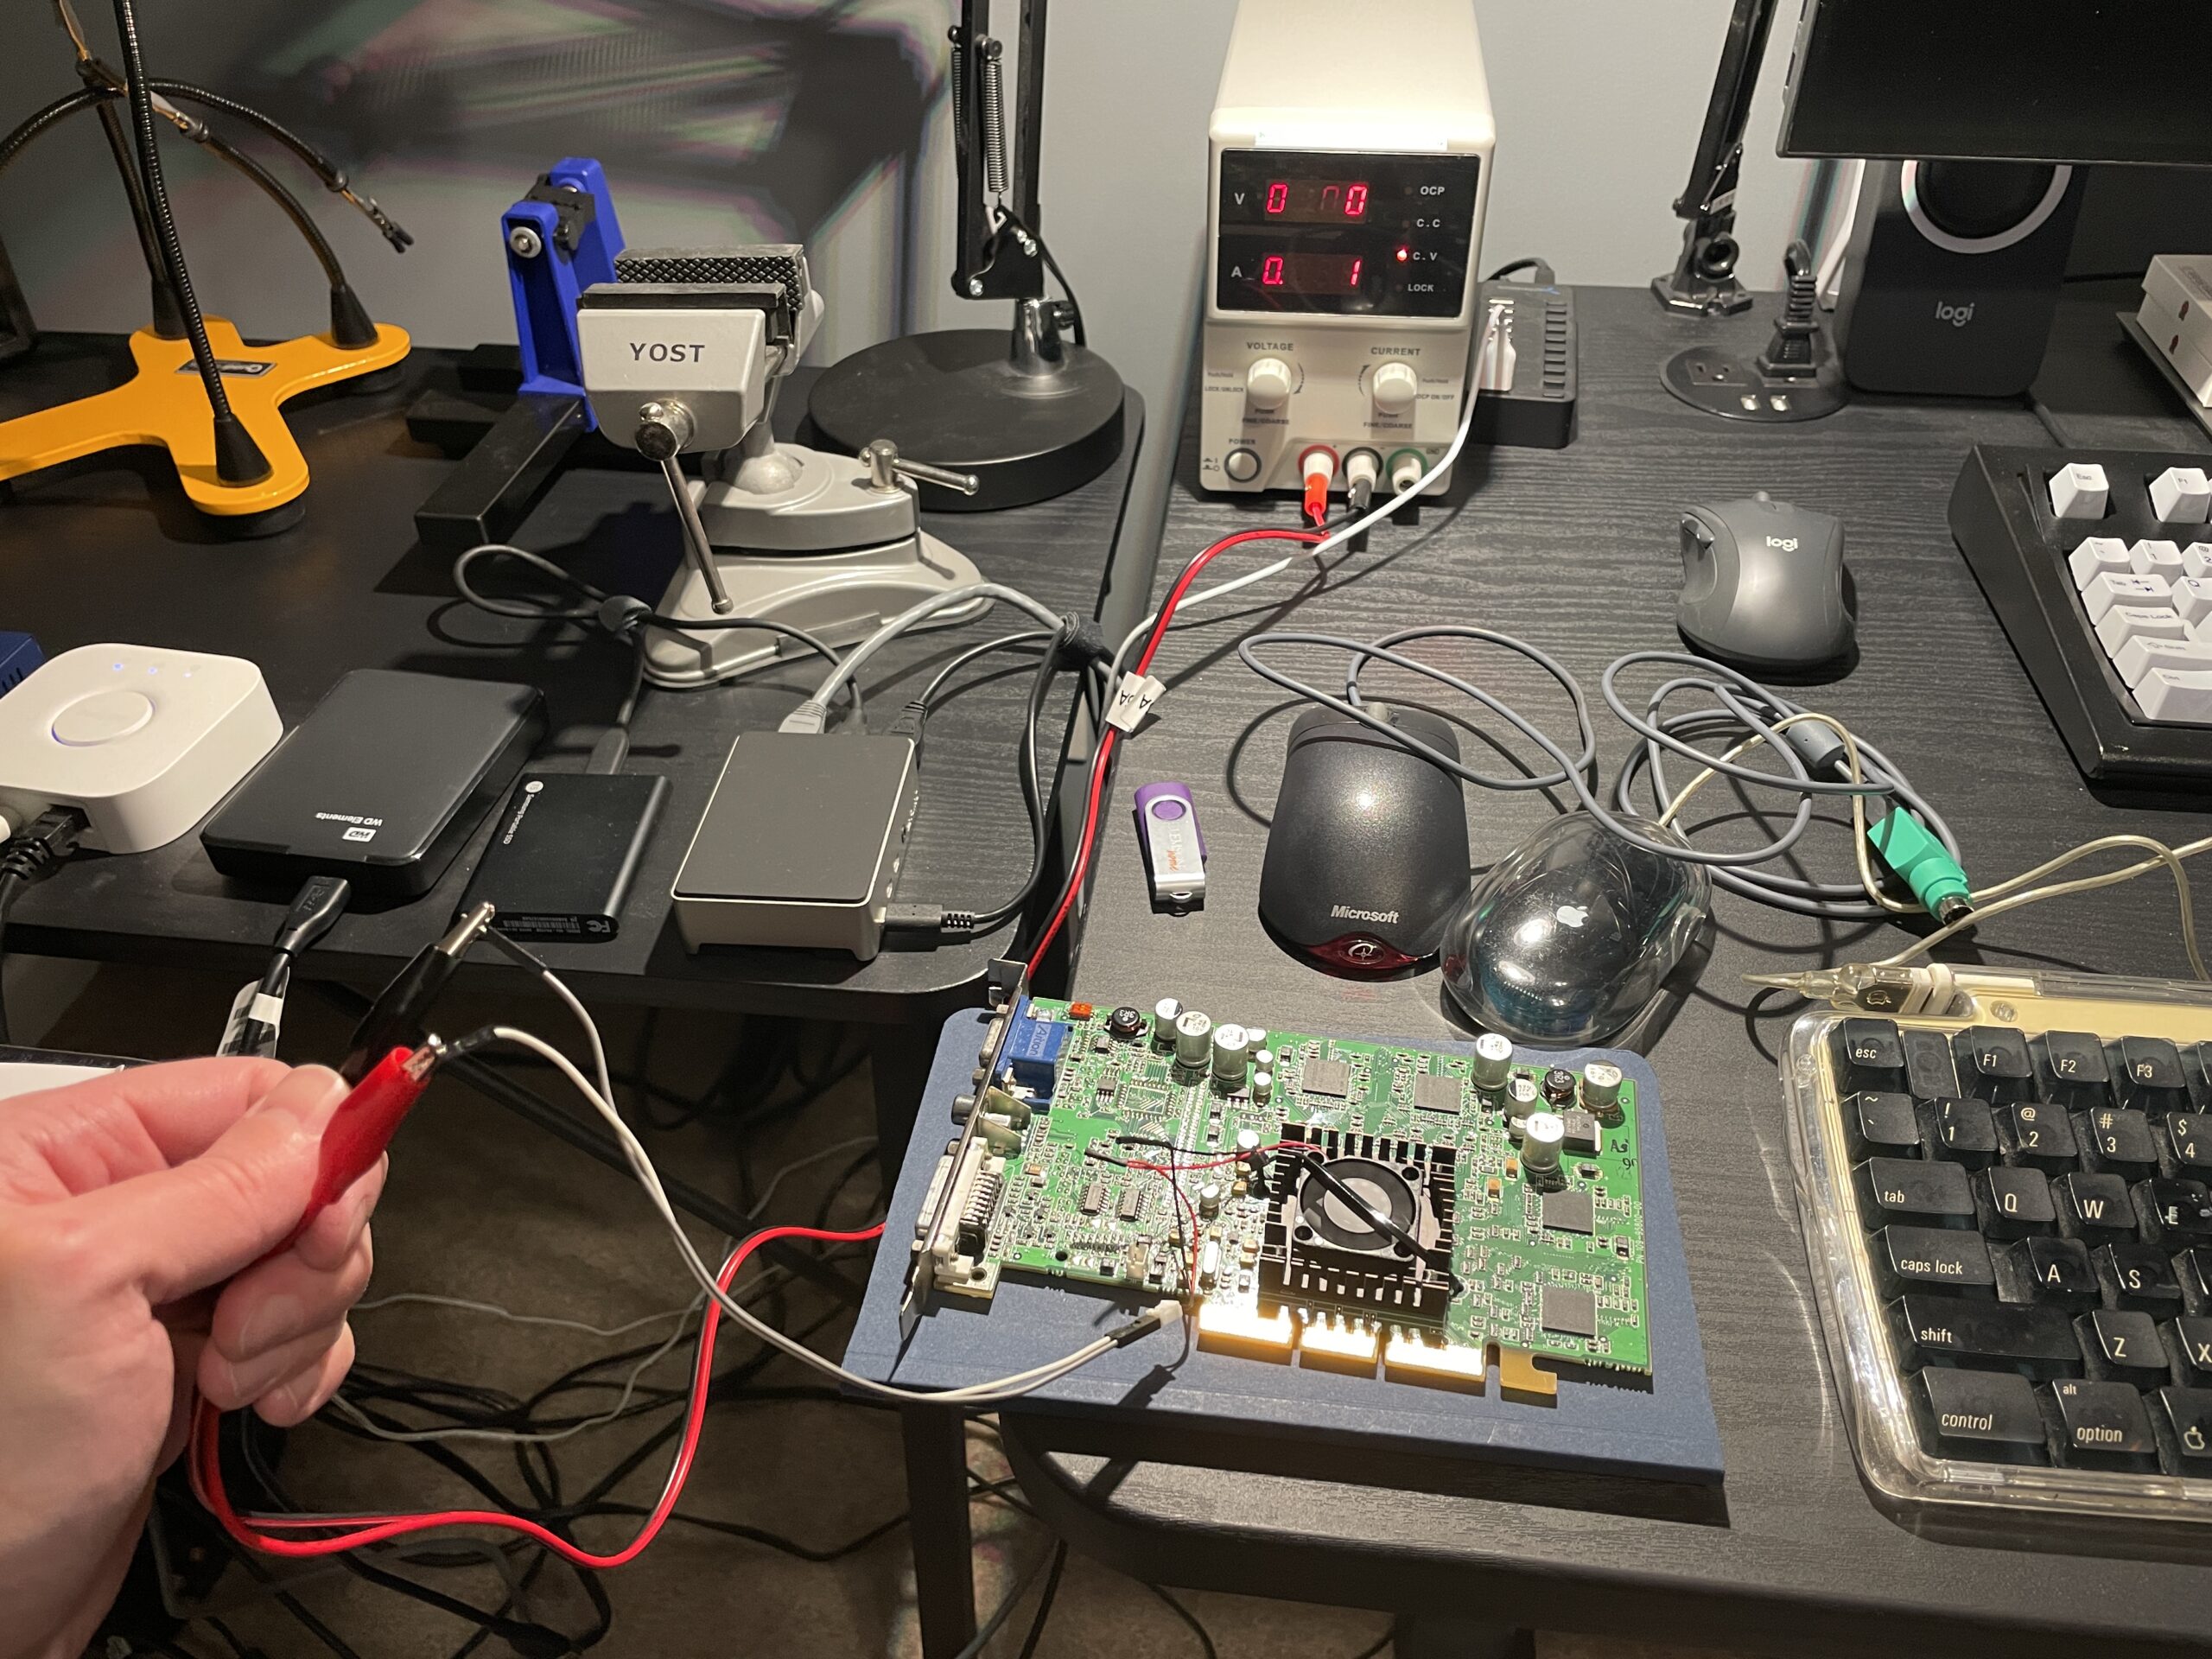
I pulled the card out of the Mac and inserted it into one of my trusty Gateway Slot-1 machines with an AGP port to flash it with the Mac firmware.
The PC needed two files:
After transferring the files I booted into DOS and followed this sequence in the directory where I’d stored the files:
atiflash -i to make sure the adapter was detected and learn the adapter ID (0 in my case).atiflash -s 0 backup.rom to make a backup of the PC ROM.atiflash -f -p 0 [mac_rom_filename.rom] to force-write the Mac ROM firmware.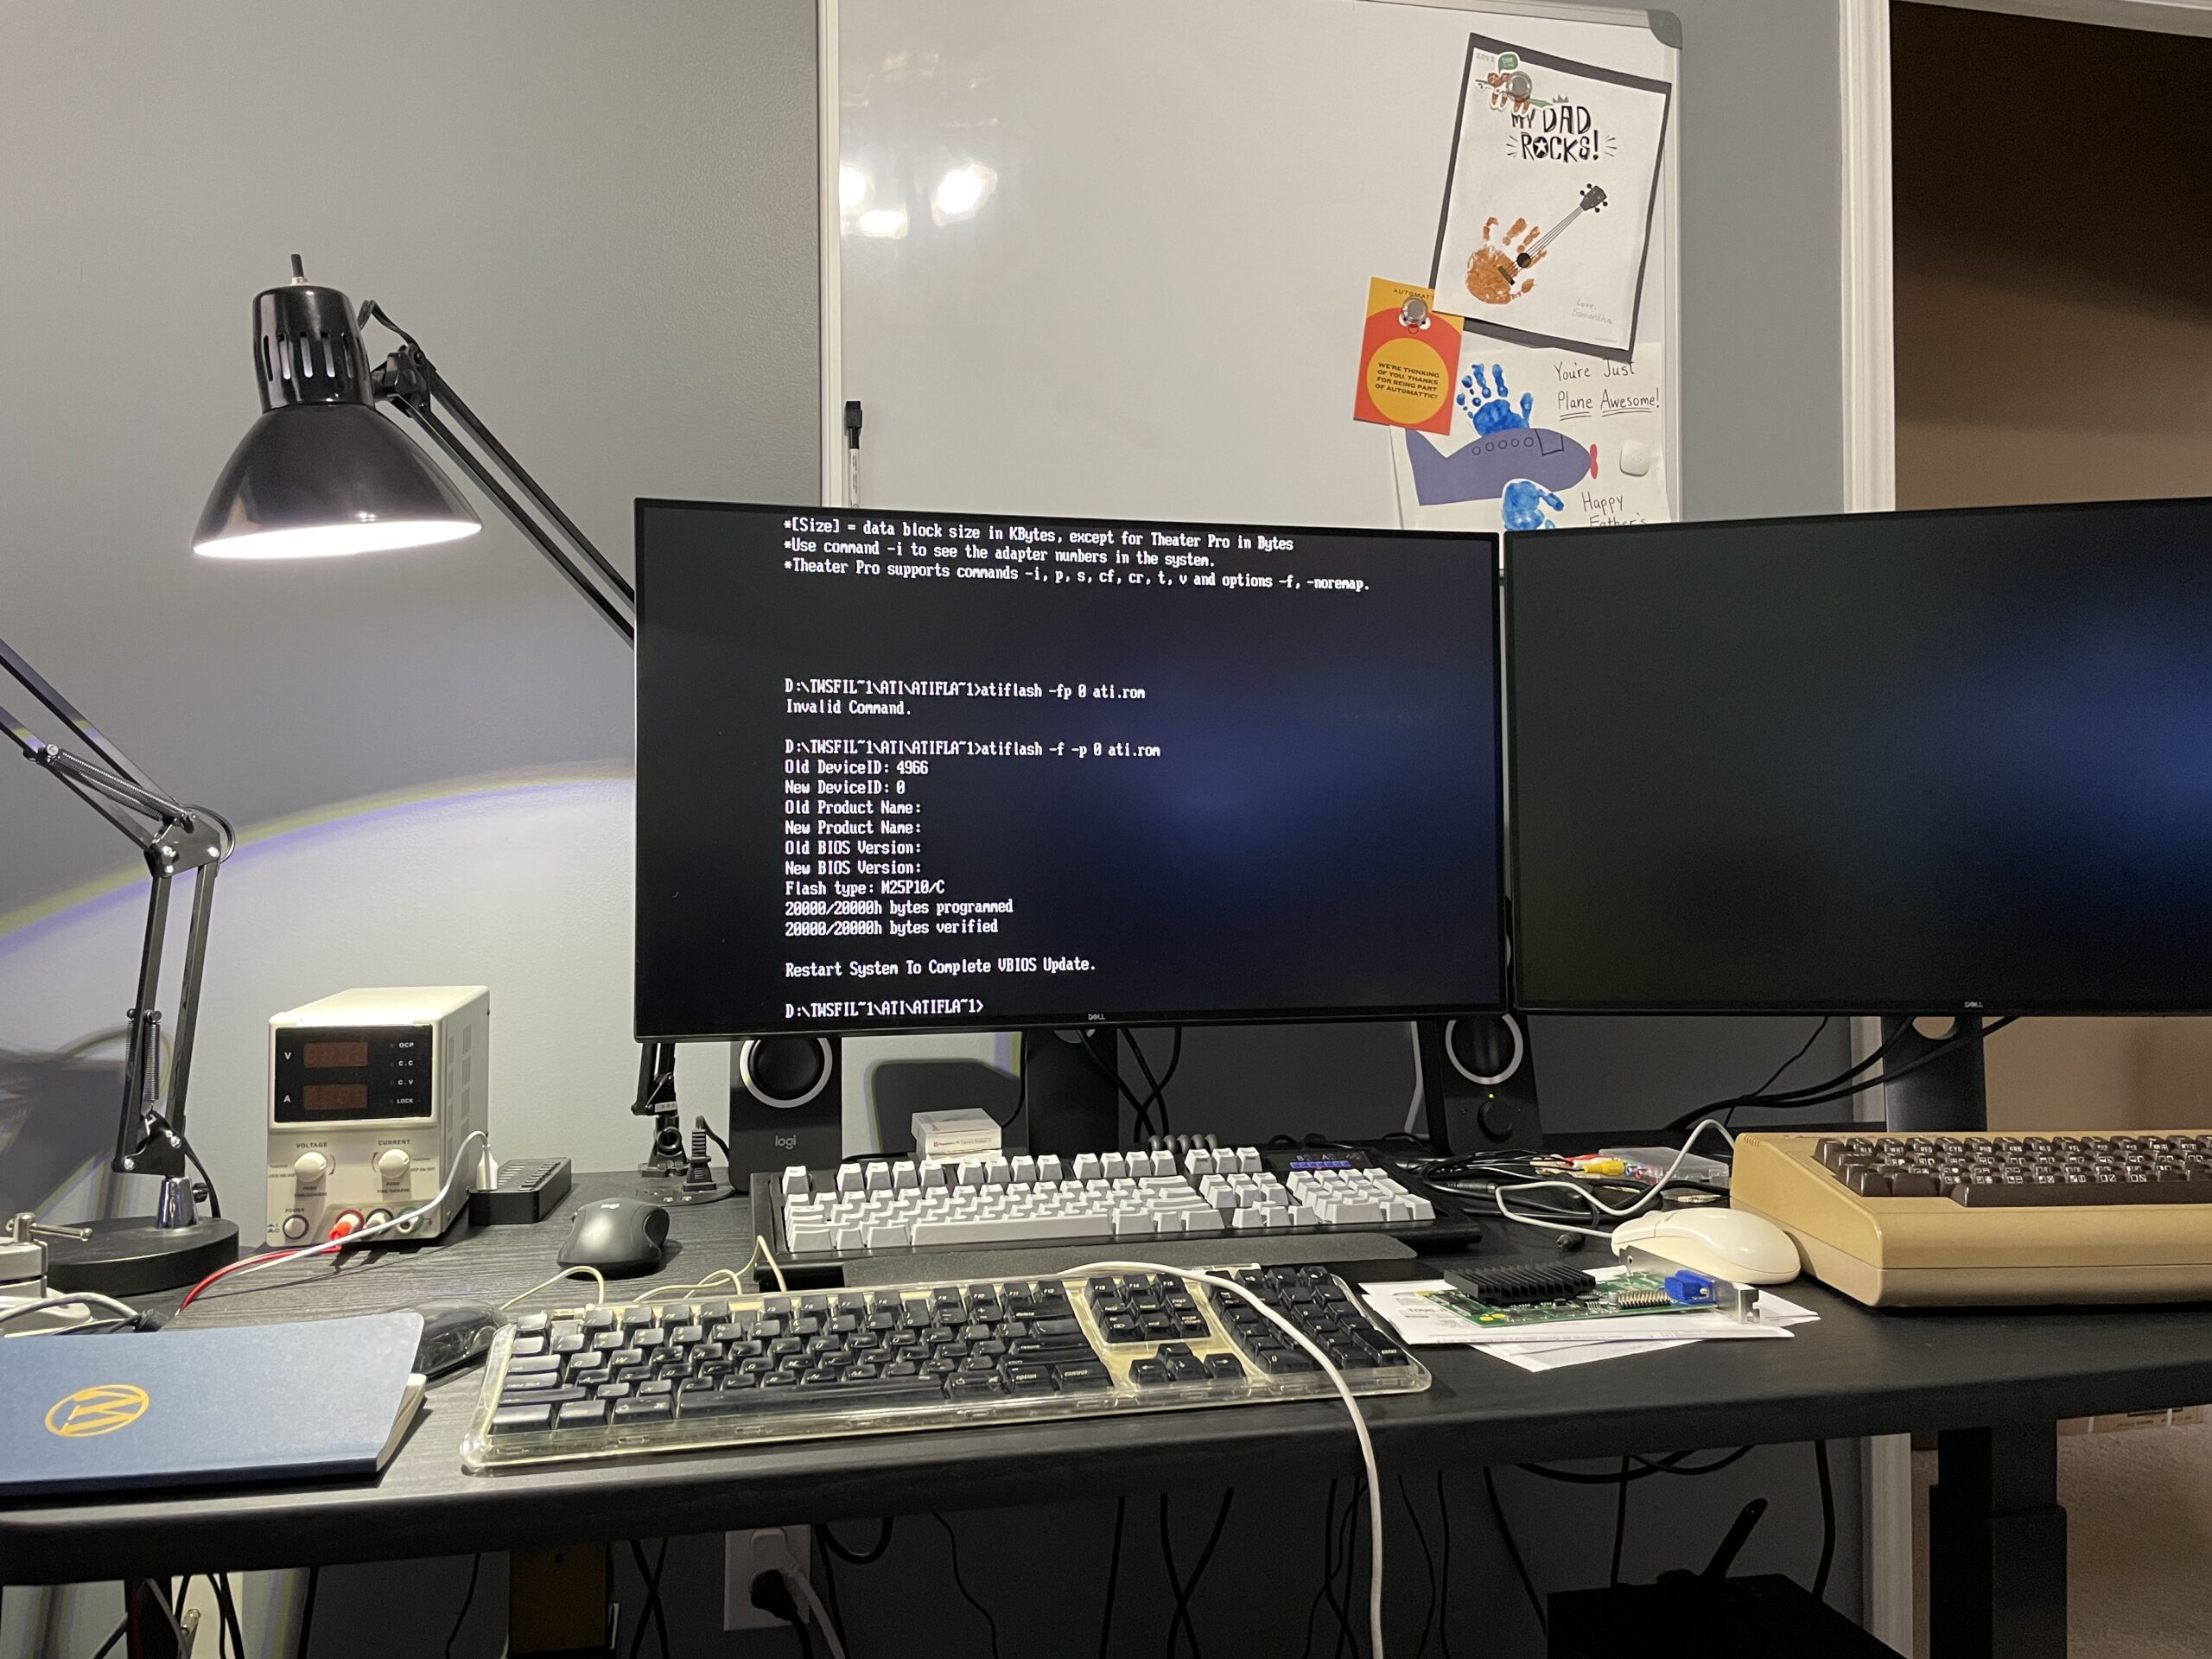
I then removed the card from the PC.
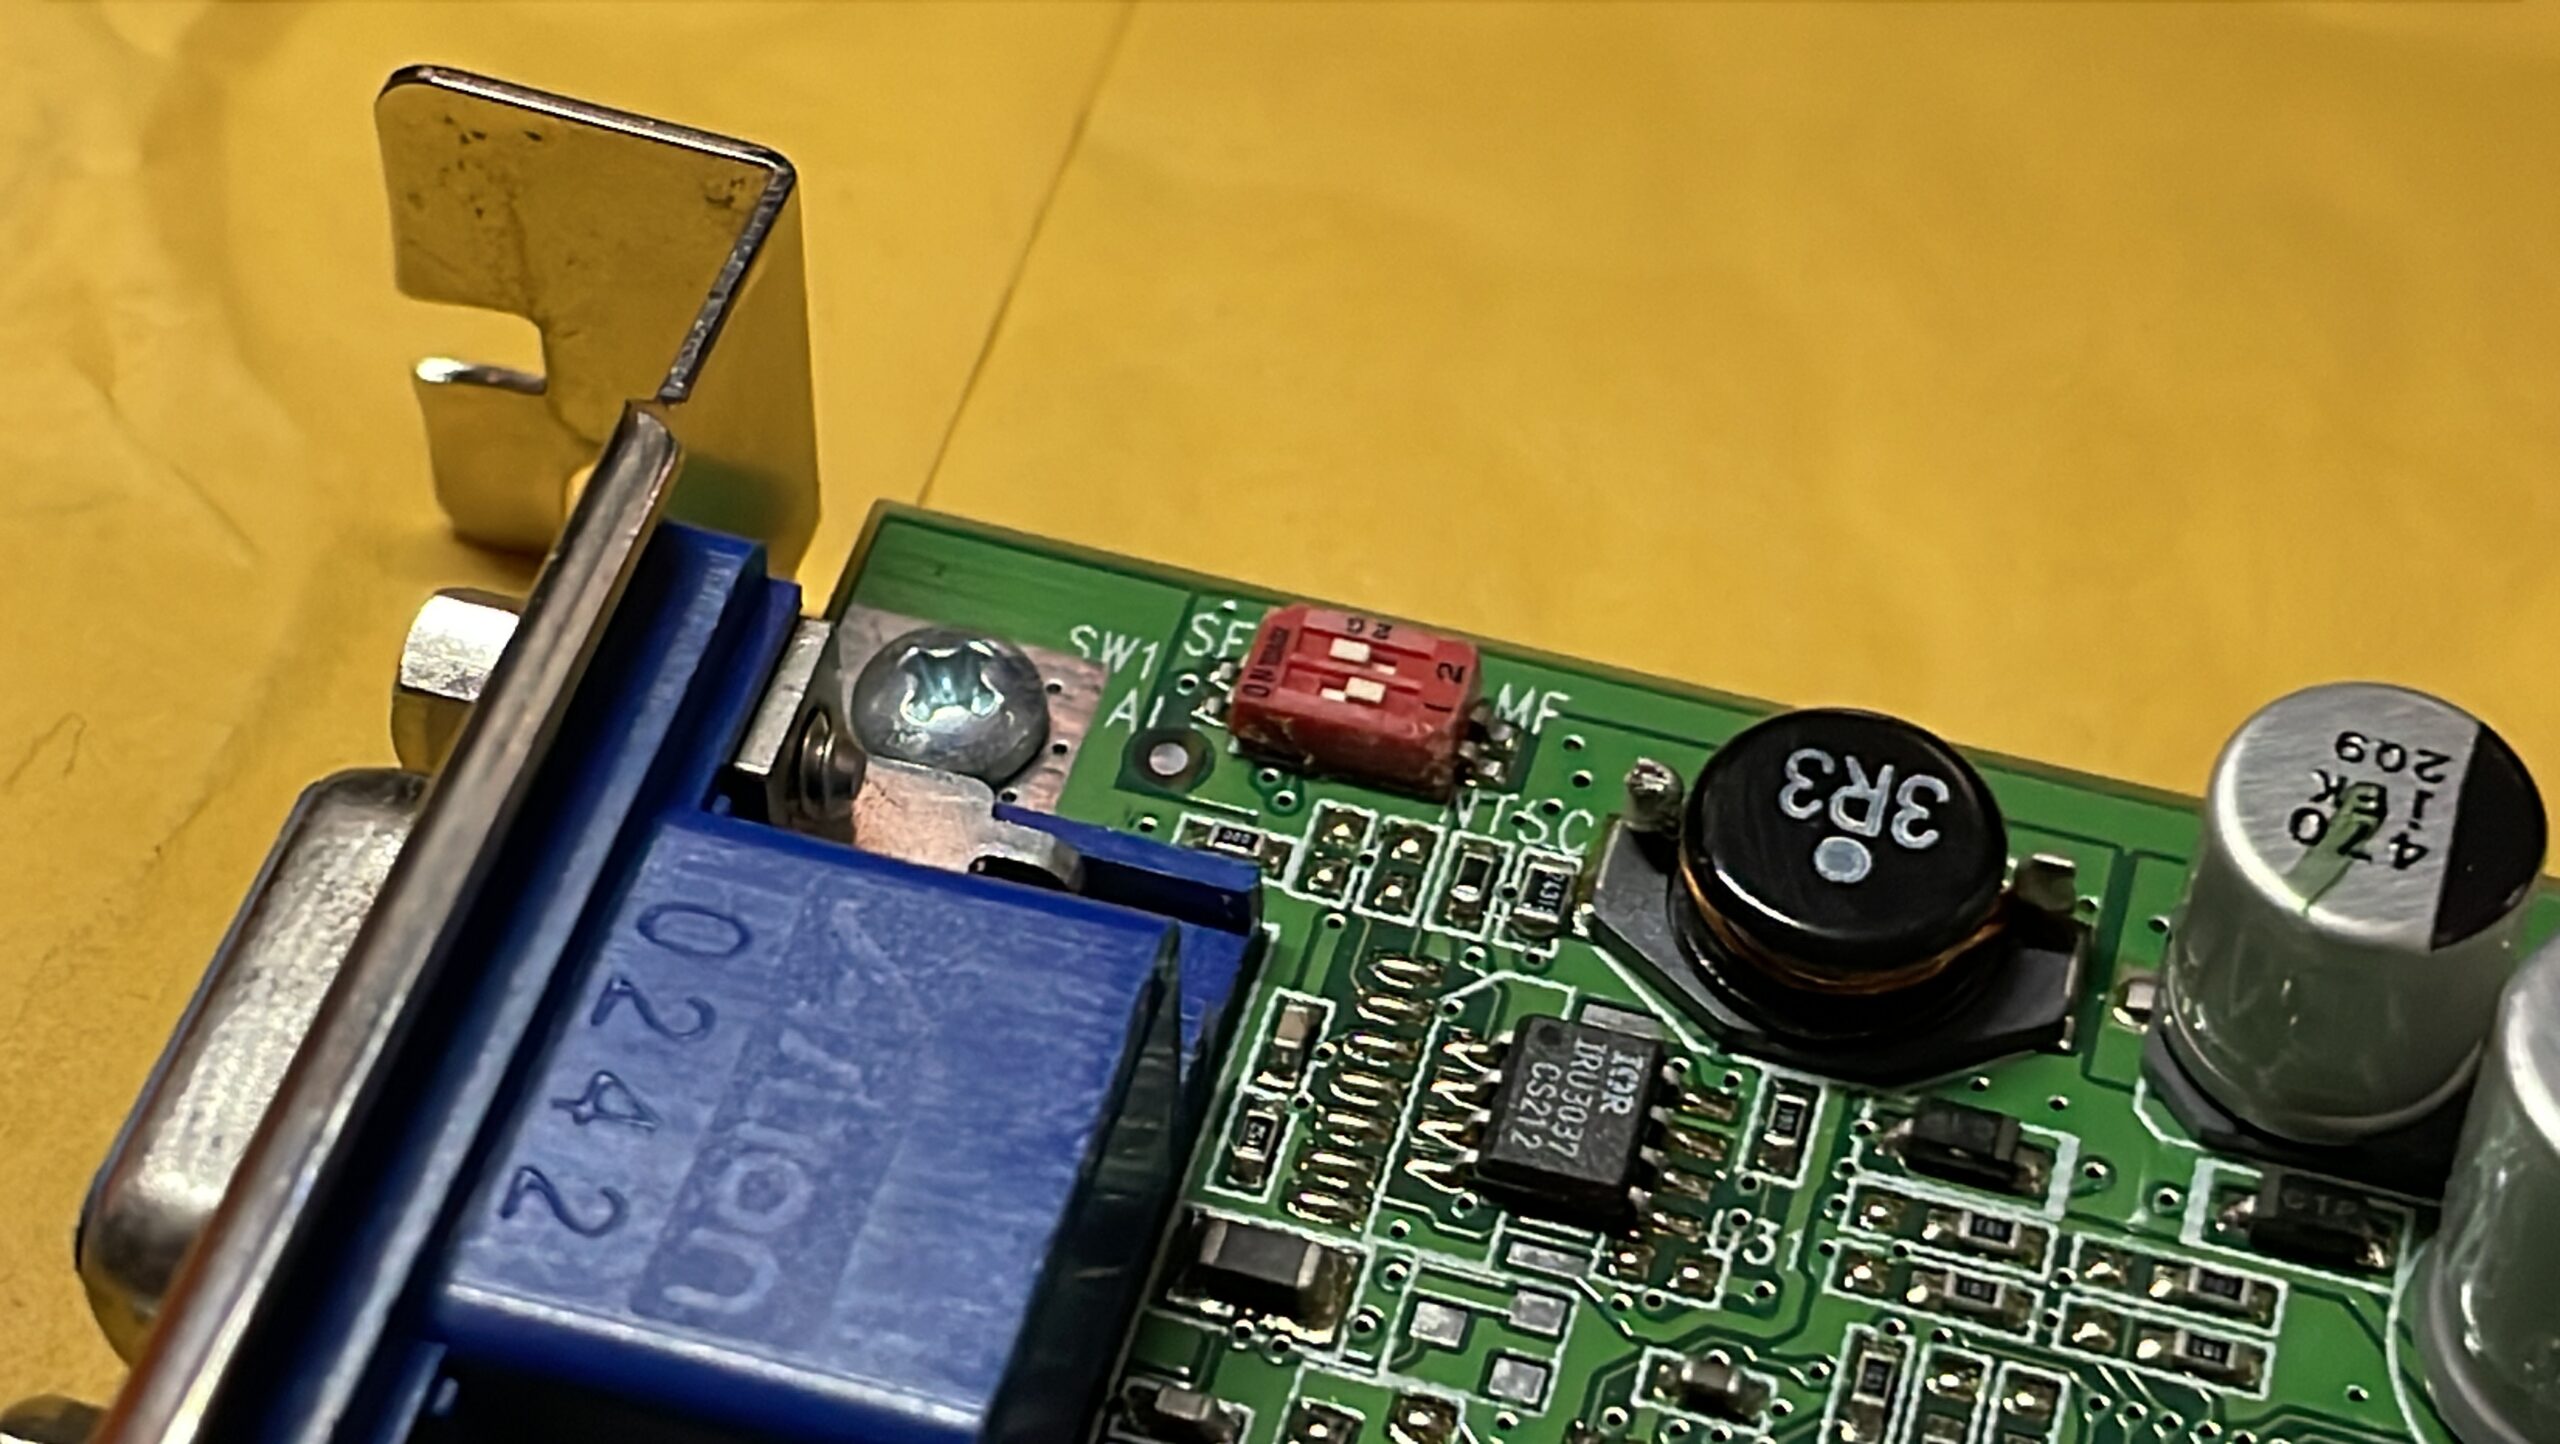
The last step to prepare the card for the Mac was to remove the protective tape at the top left and flip switch 2 (the top one pictured) from MF to SF.
With the card reinserted into the Power Mac we boot right up! Until the ATI drivers are installed there will be no hardware acceleration. The ones I’m currently using are the drivers supplied with Mac OS 9 Lives 9.2.2 and they are working great. 🚀