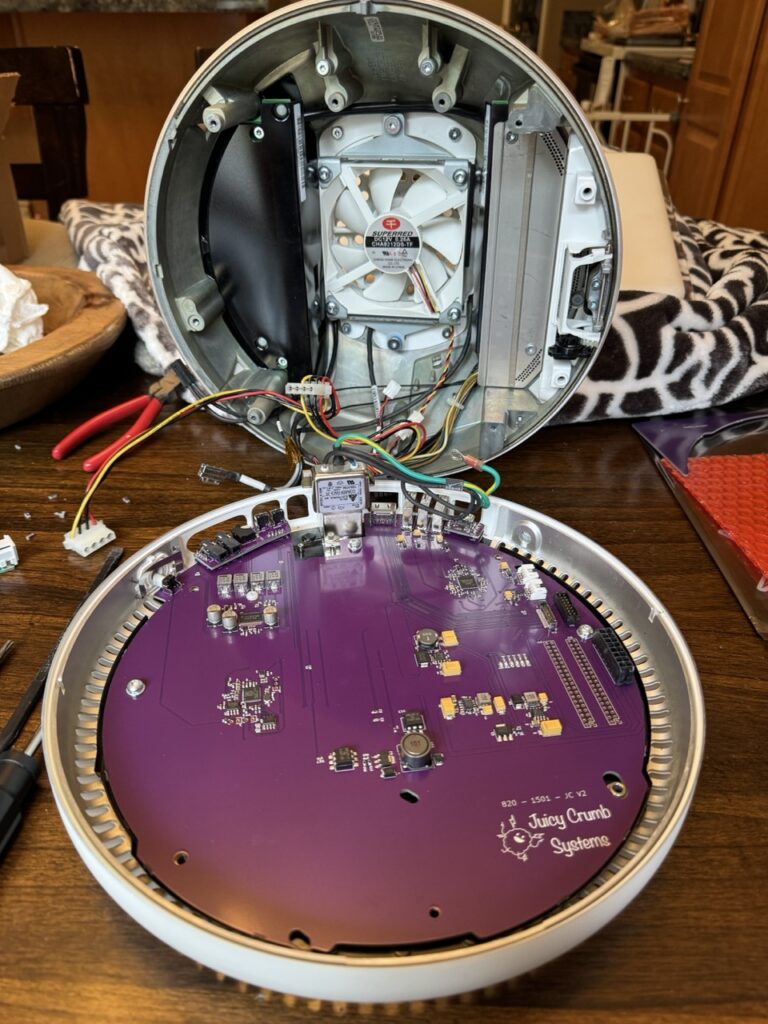
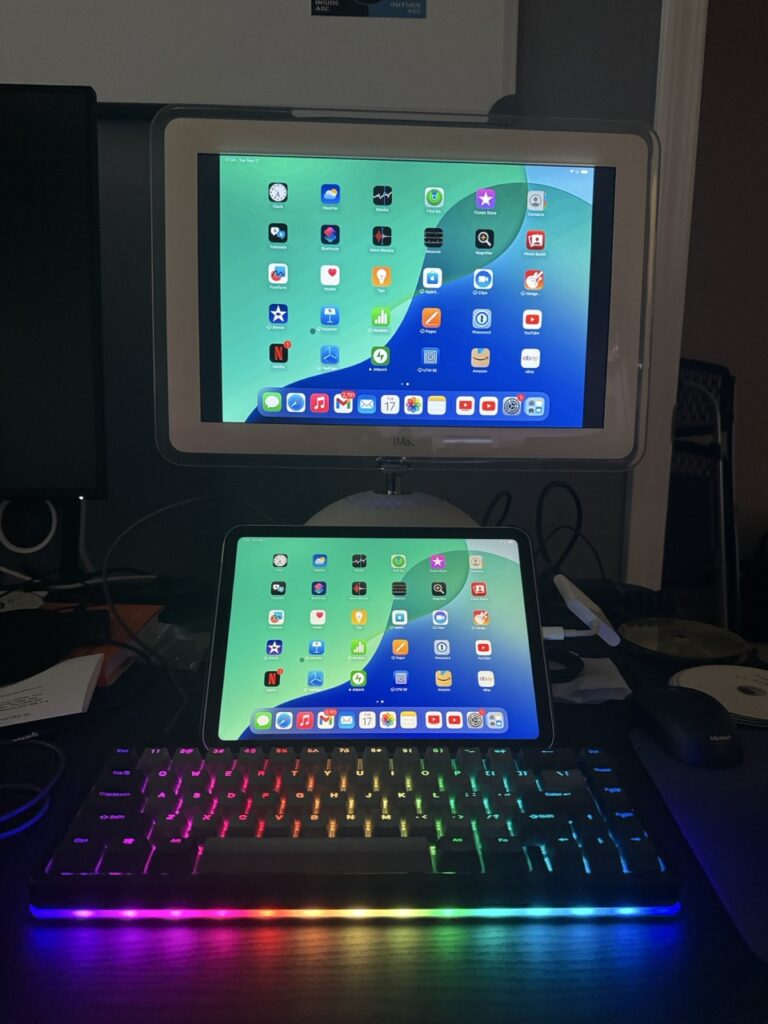
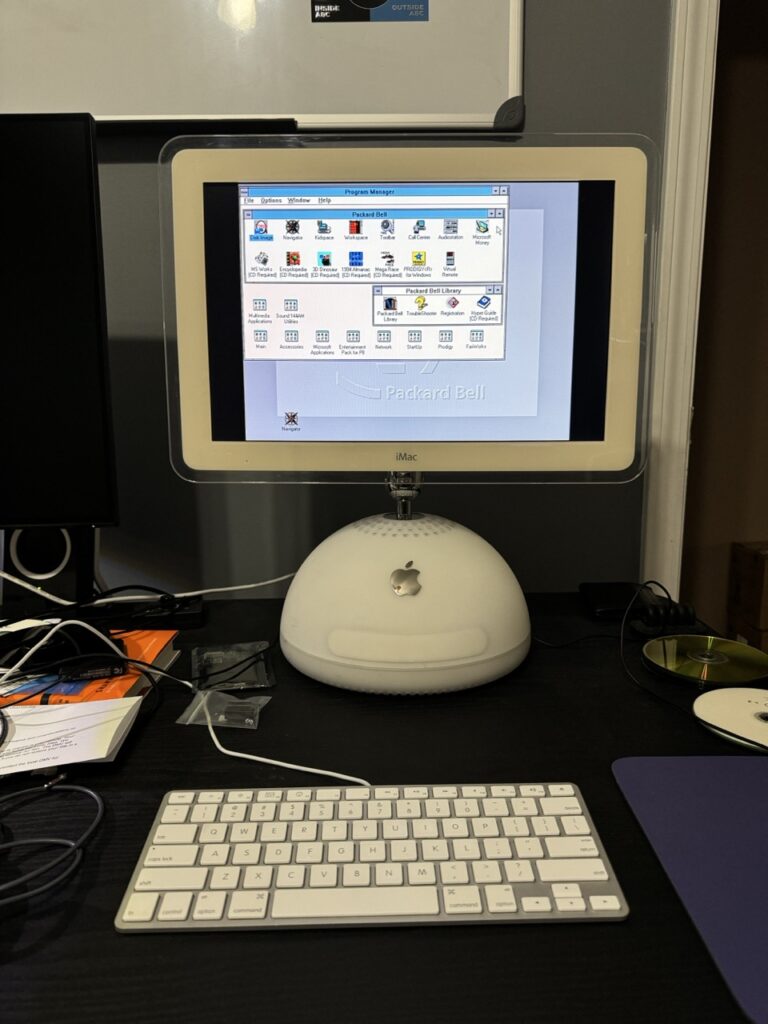
Last year, I purchased a DockLite G4 board from Juicy Crumb Systems. It’s a drop-in solution that repurposes the iconic iMac G4 into an HDMI display.
Installation
There are more affordable ways to achieve the same goal if you’ve got the time, but no one else makes it this simple.
In the box I got:
- the main board
- an installation manual
- an HDMI cable
- a minijack stereo cable
- a USB-C cable
- a sticker
- a legit Australian Tim Tam
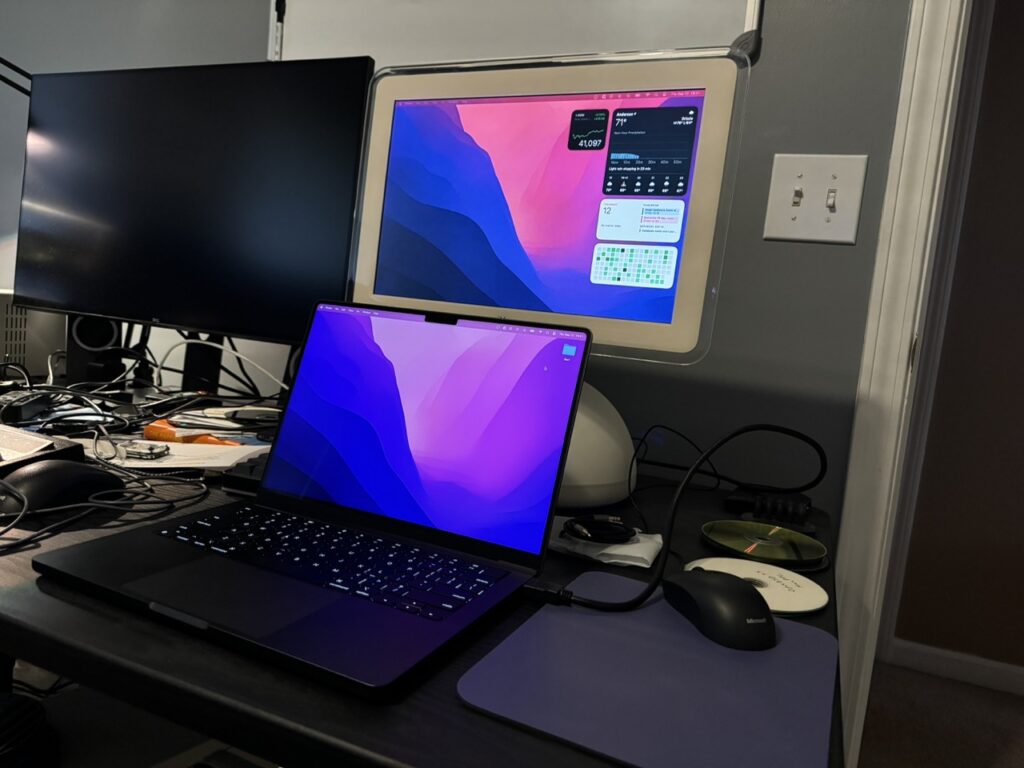
Overall, the instructions make sense – pull out the old PPC logic board, pop in the DockLite G4 board, connect power and the display, and you’re kinda done.
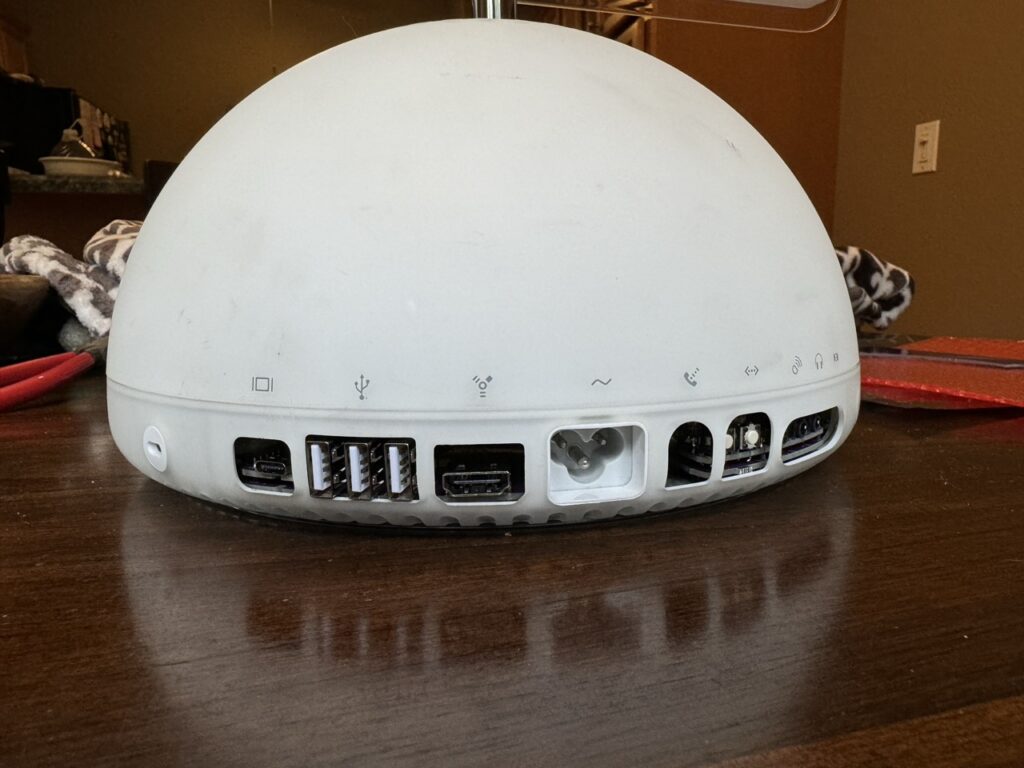
The board also features a USB hub, a speaker amplifier, and brightness-adjustment buttons. They all line up nicely with the back of the chassis, even if it’s not airtight, Apple-level industrial design.
Software control
If you’re running a Mac you can install Juicy-Link and connect to the USB hub to set the display brightness and upgrade firmware. It’s simple to install and seems to work well (as long as it’s a Mac).
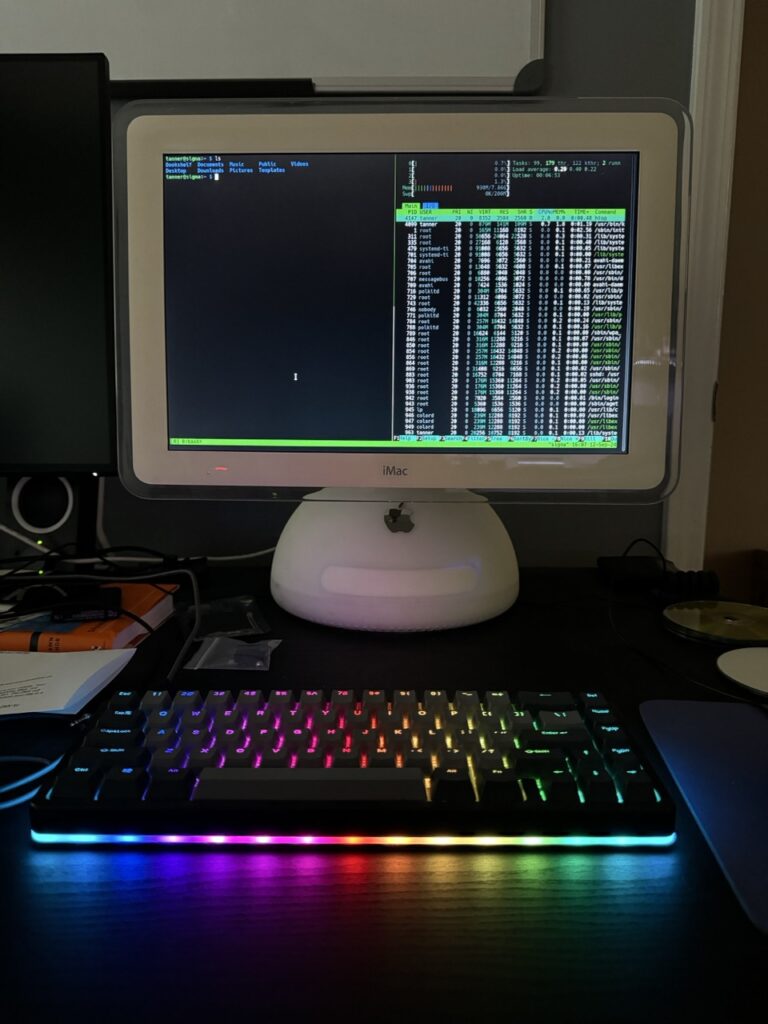
Check out this follow-up where I used an LLM to get it working on Linux!
Things to consider
Limitations
Their software is currently only available on macOS although their website claims Windows support is coming soon. Software control is better than nothing, but still not as nice as DDC/CI. If you find yourself on something other than macOS you’ll need to reach around the back and press the buttons to adjust the brightness.
More disappointing is that the display doesn’t support sleep mode, so turning off the backlight requires pressing the physical power button in the back. This makes the challenge of preserving an old backlight even harder.
The good news is that I think much of this can be fixed with software and firmware updates, so I’d love to see that happen.
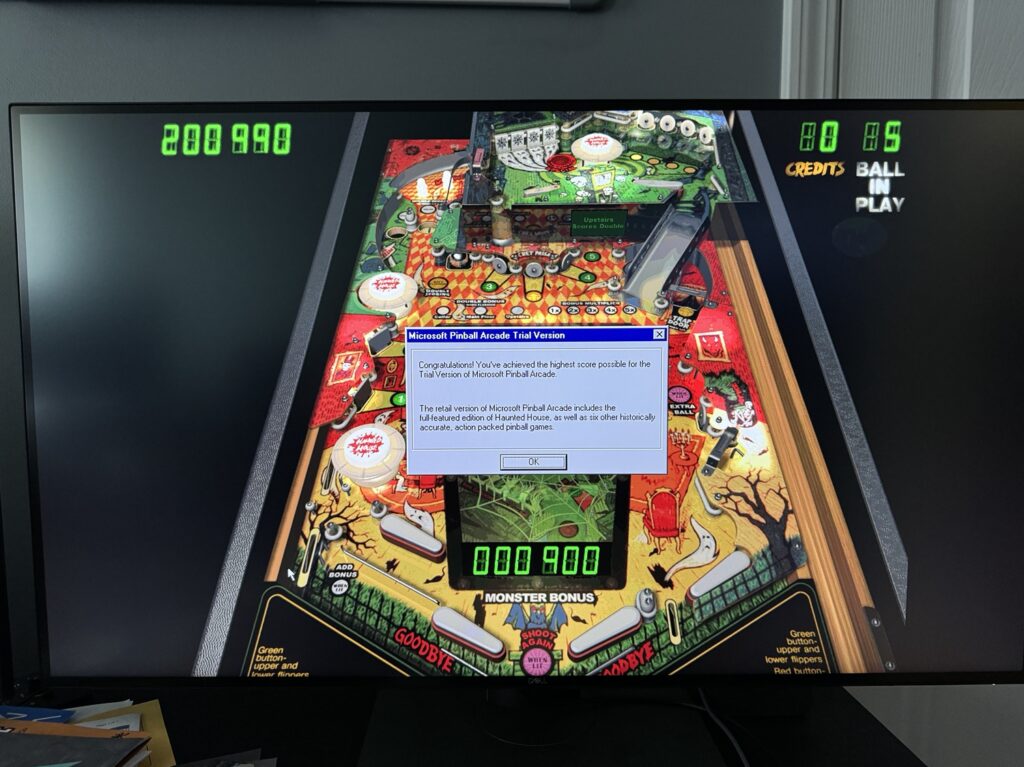
It’s still an old LCD
Modern macOS looks great on this design (round all the borders!), but your eyes won’t be fooled coming from HiDPI Retina displays. LCDs have come a long way with higher resolutions and greater pixel densities, uniform and bright LED backlights, wider viewing angles, and higher refresh rates to name a few. This display has none of that. It’s not a suitable daily driver for my eyes, but it works great as a toy.
The drives can go
Juicy Crumb recommends that you leave the CD-ROM and HDD installed so the base retains a proper weight for stability. Interestingly their instructions don’t have you unplug the power from these drives even though they aren’t in use.
I understand keeping things simple, but the type of user who is disassembling an iMac G4 can surely unplug a couple cables to reduce unnecessary power consumption and strain on an old PSU.
I removed both from my 17″ system and I have no concerns about its stability. I recommend doing the same. Plus, you’ll get better airflow with the system fan (although I question if that’s really necessary, too).
Old PSU is old
Although Apple is known for high quality hardware, installing this board doesn’t really lower the risk that the 20+ year old power supply will fail and burn something up. It’d be nice to have an alternative DC input like a barrel pin connector.
The original fan is audible
Do yourself a favor and replace the factory fan with something modern and quiet. Without a hard drive and CD-ROM spinning away, the fan becomes more noticeable. The replacement should be a standard size, though you may want to match the color—anything non-white might be distracting.
Final thoughts
I’m really happy with the purchase and have had a blast playing around with different systems. If you’ve got a compatible iMac G4 and want to do more than Mac OS 9, this is a great solution. Just promise that if you order one and don’t want your Tim Tam biscuit, you’ll send it my way.