
The 64×32 @adafruit Matrix Portal is a great device, just possibly a little too low res for an external macOS screen. #notquiteretina 😆 pic.twitter.com/MUzGMQQ3Xi
— Tanner Stokes (@TannerStokes) February 11, 2022
Category: Projects
Categories
Snake Eyes + Servos
I saw flip dots (also called flip discs) last year for the first time and instantly knew I needed some in my life. If you’re not familiar with them, check out how they work!
The particular model I have is the ALFAZETA XY5, which may be the easiest way to get up and running, but certainly not the least expensive.
After getting the board, all you need is:
- 24V power supply
- Something that talks over RS485 (in my case I used an ESP8266 connected to a MAX3485 board)
- Their documentation that defines the controller data protocol
I plan to write in more detail how it all works, but for this demo the stack is:
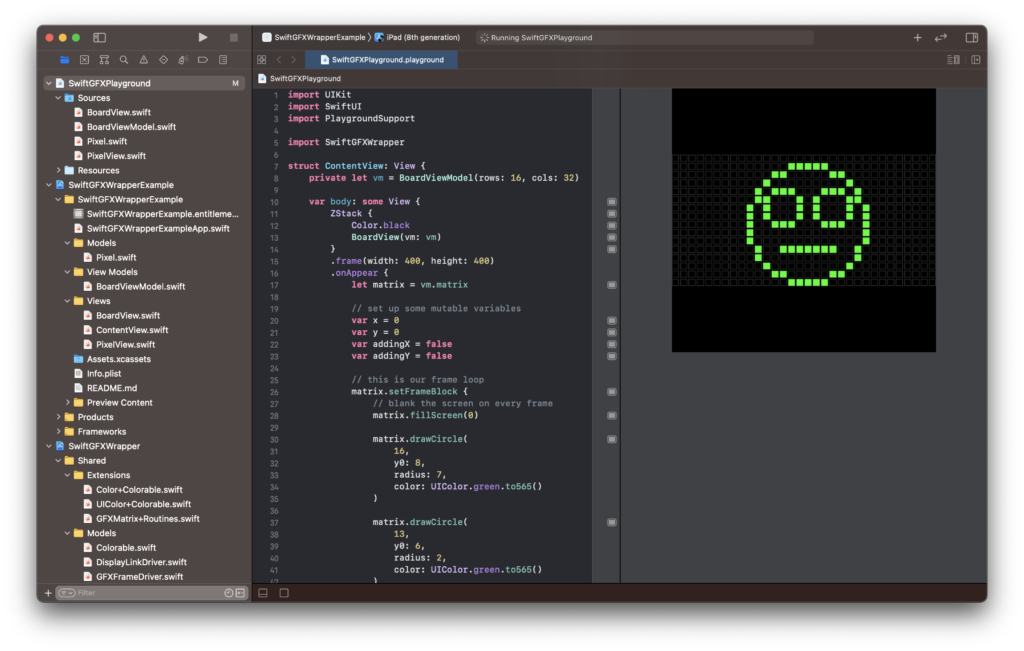
- SwiftUI app that runs SwiftGFXWrapper (which is mainly Adafruit’s GFX Library under the hood)
- The app sends the entire pixel buffer over UDP to the ESP8266
- The ESP8266 sends data to the XY5 over RS485 using their controller’s protocol
Update: Here’s more info on how it all works!
Update March 2025: The main repo URL has been updated as this is now a library.
For even easier prototyping, I’ve added Swift Playground support to my SwiftGFXWrapper project!
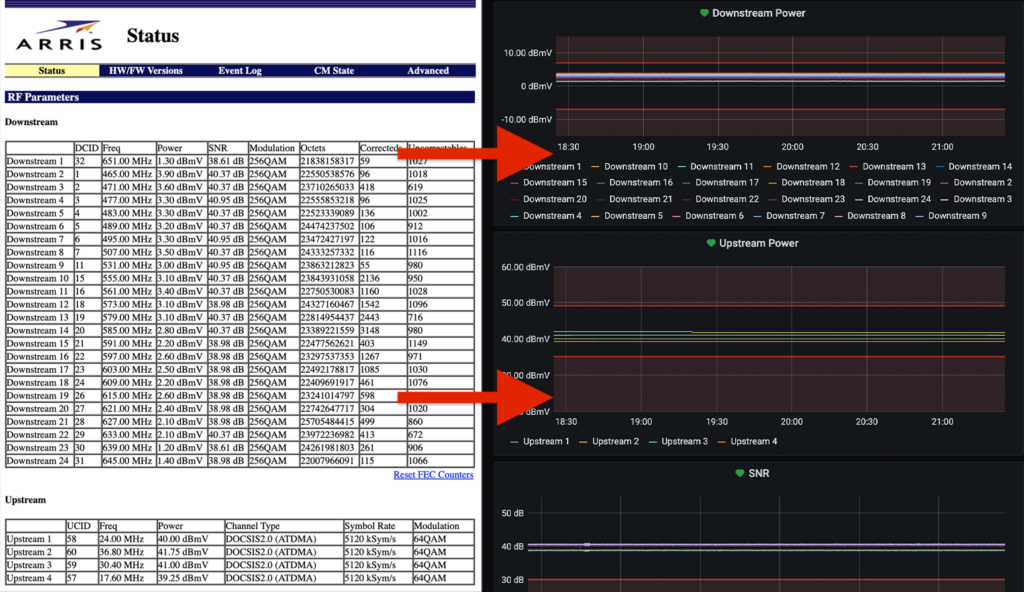
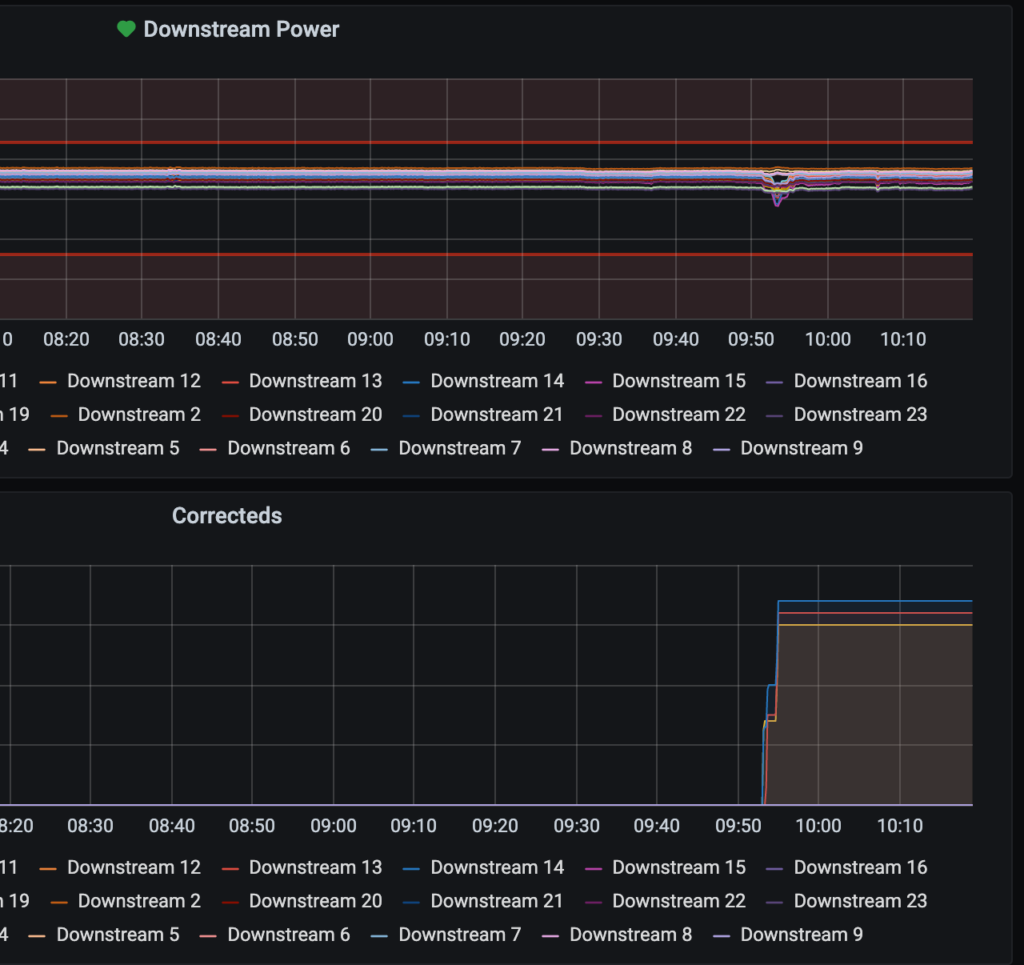
It felt good to complete this project that’s been on my list for quite some time. The main goal was to scrape the values from my modem’s status page and pipe them into InfluxDB, which feeds Grafana. Not only could I look at data trends, but I could receive alerts if certain values exceeded an acceptable threshold.
Overall this is a straightforward process:
- Pull in the HTML from the status page (which happens to not need any authentication, making it even easier)
- Parse the tables we care about (Downstream and Upstream) using XPaths
- Munge the data into something suitable for InfluxDB
- Insert the data into InfluxDB
- Query the InfluxDB data from Grafana
I knew I wanted to use Python for the project, so I first looked into Scrapy. After wrapping my mind around it (somewhat) I gave it a go and actually had a working solution… but it felt way over engineered and at times inflexible for what I wanted. I threw 90% of that solution away and went with a simpler script.
What I landed on was something that’s custom and lightweight, but extendable in case someone has a different status page or wants to use an alternative to InfluxDB.
Another fun project from a few weekends ago: Wrapping the Adafruit GFX in Objective C and bridging to Swift for some neat 8-bit effects!
The most interesting component of this project so far has been building a Swift closure that is executed in C as a const void *. This was new territory for me and a lot of fun to figure out!
Currently a work in progress, I’ve nerd sniped myself to get TCP/IP working over SLIP with a pair of Arduinos equipped with nRF24L01+ radios.
Categories
Pi 1541 – it works!

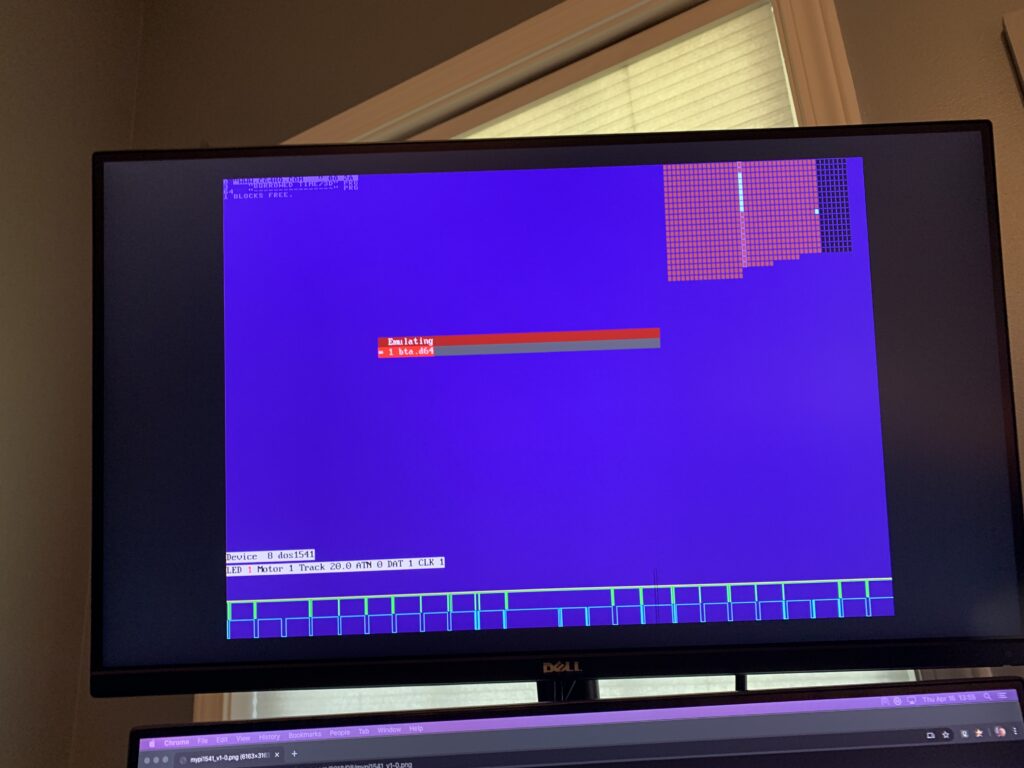

After some initial struggles, we’re good to go!